4 using basic, Using basic – SATO XL400/410 User Manual
Page 9
Programming Manual
1. Introduction
SATO RISC Printers
9
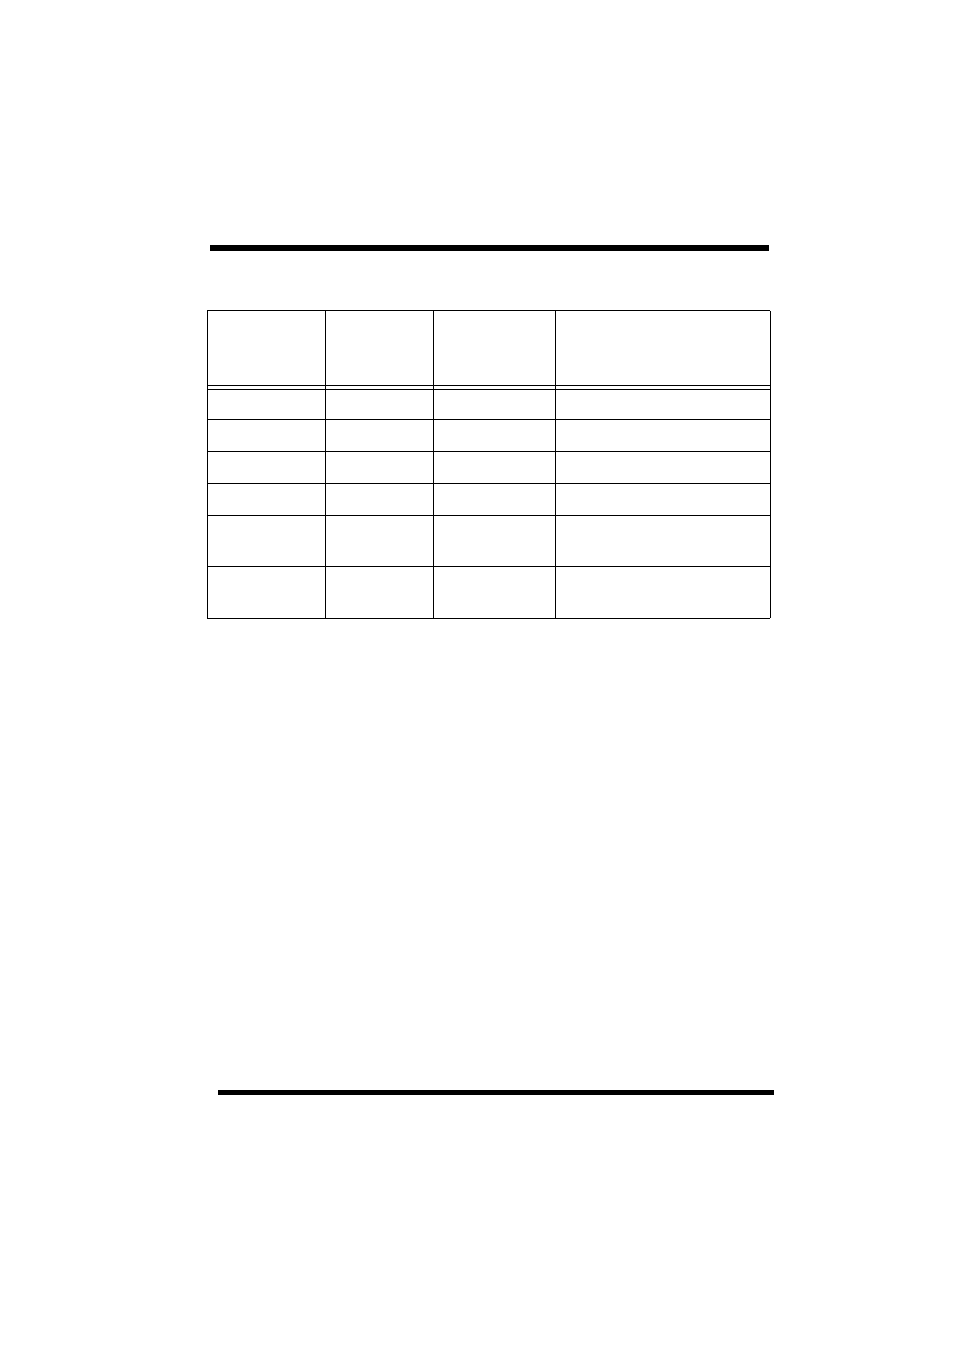
The Protocol Control codes are selected by a DIP switch DSW2-7 (Refer
to the Operation Manual,).
1.4 Using Basic
It may be useful to test your printer using a BASIC program on a PC. You
may also write your actual production programs in BASIC. Whatever the
reason, if you will be working in BASIC, some of the following hints may
help you get started:
1. Set the WIDTH of the output device to 255 characters to avoid auto-
matically sending
command string should be continuous and uninterrupted by
ted on separate lines because they will not fit on one line and do not
contain any
needed, they are explicitly noted by the inclusion of
2. If you are using the printer’s RS232 interface, it is necessary to set the
COM port on the PC such that the CTS and DSR signals will be igno-
red. Send your OPEN “COM” statement in the following way: OPEN
“COM1:9600,E,8,1,CS,DS” AS #1
3. This sets the RS232 communication parameters of the host PC’s
COM1 port for 9600 baud, Even parity, 8 Data bits, 1 Stop bit and di-
recting the port to ignore the CTS and DSR control signals.
Control
Character
Standard
DSW2-7
OFF
Non-
Standard
DSW2-7 ON
Description
STX
02 Hex
7B Hex = {
Start of Data
ETX
03 Hex
7D Hex = }
End of Data
ESC
1B Hex
5E Hex = ^
Command Code to follow
NULL
7E Hex
7E Hex = ~
Cutter Command
ENQ
05 Hex
40 Hex = @
Get printer status, Bi-Com
mode
CAN
18 Hex
21 Hex = !
Cancel print job, Bi-Com
mode