Digital audio dubbing, Editing (cont.), Make connections – JVC DR-M10 User Manual
Page 90: Place a disc and load an md, Prepare the unit for dubbing, Prepare the digital audio device for dubbing, Start dubbing, Stop dubbing
Filename [DR-M10U_10Editing.fm]
Masterpage:Left+
90
EN
Page 90
March 4, 2004 5:22 pm
EDITING (cont.)
Digital Audio
Dubbing
You can dub selected audio from a DVD or Audio CD disc to a
digital audio device.
However, it is not possible to dub copy-protected discs.
Example: Dubbing to an MD
A
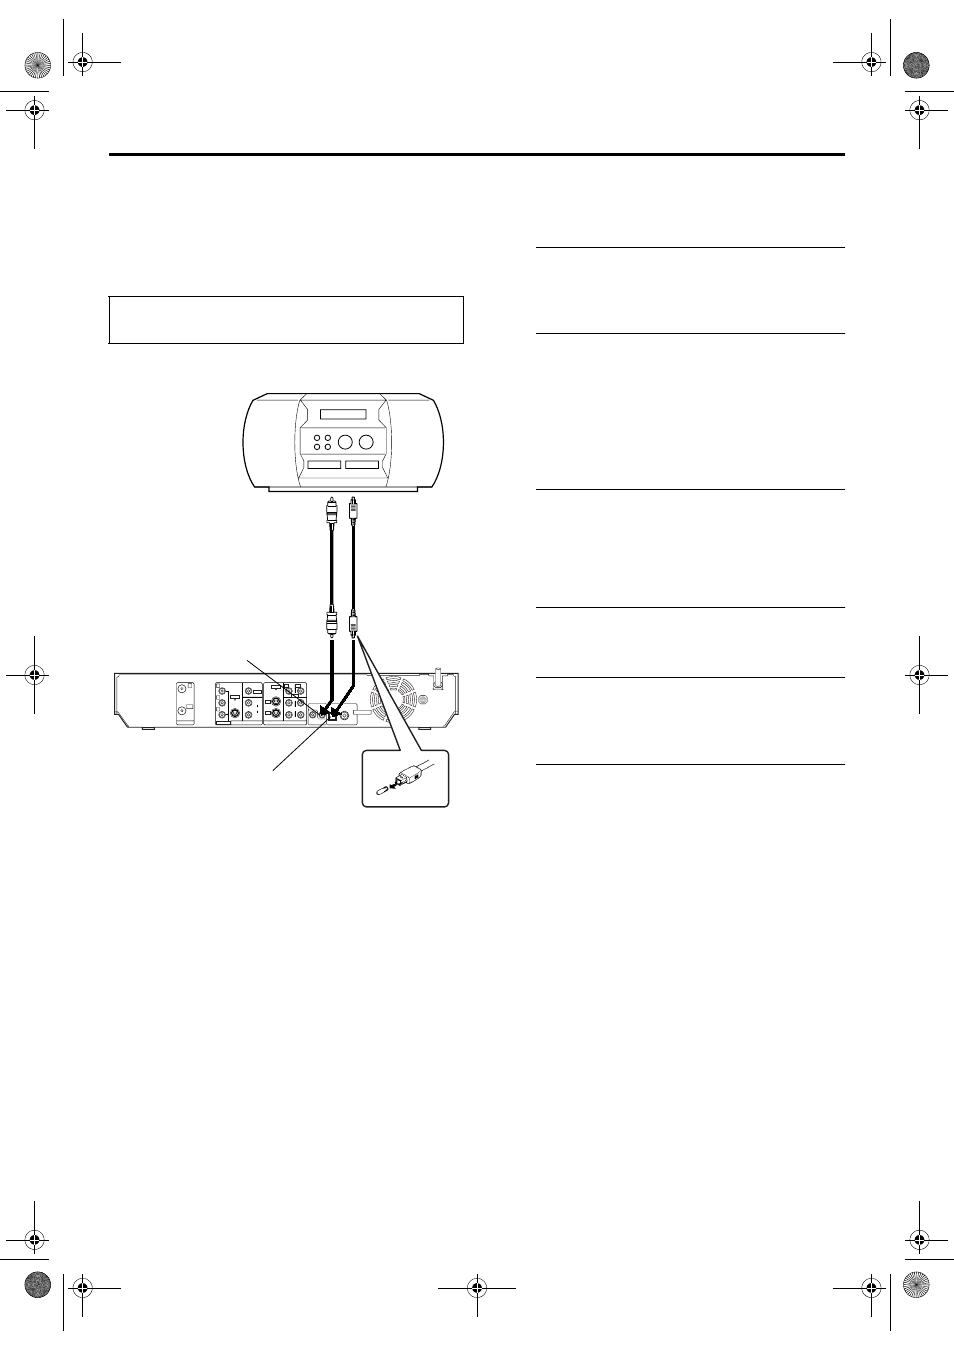
Make connections.
Connect the unit and a digital audio device using either
an optional optical cable or an optional coaxial cable.
B
Place a disc and load an MD.
For the unit
A Press x to open the disc tray.
B Place a disc on the disc tray.
C Press x to close the disc tray.
For the digital audio device
Load an MD.
C
Prepare the unit for dubbing.
A Select the audio to be dubbed.
B Start playback slightly before the actual point from
where you wish to start dubbing.
C Press 9 to pause playback.
D
Prepare the digital audio device for dubbing.
Select the input mode.
E
Start dubbing.
A Press 4 to start playback on the unit.
B Start recording on the digital audio device.
F
Stop dubbing.
Stop recording on the digital audio device. Then press 8
to stop playback on the unit.
NOTE:
There may be a discrepancy of several seconds between where
you intend editing to start, and where it actually starts.
● Turn on the TV and select the AV mode.
● Slide the TV/CABLE/DBS/DVD switch to DVD.
1
PCM STREAM
AV COMPU LINK
CABLE BOX
LEFT
AUDIO
RIGHT
LEFT
VIDEO
S-VIDEO
VIDEO
S-VIDEO
L-1
L-1
L-2
L-2
AUDIO
RIGHT
COMPONENT
COAXIAL
OPTICAL
Y
PB
PR
DIGITAL OUT
OUTPUT
INPUT
IN
OUT
ANTENNA
Rear of unit
Note for connection:
Remove the protection
cap from the cable.
Digital audio device
(MD deck, etc.)
Optical cable
(not supplied)
DIGITAL OUT
(OPTICAL)
Player
Recorder
Coaxial cable
(not supplied)
DIGITAL OUT
(COAXIAL)
DR-M10U_10Editing.fm Page 90 Thursday, March 4, 2004 5:22 PM