Satellite auto recording, Pg. 71, Set the recording speed – JVC DR-M10 User Manual
Page 71: Engage the satellite auto recording mode, Attention, Rec link rec mode, Rec mode
Masterpage:Right-No-Heading
EN
71
Filename [DR-M10U_08Recording.fm]
Page 71
January 26, 2004 11:08 am
Satellite Auto
Recording
This function allows you to automatically record a
satellite program which is timer-programed on your
external DBS receiver. Connect a DBS receiver to the
unit’s AUDIO/VIDEO INPUT (L-1) connectors and
program the timer on the DBS receiver. The unit starts or
stops recording by the signals input from the DBS
receiver. After recording, the unit’s power shuts off
automatically.
● You can also connect the cable box if it has a timer.
A
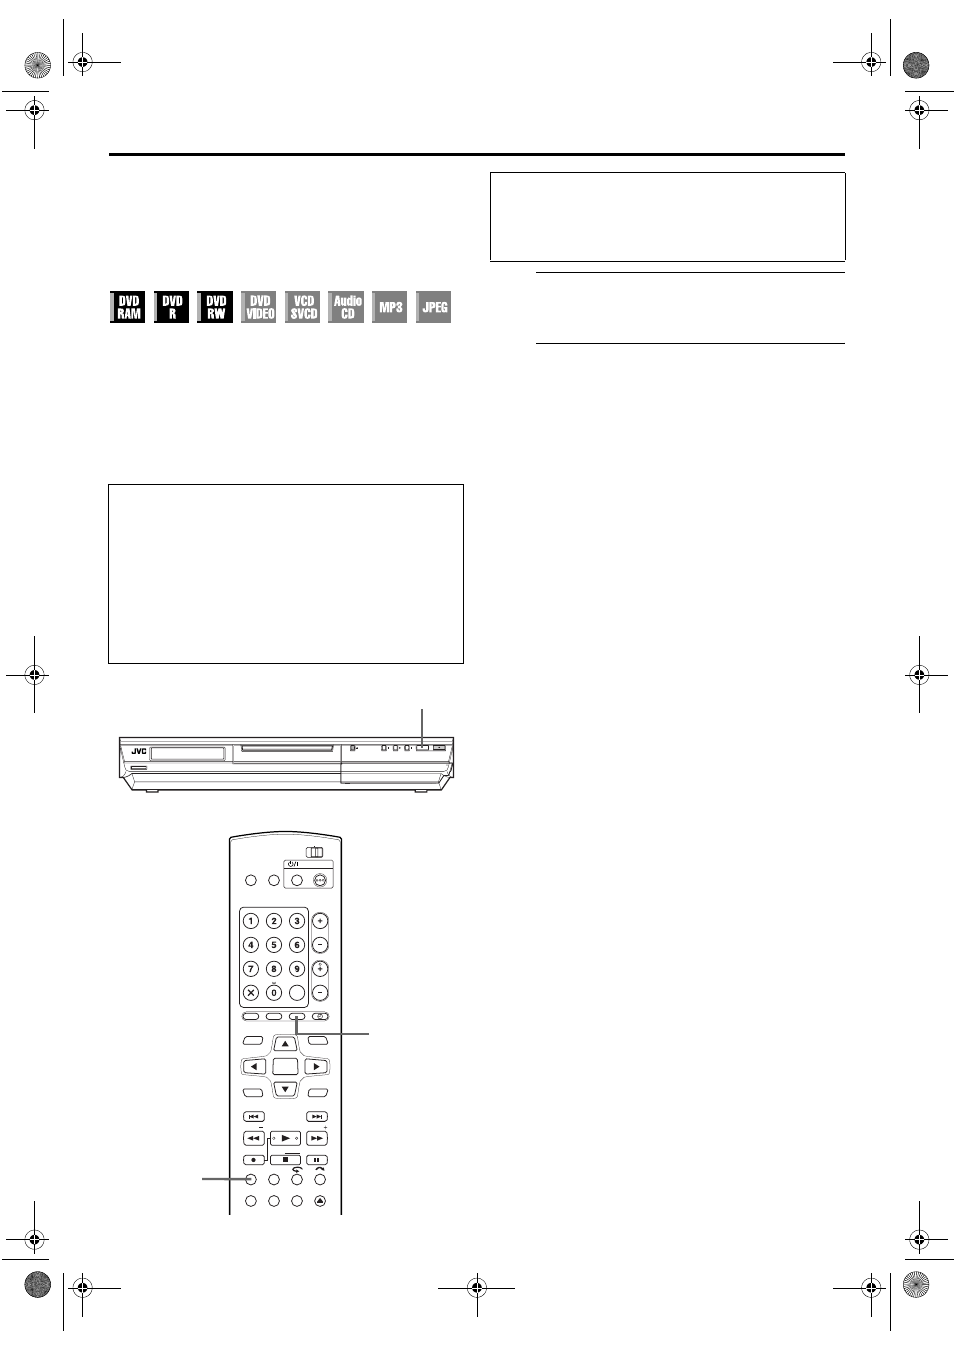
Set the recording speed.
Press REC MODE.
B
Engage the Satellite Auto Recording mode.
Press and hold REC LINK for about 2 seconds. “R–LK”
appears on the front display panel and the unit turns off
automatically.
NOTES:
● To disengage the Satellite Auto Recording mode, press REC
LINK.
● If the unit’s power is off, it is not possible to engage the
Satellite Auto Recording mode.
● In step B, if “R–LK” blinks quickly on the front display panel
even though your DBS receiver’s power is off, Satellite Auto
Recording will not work properly with that DBS receiver*. If
this is the case, perform “Manual Timer Programing”
(
pg. 64) to timer-record a satellite program.
* Some DBS receivers output signals even if the power is off. Satellite
Auto Recording is not possible with those DBS receivers.
● “R–LK” blinks on the front display panel while Satellite Auto
Recording is in progress.
● For timer programing of the DBS receiver, refer to the
instruction manual of the DBS receiver.
● Satellite Auto Recording is not possible if your DBS receiver
does not have a timer.
● Pressing the unit’s 1 button while Satellite Auto Recording is
in progress turns off the unit’s power and disengages the
Satellite Auto Recording mode.
● If there are more than one satellite programs you wish to
record with Satellite Auto Recording, it is not possible to set
different recording speeds for each program.
● Depending on the type of DBS receiver, the unit may not
record a slight portion of the beginning of the program or may
record slightly longer than the actual length of the program.
● If you engage the Satellite Auto Recording mode when the
DBS receiver’s power is on, the unit will not start Satellite Auto
Recording even though “R–LK” blinks on the front display
panel. When the DBS receiver shuts off once and is turned
back on again, the unit starts recording.
● You can also record a program from your cable system in the
same way if the system has a timer.
● When the Satellite Auto Recording mode is engaged, or the
unit’s power is turned off after Satellite Auto Recording is
finished, the unit will not enter the Timer mode even though
“AUTO TIMER” is set to “ON” (
ATTENTION
● Be sure not to turn on the DBS receiver before the program
is executed; otherwise, the unit will start recording when
the DBS receiver’s power is turned on.
● If you have connected another appliance other than a DBS
receiver to the AUDIO/VIDEO INPUT (L-1) connectors, be
sure not to engage the Satellite Auto Recording mode;
otherwise, the unit will start recording when the connected
appliance’s power is turned on.
● Satellite Auto Recording and timer-recording cannot be
done at the same time.
CABLE/DBS
DVD
TV
DVD
CH
TIMER
REC LINK
PROG/CHECK
VCR Plus+
NEXT
PREVIOUS
PAUSE
REC
REC MODE LIVE CHECK
SET UP DISPLAY ON SCREEN
OPEN/
CLOSE
SLOW
SLOW
PLAY/SELECT
STOP/
CLEAR
NAVIGATION
TOP MENU
RETURN
ENTER
MENU
TV/CBL/DBS
STANDBY/ON
TV
MUTING
TV/
VIDEO
TV VOLUME
ABC
JKL
GHI
MNO
TUV
PQRS
WXYZ
AUX
CANCEL
MEMO/MARK
DBS
DEF
REC LINK
REC MODE
1 STANDBY/ON
S-VIDEO
VIDEO
L(MONO)-AUDIO-R
DV
DV IN
F1
REC MODE
PULL - OPEN
REC MODE
Before performing the following steps:
● Make sure the DBS receiver is connected to the unit’s
AUDIO/VIDEO INPUT (L-1) connectors.
● Program the timer on the DBS receiver.
● Slide the TV/CABLE/DBS/DVD switch to DVD.
DR-M10U_08Recording.fm Page 71 Monday, January 26, 2004 11:09 AM