Epson 5000 User Manual
Page 107
8.
9.
10.
11.
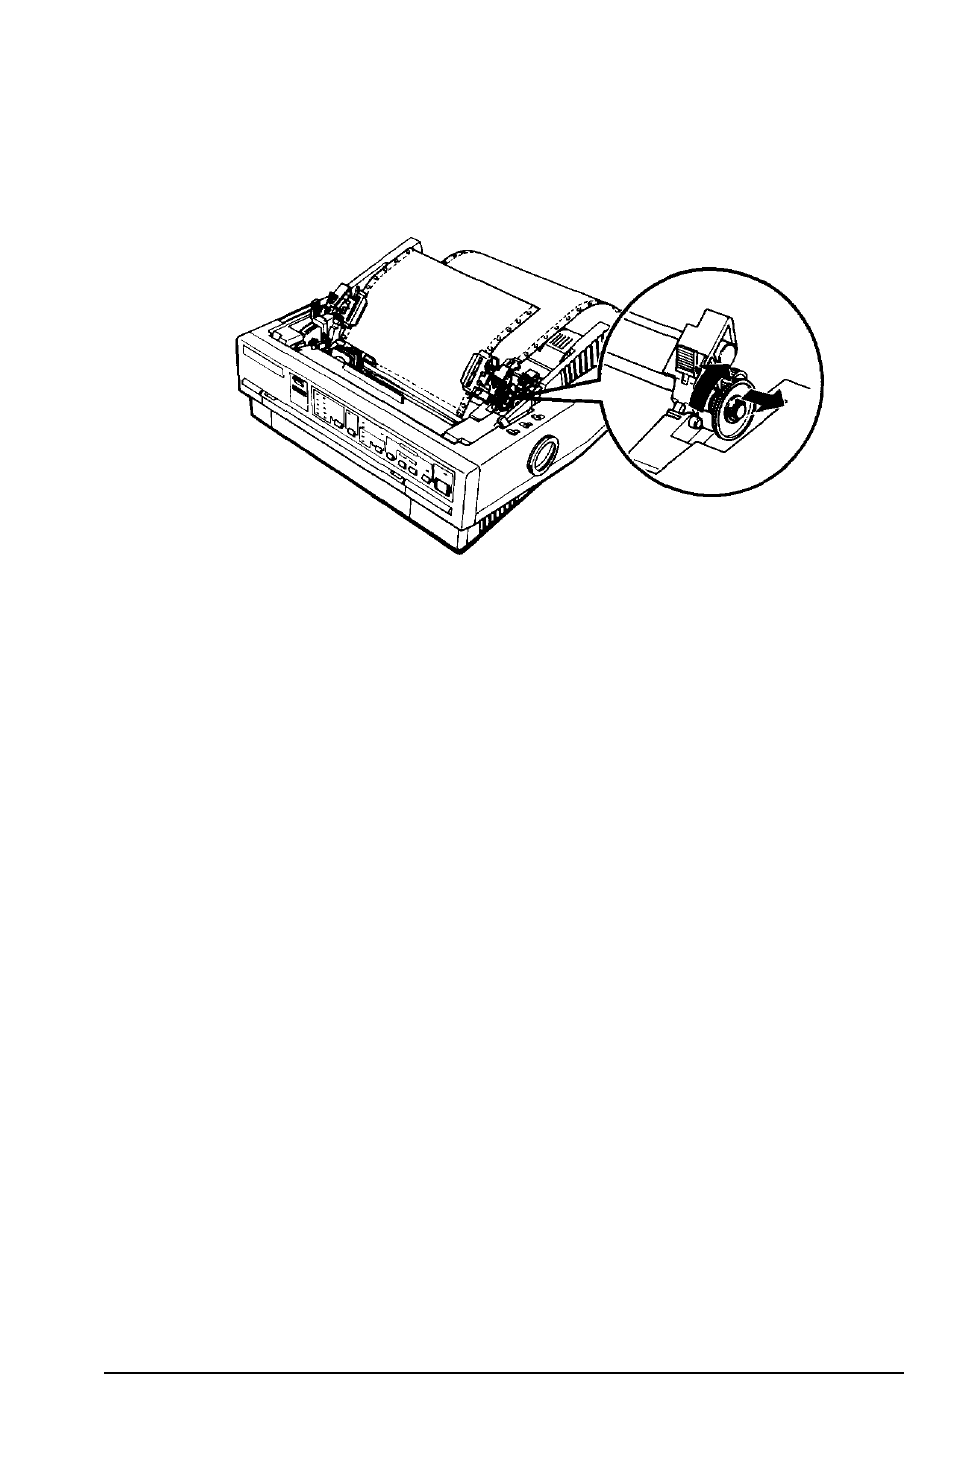
Pull out on the gear at the right side of the pull tractor and
turn it to remove any slack in the paper between the push
and pull tractors.
Place the notches on the paper guide straight down over the
mounting posts on the printer.
Slide both edge guides to the middle of the paper guide.
Slightly lift the paper guide and then lower it until it rests
on the printer.
Replace the Printer cover by inserting the front tabs into the
slots on the printer and then lowering the cover into place.
Raise the paper guide cover and rest it on the paper guide.
Note:
When you want to print several pages of continuous paper, fold the
first page foward at the perforation after the perforation emerges from
below the printer cover. This helps the printer feed the printed pages
properly and prevents paper jams.
Using Printer Options
4-15
- C8230 (29 pages)
- 400 (38 pages)
- 400 (148 pages)
- 600 (135 pages)
- 640 (45 pages)
- 700 (10 pages)
- 850 (147 pages)
- 1520 (40 pages)
- C82314 (71 pages)
- RS-485 (2 pages)
- 6200A (97 pages)
- C82307 (37 pages)
- UB E02 (86 pages)
- 440 (240 pages)
- 440 (212 pages)
- 660 (92 pages)
- 5000 (154 pages)
- 9000 (68 pages)
- ARM.POWERED ARM720T (224 pages)
- SD-DSPUSBB (2 pages)
- CMD-2260 (18 pages)
- C823301 (17 pages)
- S1C6200A (98 pages)
- 33+ (10 pages)
- FEH300b (46 pages)
- SED 1520 Series (40 pages)
- Serial Interface GQ-3500 (13 pages)
- ETX-945 (39 pages)
- Photo EX (35 pages)
- C82364 (279 pages)
- 214D-1 (57 pages)
- EM07ZS1647F (168 pages)
- Connect-It SD-DSWIFIB (2 pages)
- ACTIONPC 7000 (10 pages)
- S5U1C63000H2 (35 pages)
- C824 (4 pages)
- C82069* (46 pages)
- 80211b (68 pages)
- C82312 (13 pages)
- S5U1C17801T1100 (60 pages)
- C82324* (57 pages)
- C82372 (22 pages)
- C82315 (48 pages)
- P07303 (36 pages)