Using the head cleaning utility – Epson 740i User Manual
Page 26
20
Using the Head Cleaning Utility
1. Make sure the printer is turned on but not printing, and the
B black and
A color
ink out lights are off.
2. Start an application and open a document.
3. Open the File menu and choose
. You see the main printer settings dialog
box.
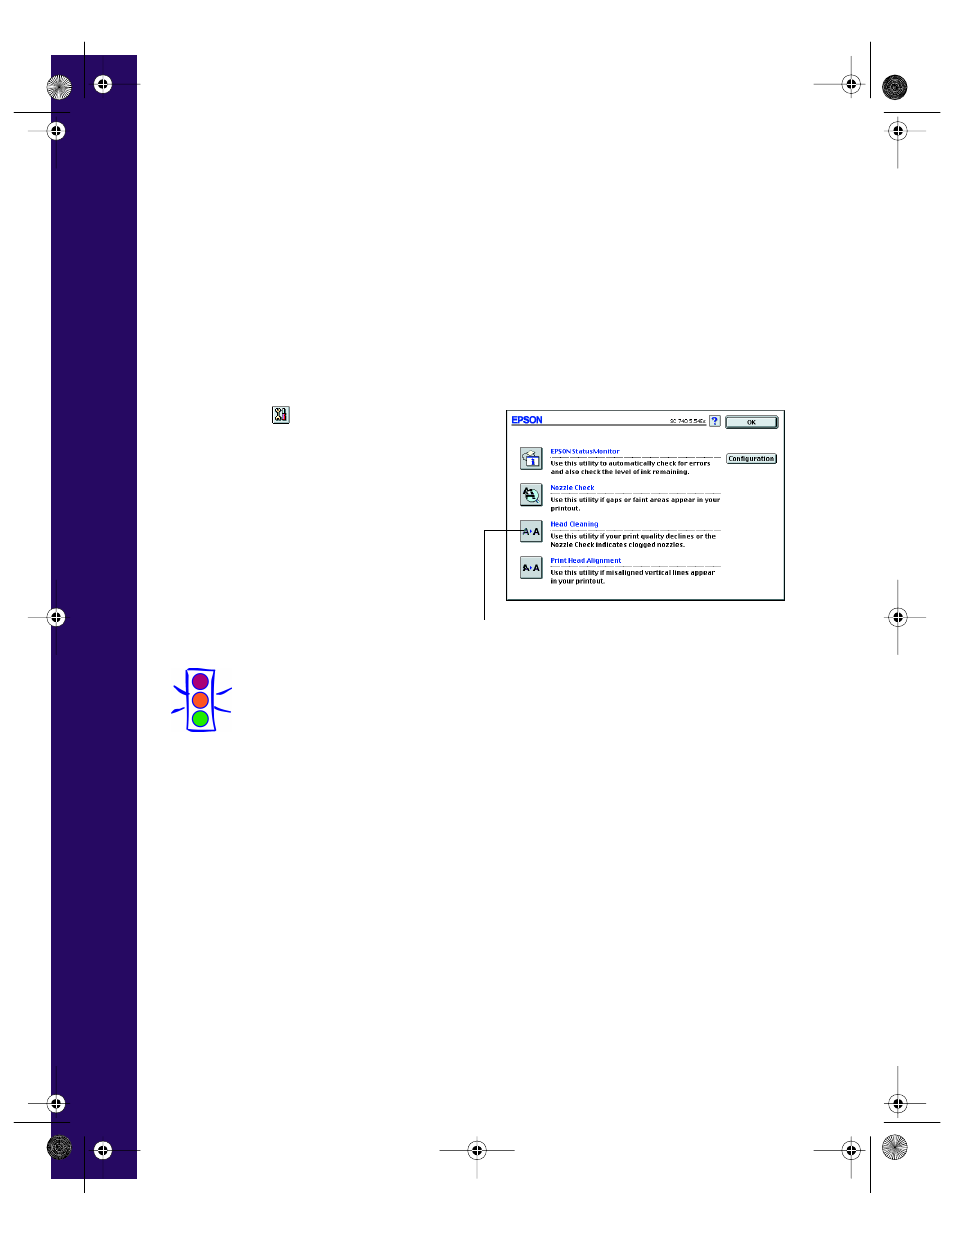
4. Click the
Utility icon. You see
the Utility menu shown to the
right:
5. Click the
Head Cleaning
icon.
Follow the instructions on the
screen to clean the print head.
Cleaning takes a little over a
minute, during which the printer
makes some noise and the
Ppower
light flashes.
Caution:
Never turn off the printer while the
Ppower light is flashing, unless
the printer hasn’t moved or made noise for more than 5 minutes.
6. When the
Ppower light stops flashing, run a nozzle check to test the results and
reset the cleaning cycle.
Make sure paper is loaded in the printer and click
Confirmation
. Then click
Next
.
The nozzle check pattern prints; see page 22 for details.
7. If the nozzle check pattern is filled in completely, click
Finish
.
If the pattern is missing dots, click
Clean
to run another cleaning cycle. If you
don’t see any improvement in the print quality after cleaning two or three times,
check the solutions on page 36.
Head Cleaning utility
740i.book Page 20 Thursday, April 15, 1999 2:11 PM