Customizing print settings – Epson 740i User Manual
Page 22
16
■
PhotoEnhance3
For printing images captured using a video camera, digital camera, or scanner.
Automatically adjusts the contrast, saturation, and brightness and corrects
overall under- or over-exposure of the original image.
■
Digital Camera
For printing images captured using a scanner or digital camera. Corrects noise
and other common flaws.
■
Text/Graph
For printing graphics-intensive documents like presentations with charts and
graphs. Intensifies colors and lightens the midtones and highlights.
■
Text
For fast printing of text-only documents on plain paper.
■
Economy
For rough drafts of text on plain paper. Saves ink.
■
ColorSync
Automatically adjusts printout colors to closely match the colors on your
screen; see your electronic EPSON Stylus COLOR 740i Manual for details.
4. Select any other settings you need to change in the printer software, then click
to print your document.
Customizing Print Settings
For maximum control over your project, you can customize your print settings and
experiment with special effects and color management. You can even save your
custom settings as a group so you can use them whenever you print a similar project.
1. Open an application and create your project. Then open the File menu and
choose
. You see the main printer settings dialog box.
2. Select the correct Media Type setting for
your paper and choose
Color
or
Black
Ink.
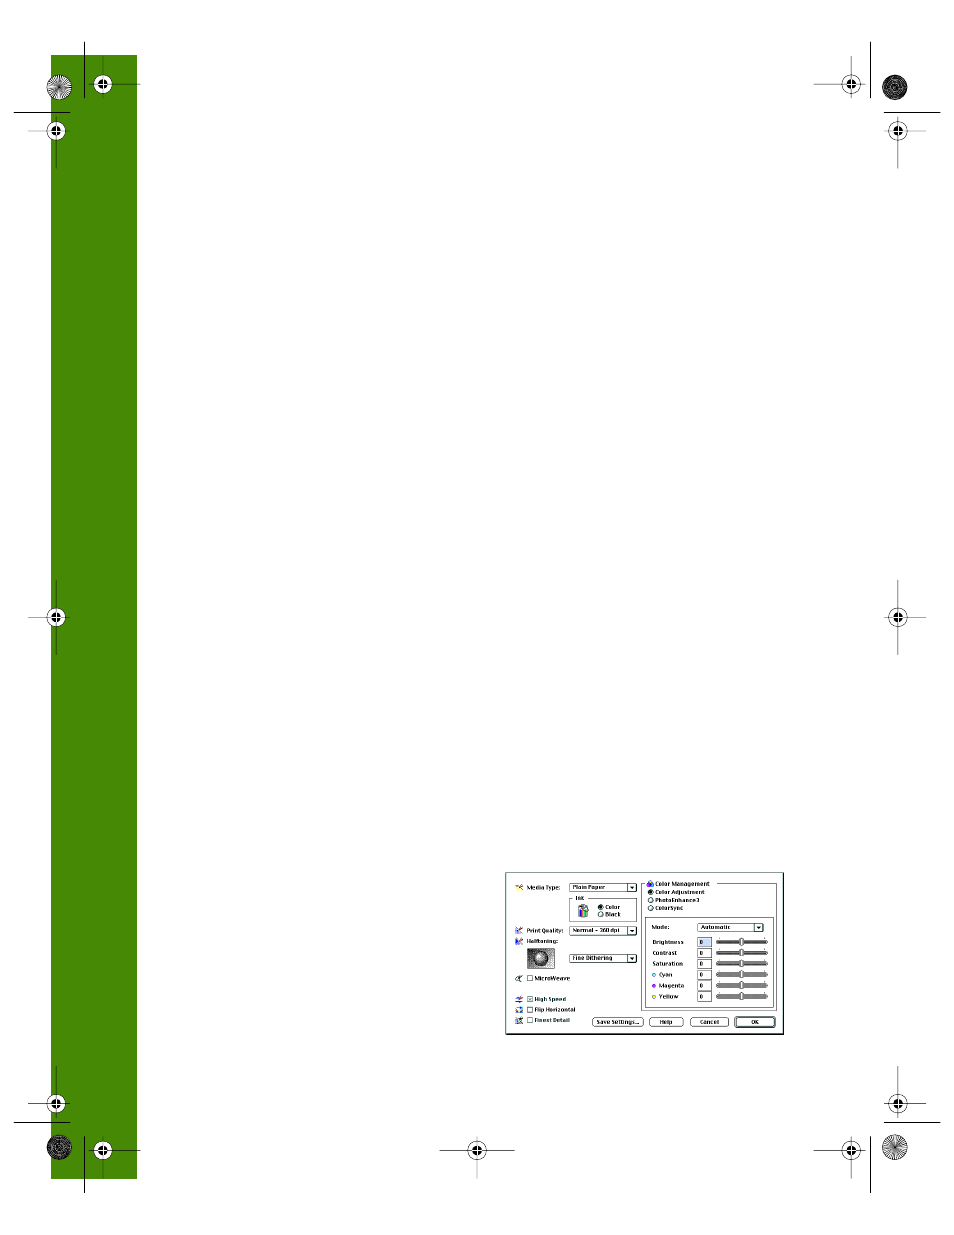
3. Click the
Custom
button, then click
the
Advanced
button. You see the
Advanced dialog box shown to the right:
740i.book Page 16 Thursday, April 15, 1999 2:11 PM