Rugged Cams Workhorse DVR 16 Channel User Manual
Page 102
101
On the {System} menu, go to the remote ID selection box using the arrow (ST) buttons and
press the [Select] button.
On the ID input field, enter the ID using the numeric buttons on the remote control or the arrow
(STWX) and [Select] buttons.
The ID may be between 0 and 99.
After inputting the data, go to [Save and Exit] using the [Tab]
or arrow (WX) buttons and
press the [Select] button.
After setting the remote control ID of the DVR, apply the new setting.
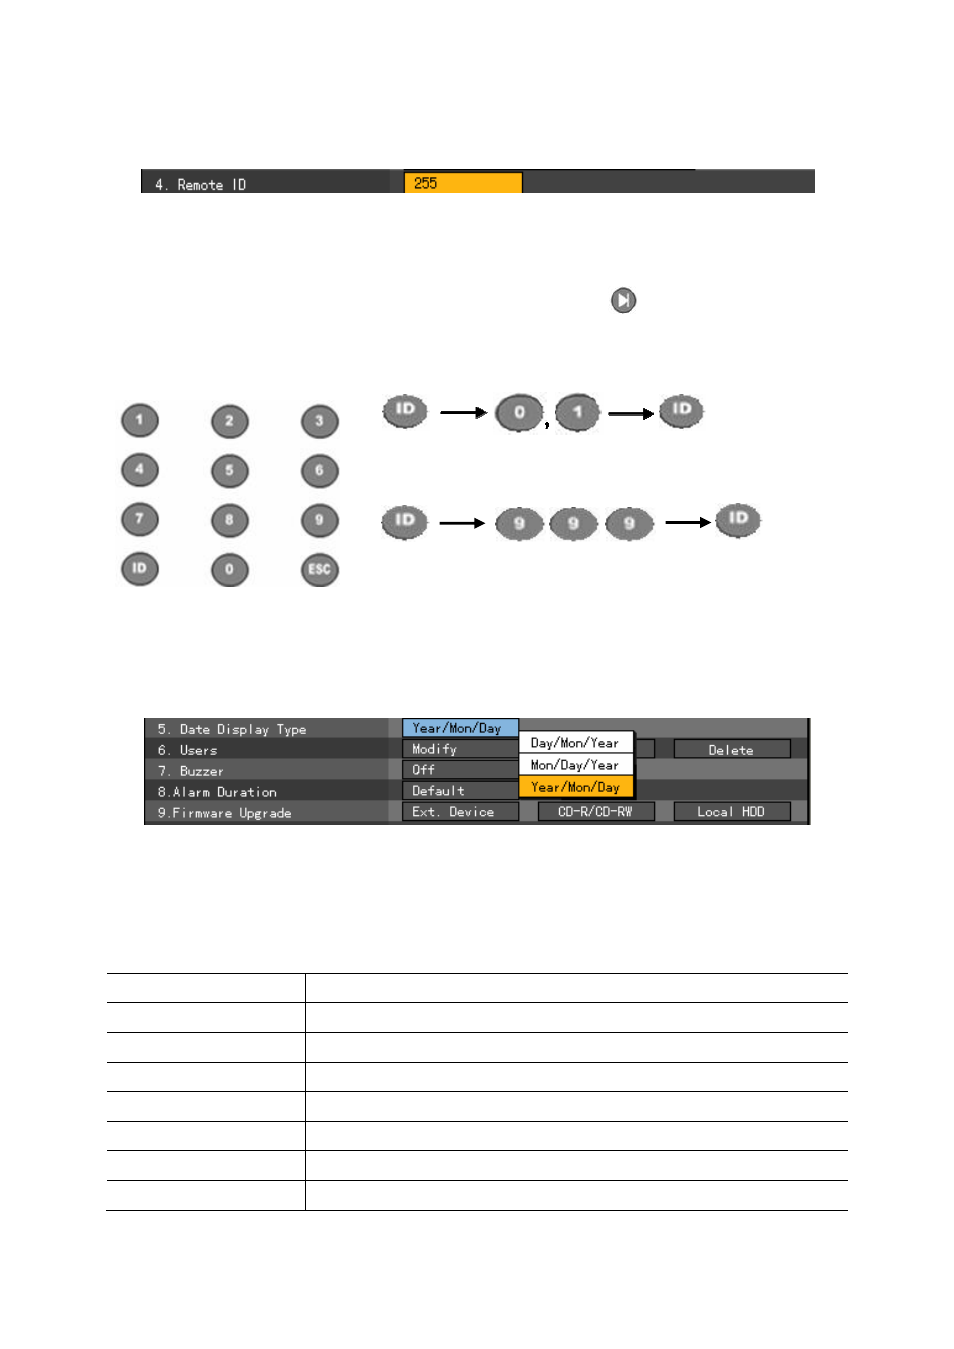
Select the ID button and enter the two-digit remote control ID.
Afterward, select the ID button again.
To control all DVRs with different DVR IDs, set the remote
control ID as 999.
(6) Date Display Type
On the {System} menu, go to {5. Date Display Type } using the arrow (ST) buttons and
press the [Select] button.
On the selection box, set the date display format using the arrow (WX) and [Select] buttons.
(7) User
Used to add, modify, or delete system users
System authority
Network live
Viewing screen in real time
Network play
Viewing recorded screen
Download network file Network access, File download
Main setup
Data, Schedule, System setup
Additional setup
PTZ camera, Network setup
Network PTZ control
PTZ camera control
Network backup
Backup feature
Remote upgrade
Remote upgrade