Multi-Contact MA043 User Manual
Page 8
Advanced Contact Technology
8 / 12
www.multi-contact.com
3
1
26
28
D
29
K
3
30
B
3
27
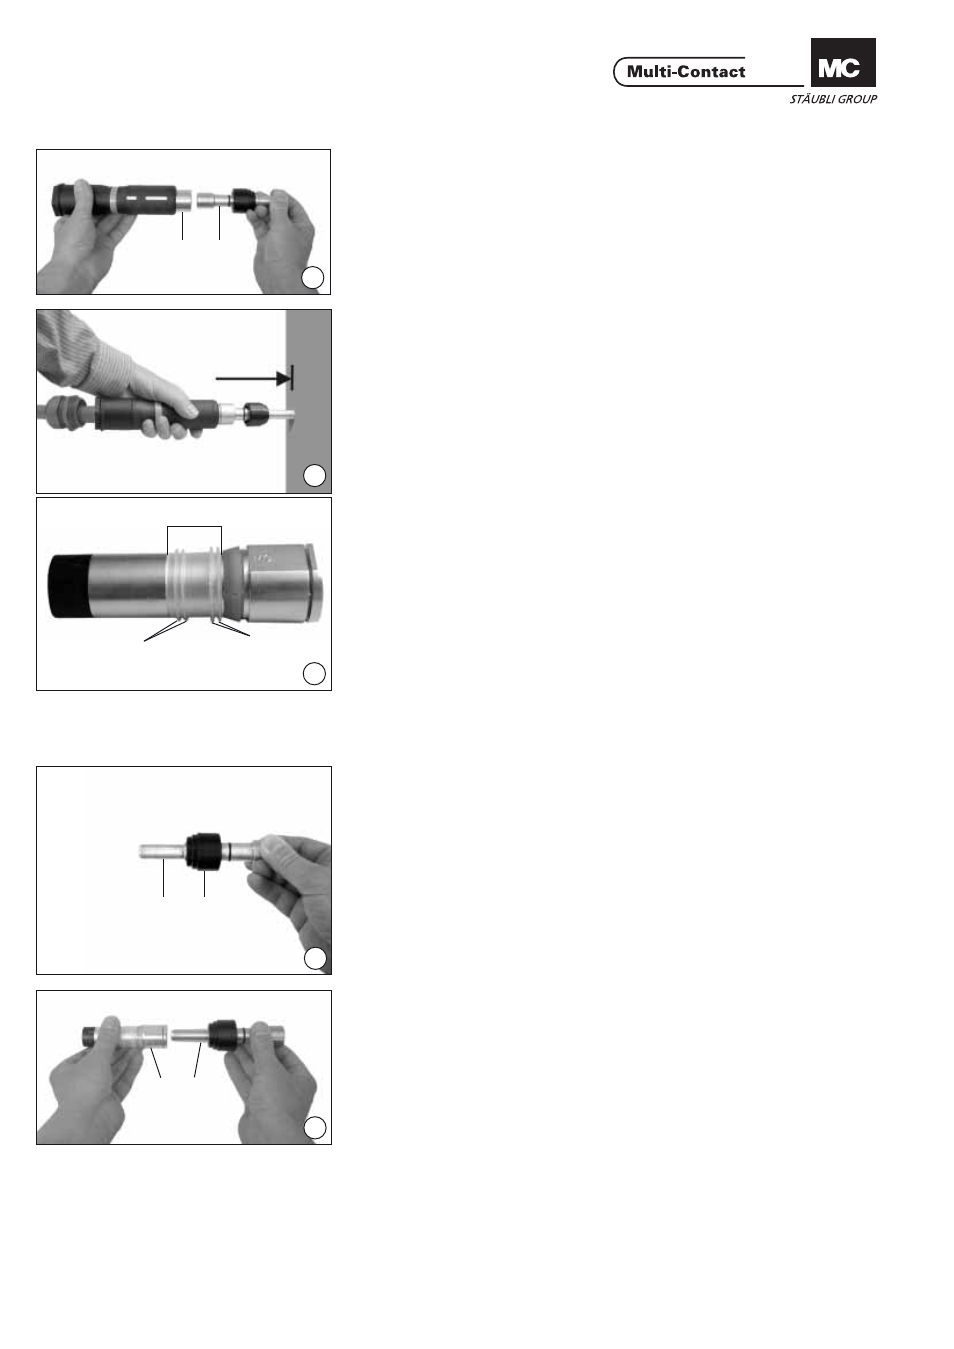
(ill. 26)
Engager le boulon 3 (par le grand
diamètre) dans l‘entretoise 1.
(ill. 26)
Push pin 3 into the sleeve 1, thicker
end fi rst.
(ill. 27)
Presser l‘ensemble contre un support
rigide jusqu‘au déverrouillage du corps
de contact (l‘isolant noir se retrouve
alors en butée sur l‘entretoise 1).
(ill. 27)
Press against a hard surface until the
contact insert is unlocked or the black
plastic part comes into contact with
the sleeve 1.
(ill. 28)
Vérifi er la position du joint D. Rouler le
joint d‘étanchéité pour le déplacer ou
le monter. Ne pas utiliser de produit
lubrifi ant. Vérifi er l‘intégrité des lèvres
d‘étanchéité. Le cas échéant, rempla-
cer le joint.
Type DR16BV-NS-A, N° de Cde 15.5369.
(ill. 28)
Check position of the seal D. When
installing or moving the seal, it must
be rolled. Use no lubricants. Check
lips of seal for damage and replace if
necessary.
Type DR16BV-NS-A, Order No. 15.5369.
Démontage du fыt а sertir,
voir ill. 13 à ill. 15
Removing the crimping slee-
ve see ill. 13 to. ill. 15
Montage de l‘insert de
contact KBT16BV
Installing the contact insert
for KBT16BV
(ill. 29)
Positionner l‘isolant de guidage K du
boulon 3 entre les deux joints to-
riques.
(ill. 29)
Push the plastic guide K of the pin 3
between the two O-rings.
(ill. 30)
Engager le boulon 3 (par le petit dia-
mètre) dans le corps de contact B
(ill. 30)
Insert pin 3 into the contact insert B,
thinner end fi rst.
lèvres courtes
short lips
lèvres longues
long lips