0 setup, 1 navigating the remote – Magnum Energy ME-RC Remote User Manual
Page 14
7
©2013 Magnum Energy, Inc.
3.0 Setup
3.0 Setup
When the remote is connected to a Magnum inverter/charger, the settings in
the remote control determine the inverter/charger’s operating parameters.
The default settings in the remote control are adequate for most installations
(see Table 3-5); however, you have the option to change some of the
operating parameters. This section shows you how to navigate the remote
and gives you an understanding of the function of each adjustable setting.
3.1
Navigating the Remote
The ME-RC has menu items and adjustable settings that provide the ability
to confi gure your inverter/charger to your specifi c parameters.
Info: See Figures 4-1 through 4-3 for complete maps of the inverter/
charger’s menu items and adjustable settings.
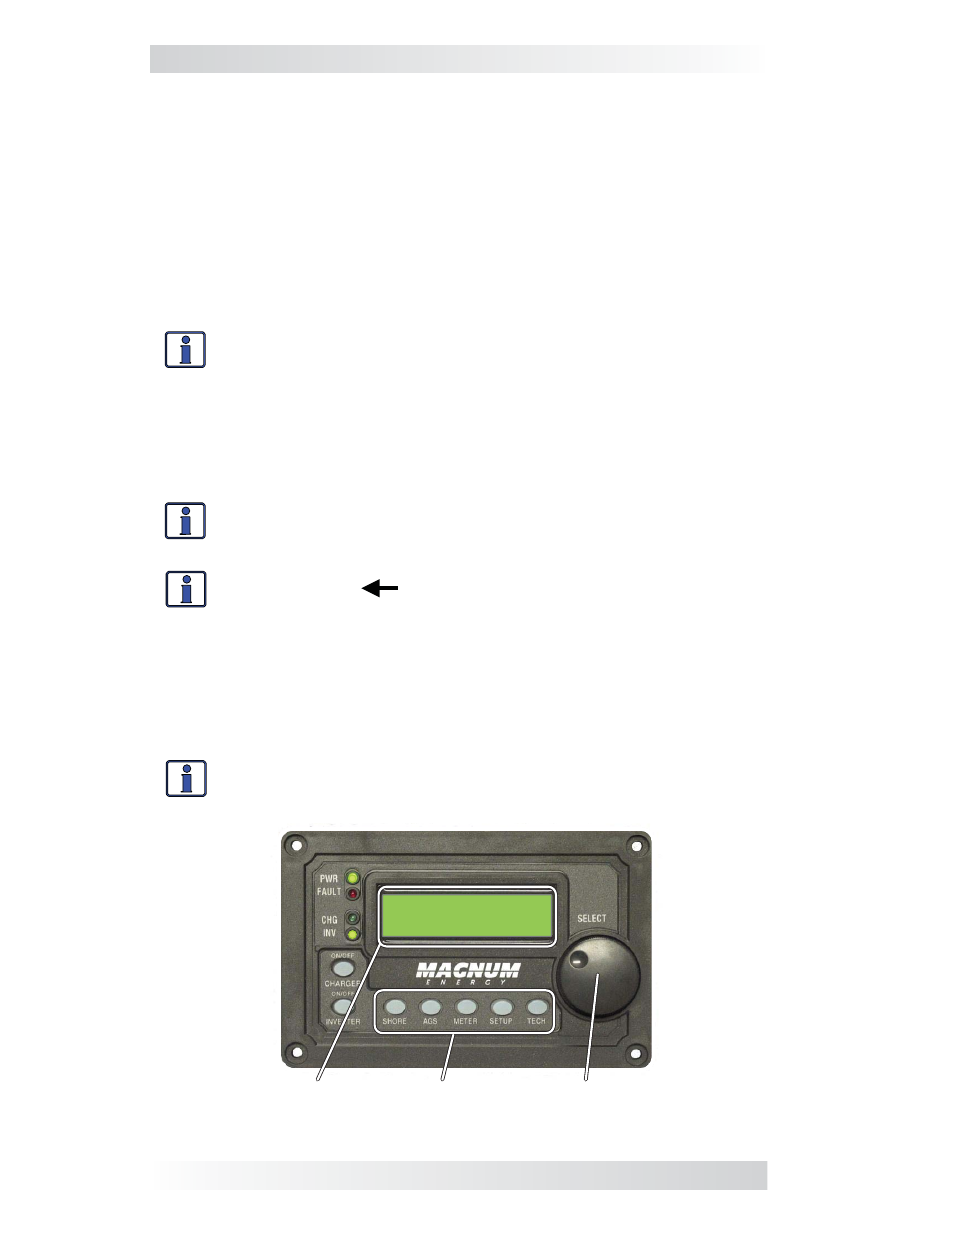
Familiarize yourself with the display and controls on the remote’s front panel
that are used to fi nd, adjust, and save the desired settings (see Figure 3-1).
• LCD
Display
– The 2-line LCD display shows status and information for
the inverter/charger and any attached accessories. All setup menus and
faults also appear on the LCD display.
Info: The LCD display returns to the remote home screen to show
DC voltage and current (see Figure 2-6) after 5 minutes—if no but-
tons have been pressed.
Info: When the
(left facing arrow) symbol is shown on the
display, the displayed setting has been selected and will be used.
• Menu Buttons (x5) – These fi ve buttons allow simple access to menu
items that can help with confi guring, monitoring, and troubleshooting
your inverter/charger system.
• Rotary SELECT Knob – This rotary knob allows you to quickly scroll
through and select various menu items and settings. Pressing the knob
selects the menu item to change, or saves the current selection.
Info: Hold down the SELECT button for 10 seconds to refresh the
LCD display.
Inverting
DC: 12.6V 50A
Rotary
SELECT Knob
LCD Display
Menu
Buttons
Figure 3-1, Front Panel Setup Features