1 flush mount installation procedure, 0 installation – Magnum Energy ME-RC Remote User Manual
Page 12
5
©2013 Magnum Energy, Inc.
2.0 Installation
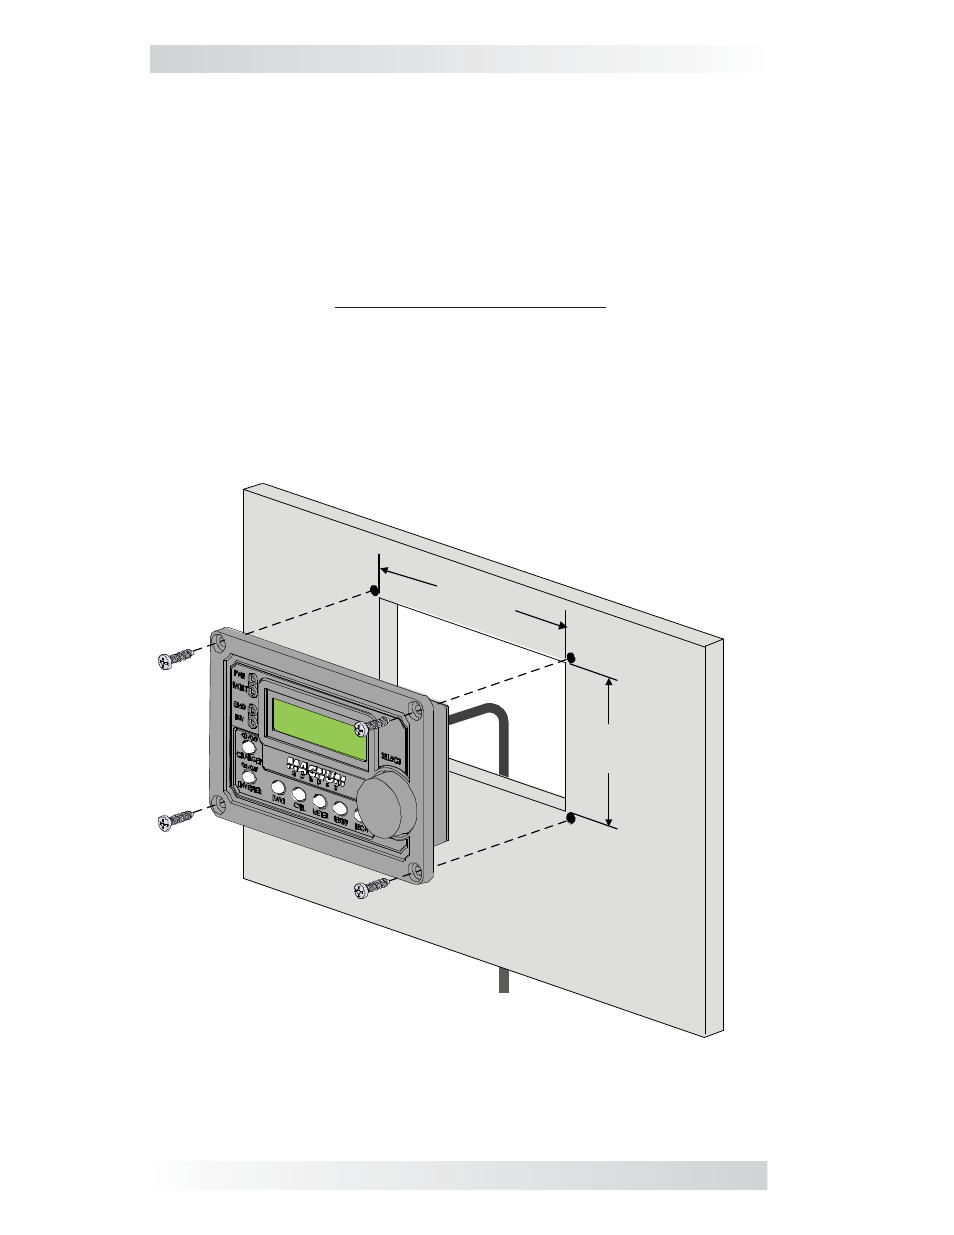
Figure 2-4, Flush Mounting the ME-RC
3.0"
(7.6 cm)
5.0"
(12.7 cm)
2.4.1 Flush Mount Installation Procedure
To fl ush mount, the wall opening must have at least a 2” (5 cm) depth to
allow room for the remote and the cable.
1. Cut an opening in the wall (Figure 2-4). Ensure there are no openings
around the display and enough material for the screws to secure the unit.
2. Drill four pilot holes for the #8 x 3/4 screws that will attach the remote to
the wall (refer to Figure 2-3 for remote hole locations and dimensions).
3. Route one end of the cable through the wall opening to the inverter/
charger, and then plug it into the RJ11 REMOTE port (blue label) on the
inverter/charger—inverter has DC power, but is OFF. See Figure 2-2.
4. Take the other end of the remote cable and while plugging it into the
back of the ME-RC, view the remote’s display to ensure the Power-up
Self Test initiates (see Section 2.5).
5. If the self test is successful, secure the ME-RC to the wall using the
four supplied Phillips screws. If the self test is unsuccessful, refer to the
Troubleshooting section.