Replace compactflash boot media – Grass Valley K2 Summit Client Upgrade Instructions v.8.x Mar.02 2012 User Manual
Page 15
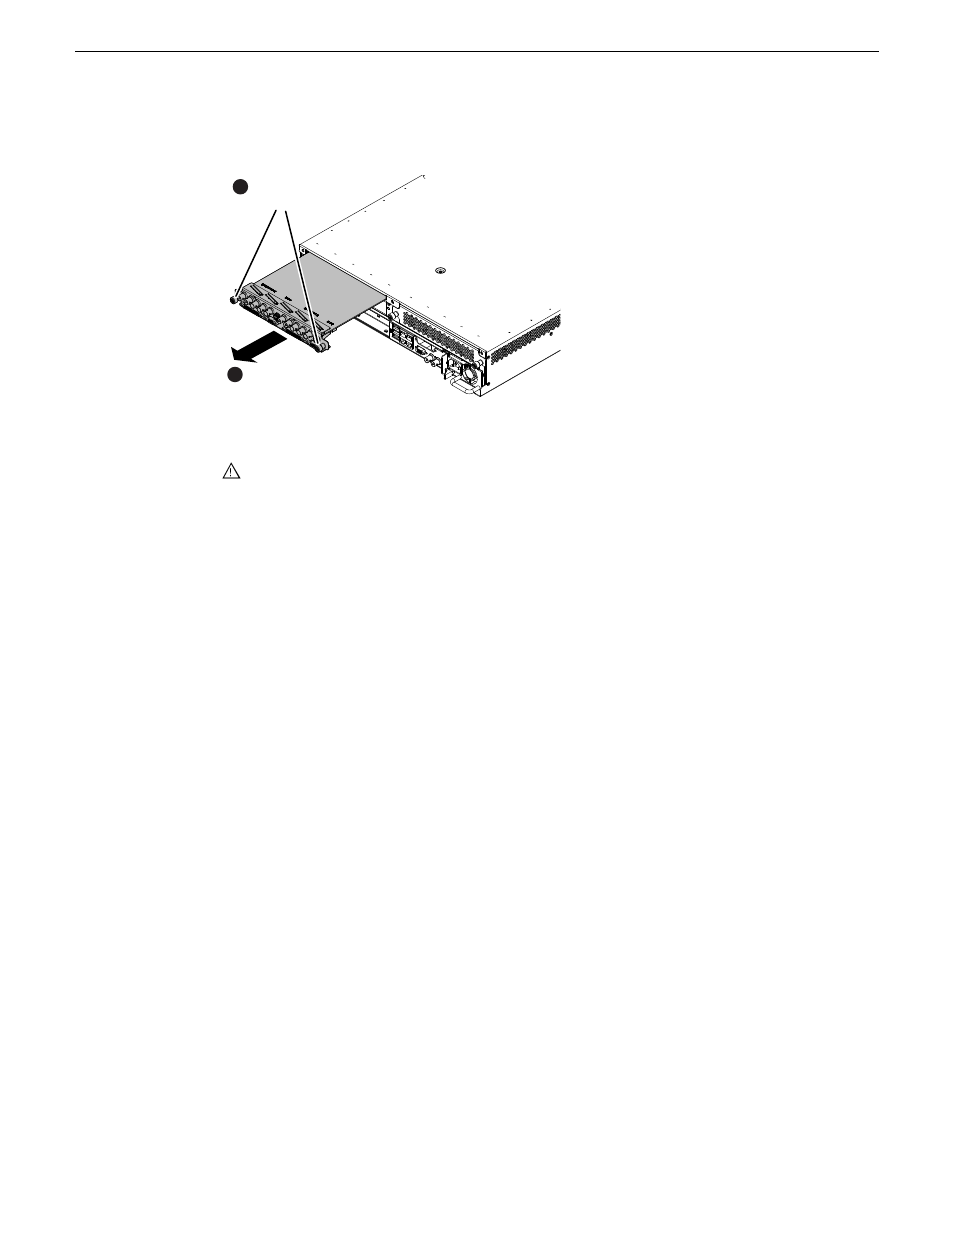
2. Access the rear panel and remove as illustrated.
Slide out
2
Loosen
thumbscrews
1
NOTE: With a firm grip on the metal (EMI) bracket, ensure the board is level and parallel
to the card guides to avoid damage to the components on the edge opposite the rear panel.
CAUTION: Improper handling can damage components on the board. Do not allow the
board to come in contact with the chassis sheet metal during removal or installation. The
components on the edge opposite the rear panel are the most susceptible to damage.
3. Install the new codec modules.
4. Replace the current power supply modules with the new power supply modules.
5. Reconnect cables to the codec modules and power supplies.
Next, do one of the following:
•
If you are installing K2-XDP-3G2-FK on a K2 Summit system, skip ahead and reimage.
•
If you are installing or K2-XDP-3G1-FK on a K2 Summit system, replace the CompactFlash
boot media.
Related Links
on page 34
Replace CompactFlash boot media
Do this task if installing K2-XDP-V8x-FK, K2-XDP-CPU-FK, or K2-XDP-3G1-FK.
Before doing this task, make sure the K2 Summit/Solo system is powered off.
1. Remove the front bezel assembly.
2. Replace the current CompactFlash boot media with the new CompactFlash boot media.
3. Replace the front bezel assembly.
Next, reimage the K2 Summit/Solo system.
Related Links
Front bezel assembly removal K2 Summit
on page 35
CompactFlash boot media removal K2 Summit
on page 35
on page 37
CompactFlash boot media removal K2 Solo
on page 37
02 February 2012
K2 Summit/Solo Field Kit Upgrade Instructions
15
Upgrade instructions