5 position on farming machine, 1 system recommended composition, 2 monitor position – ARAG Navigator LT User Manual
Page 5: 3 bracket fixing, System recommended composition, Monitor position, Bracket fixing, Installation, System for gps guidance monitor
5
5
POSITION ON FARMING MACHINE
5.1
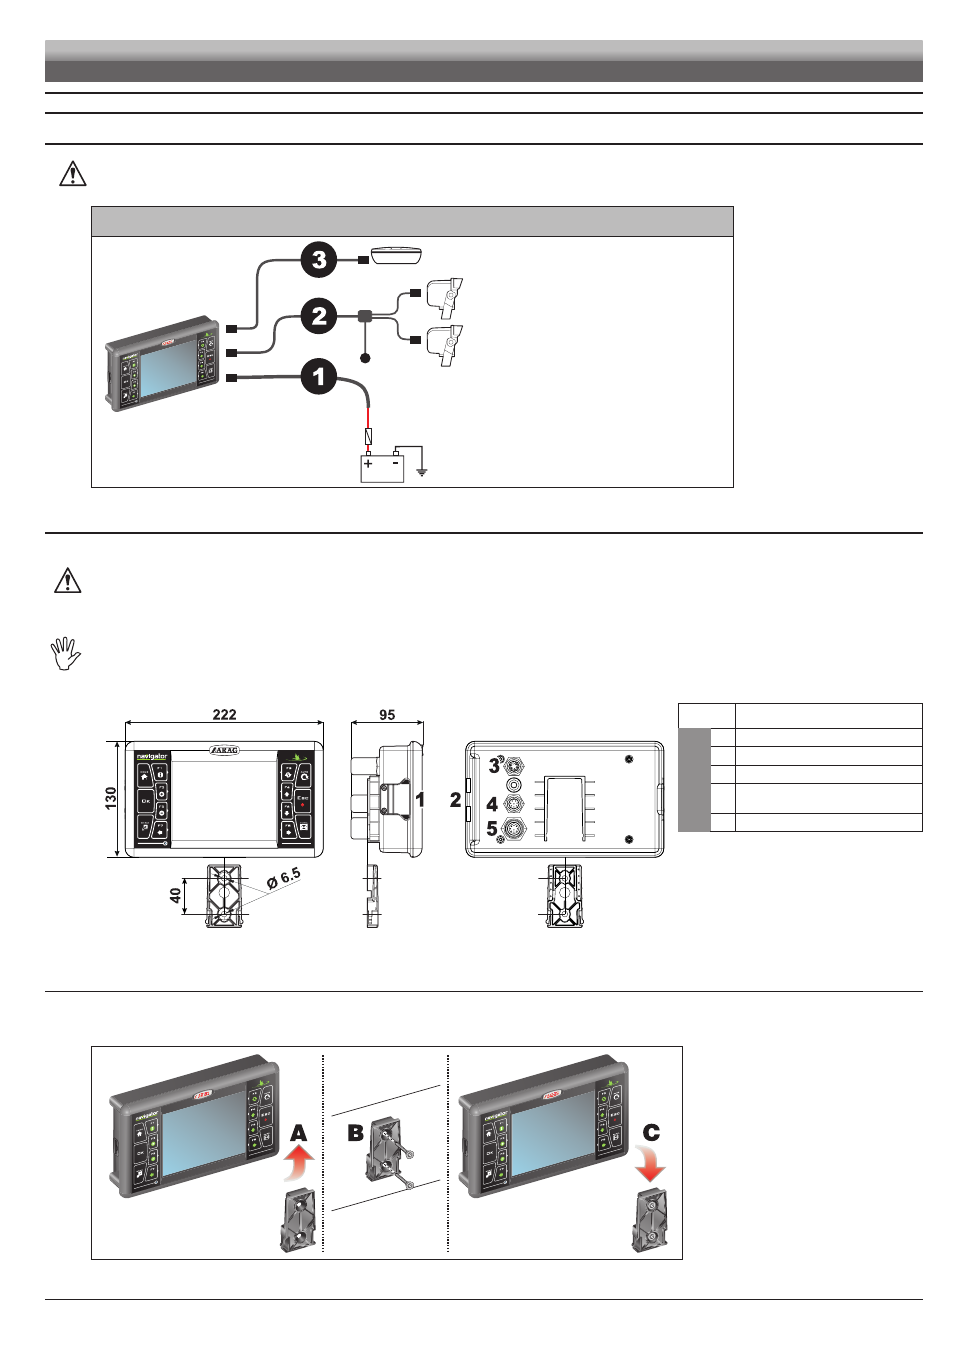
System recommended composition
Connect the power cable directly to the battery using the suitable eyelets.
WARNING! DO NOT connect to key-operated switch (15/54).
SYSTEM FOR GPS GUIDANCE MONITOR
Fig. 2
Legend of connection cables:
1 Power cable
2 Cameras / spraying activation
3 GPS receiver
5.2
Monitor position
• Navigator must be placed in the control cabin of the farming machine. Observe the following precautions:
- Do NOT install the monitor in areas where it would be subjected to excessive vibrations or shocks, to prevent any damage or
accidental use of the control keys;
- Install the device in a visible position within easy reach by hand; bear in mind that the monitor should not obstruct the
operator’s freedom of movement or block his view.
Consider all necessary connections of the computer (Fig. 3), the cable length, and make sure there is enough space for
connectors and cables.
An identification symbol is located next to each connector to indicate its function.
For any reference to the system configuration read par. 5.1.
Fig. 3
ITEM
CONNECTION POINTS
MONITOR
1
SD memory card
2
USB (2)
3
GPS receiver
4
Cameras +
spraying activation
5
Power supply connection
5.3
Bracket fixing
The navigator must be mounted after fixing the bracket at the desired location (the previous paragraph shows the bracket drilling template).
The bracket must be slid out of the monitor seat (
A
, Fig. 4) and fixed using the supplied screws (
B
).
Make sure the bracket is securely mounted, fit the monitor on it, and push it until it locks in place (
C
).
Fig. 4
INSTALLATION