Step 5: connect the camera to the network, Step 6: access the camera live view, Step 7: adjust the viewing angle and focus – ACTi Bullet Camera on Straight Wall with Bundled Bracket User Manual
Page 41: Step 8: attach the sunshield
Installation Guide
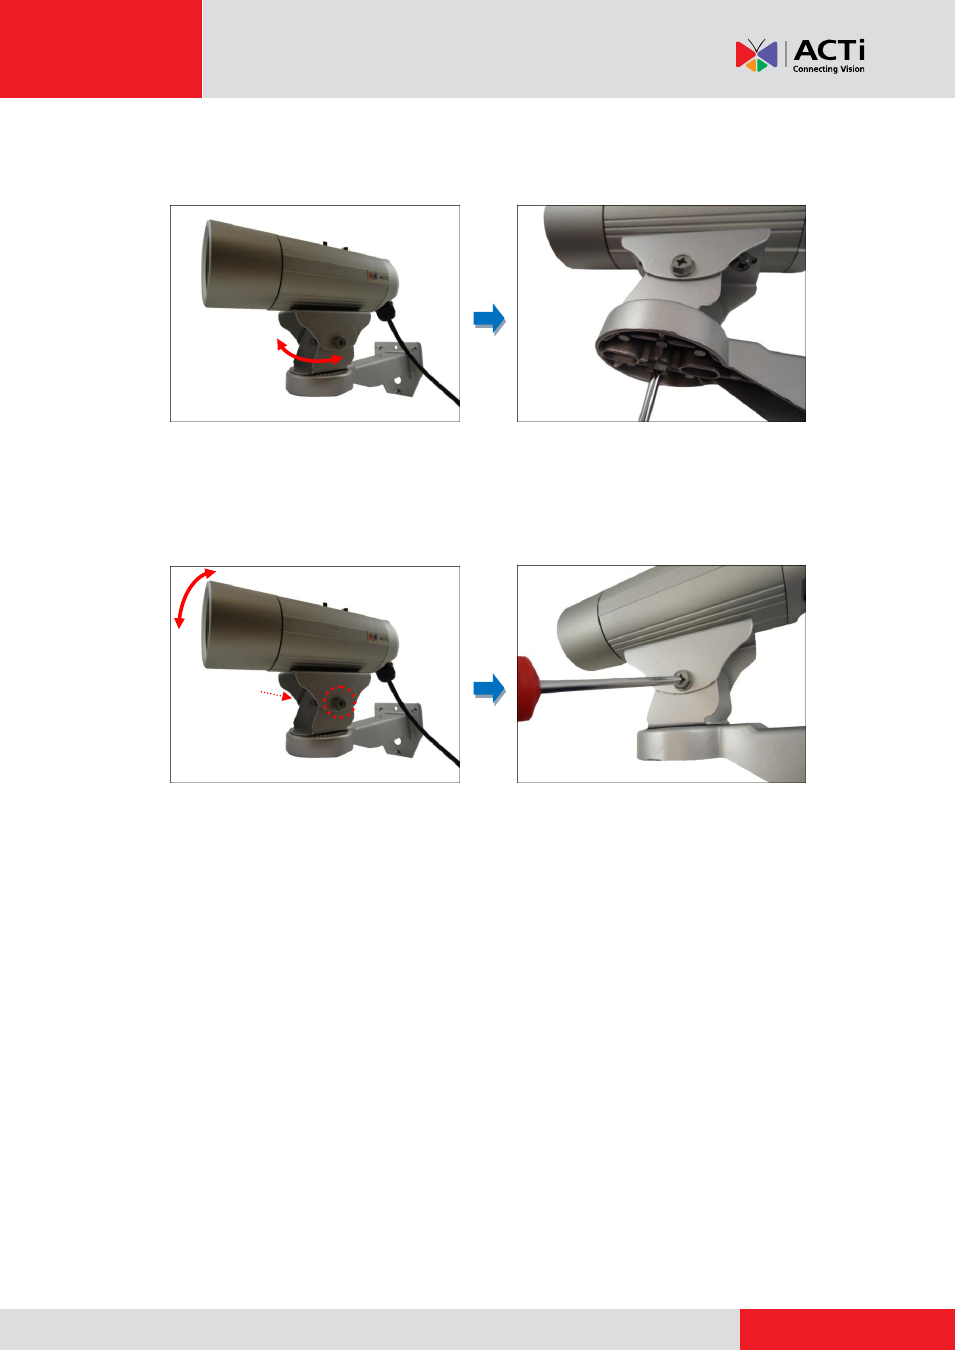
3.
As needed, turn the holder left or right to adjust the camera viewing direction. Then, secure
the screw tightly to fix the position.
4.
As needed, loosen the two (2) side screws of the holder and then move the camera up or
down to adjust the camera viewing angle. Then, tighten the two (2) side screws to fix the
position.
Step 5: Connect the Camera to the Network
Connect the other end of the Ethernet cable to a PoE switch.
Step 6: Access the Camera Live View
Live View on page 42 for more information.
Step 7: Adjust the Viewing Angle and Focus
Based on the Live View, adjust the viewing angle and focus of the camera. Adjustments vary per
model; for detailed information, please refer to the following sections:
For D3x / E3x camera series, see
on page 50.
For D4x / E41 / E41A / E42 / E42A / E43 / E43A series, see
on page 52.
Step 8: Attach the Sunshield
on page 53 for more information.
- Bullet Camera on Straight Wall with Heavy Duty Bracket Bullet Camera on Tilted Wall with Bundled Bracket Bullet Camera on Hard Ceiling with Bundled Bracket Bullet Camera on Dropped Ceiling with Bundled Bracket Bullet Camera on Corner with Accessory Set Bullet Camera on Vertical Pole with Accessory Set