2 set the re-alarm interval, Connect the seahawk leak detection cable, 1 connect lengths of sensing cable – RLE 10K V.2.5.a User Manual
Page 20: Set the re-alarm interval, Connect lengths of sensing cable
20
SeaHawk 10K User Guide
800.518.1519
2
Installation and Configuration
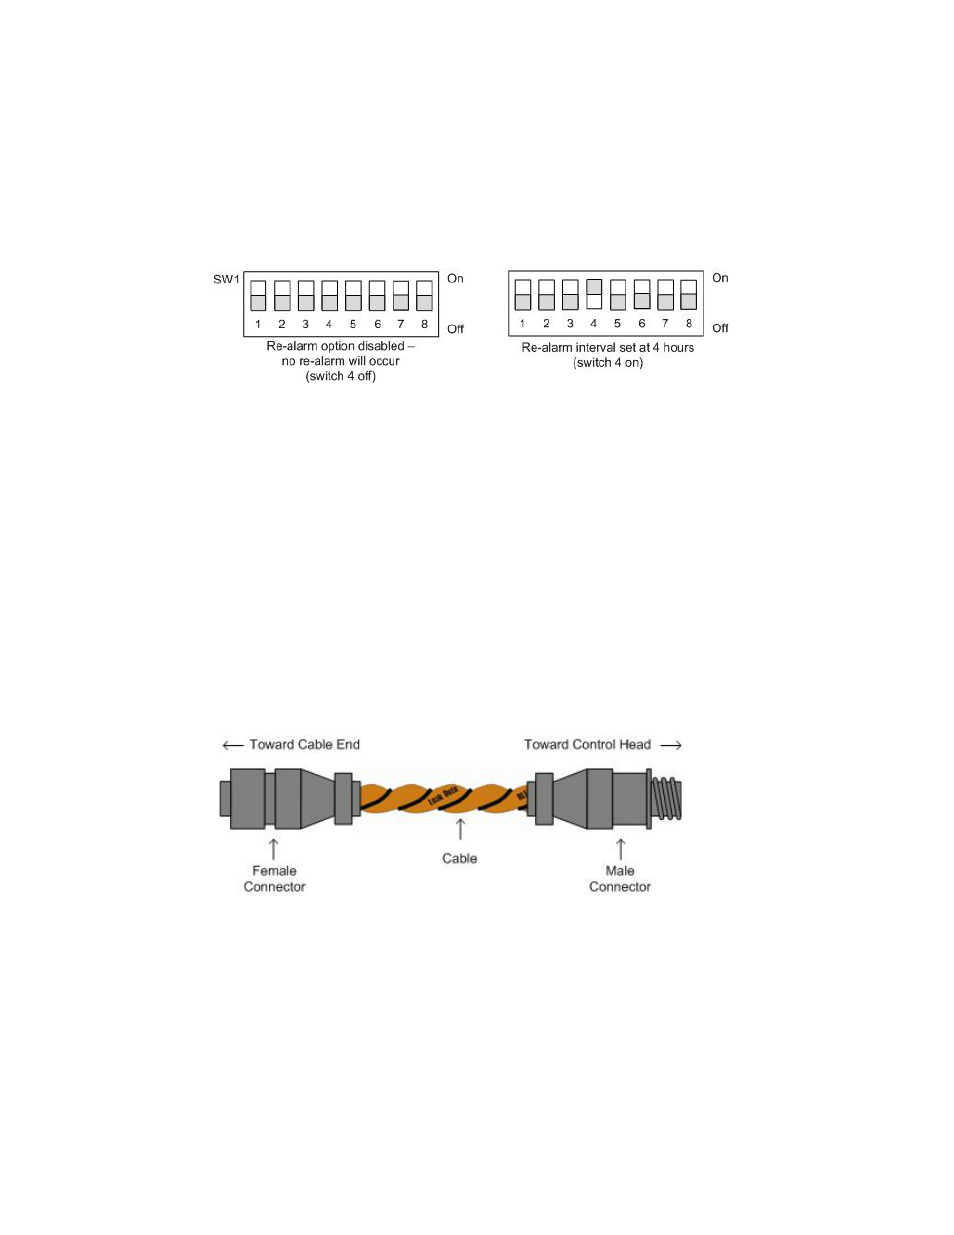
2.5.2 Set the Re-Alarm Interval
The SeaHawk 10K can be set to re-alarm – after a leak or cable fault has been detected, the
alarm will be re-sent at a 4 hour interval until the alarm condition has been resolved. This re-
alarm triggers both the audible alarm and the Modbus readout.
The re-alarm option is disabled by default. Activate the re-alarm setting with DIP switch 4 of
SW1:
Figure 2.15
DIP Switch 4, SW1 - Re-Alarm Interval
2.6.
Connect the SeaHawk Leak Detection Cable
I
MPORTANT
To avoid faulty leak detection readings, connect a minimum length of 35 feet (10.7m) of
sensing cable to the SeaHawk 10K.
The SeaHawk 10K is shipped with a 15-foot (4.57m) leader cable. This leader cable was
connected to the SeaHawk 10K in
. The following directions help you
connect sensing cable to the SeaHawk 10K.
2.6.1 Connect Lengths of Sensing Cable
1
Unscrew the end-of-line (EOL) terminator from the end of the leader cable.
2
Attach the first length of sensing cable to the leader cable. Insert the male pins into the
female connector, and twist the collar on the female side of the connector to secure.
Figure 2.16
SeaHawk Sensing Cable
3
Route the sensing cable according to your cable layout diagram. Attach additional lengths
of sensing cable as necessary.
4
Secure the EOL terminator to the unoccupied end of the last length of sensing cable.
Note
If the EOL terminator is not present at the end of the cable run, a cable fault will register.
5
If you are using a reference map, compare it with the actual cable installation. Revise any
discrepancies created through the physical installation of the cable.