RLE 10K V.2.5.a User Manual
Page 17
rletech.com
SeaHawk 10K User Guide
17
2
Installation and Configuration
2
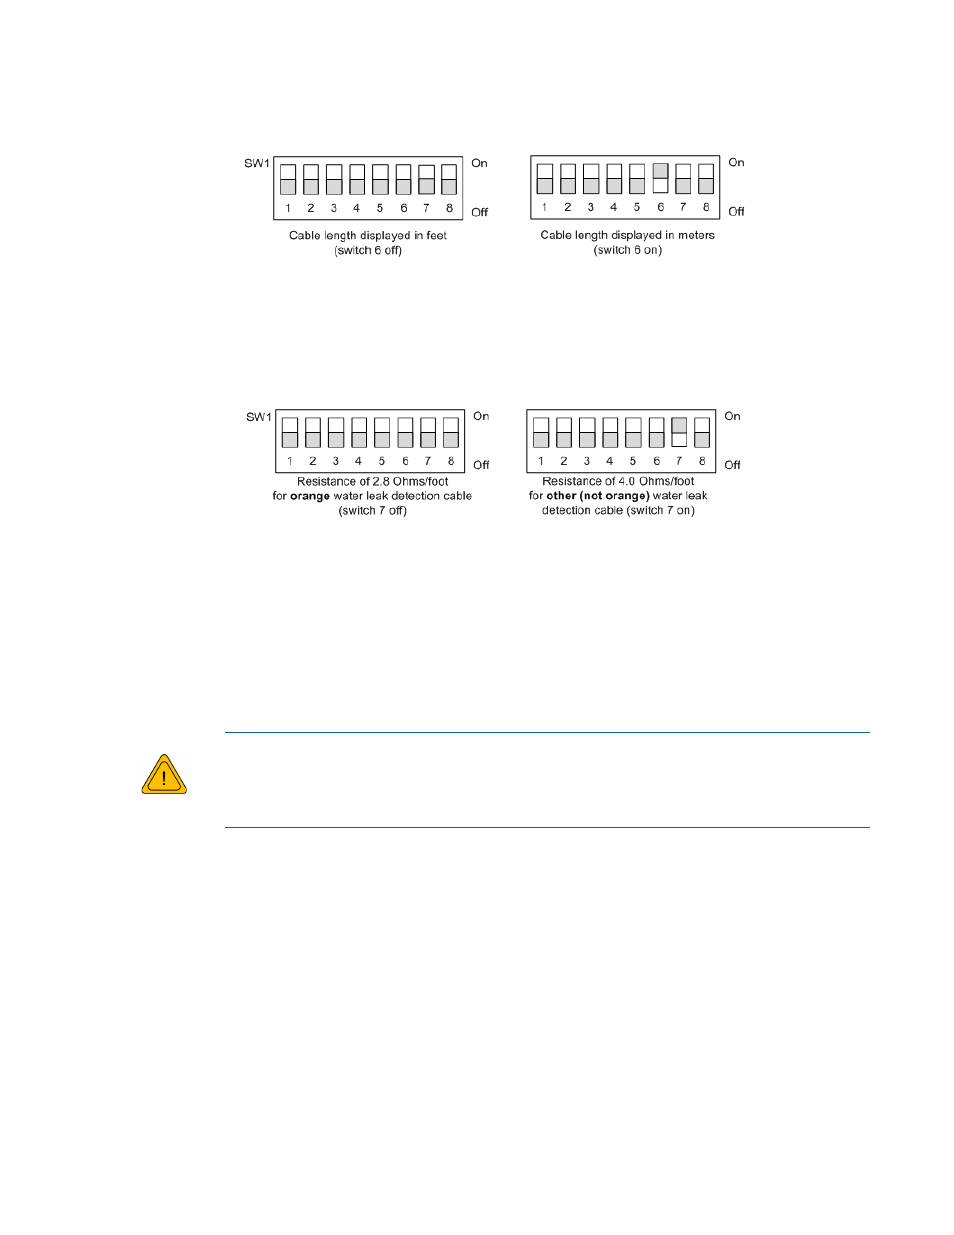
Use DIP switch 6 in block SW1 to designate whether the distance on the display is shown in
feet or meters:
Figure 2.9
DIP Switch 6, SW1 - Display Cable Length in Feet or Meters
3
RLE’s orange sensing cable has a resistance of 2.8 ohms per foot. Most other sensing cables
have a resistance of 4.0 ohms per foot. If you have questions regarding the resistance of
your cable, please reference the cable’s data sheet. Set DIP switch 7 in block SW1 to the
appropriate resistance-per-foot value.
Figure 2.10
DIP Switch 7, SW1 - Ohms per Foot Resistance
2.4.3 TB3 and TB4: Input Power and EIA-485
Communications Port
The SeaHawk 10K operates on either 12-24VAC or 12-24VDC power. A power supply is not
included with the SeaHawk 10K.
An isolated power supply must be provided for the SeaHawk 10K.
Do not connect 120/230 VAC to the unit, or damage will occur to the circuitry.
1
Run a power supply to the location of the SeaHawk 10K, or use a DIN rail mountable
power supply and mount it next to the SeaHawk 10K.
2
If you are installing just one SeaHawk 10K, use the two left-most pinouts on either TB3 or
TB4 (marked AC/DC) to connect power to the SeaHawk 10K. Insert the positive and
negative wires of the power supply into either of the pinouts; the SeaHawk 10K’s circuitry
will auto-correct.
If you are installing more than one SeaHawk 10K, use TB3 and TB4 to create a daisy-
chained power connection.
3
If you are installing just one SeaHawk 10K and it will communicate via Modbus to a
Modbus-enabled controller, use the three right-most pinouts on TB3 or TB4 to connect the
SeaHawk 10K to an EIA-485 network.
W
ARNING