Unit dimensions – REMKO ML 262 DC Arctic User Manual
Page 25
Final tasks
■
Reassemble all disassembled
parts.
■
Familiarise the operator with
the system.
4. If no leaks are found, open
the stop valves by turning
them anti-clockwise as far as
they will turn using a hexagon
spanner. If leaks are found,
repair the faulty connection. It
is imperative that the vacuum
creation and drying steps are
repeated!
5. Switch on the mains switch or
circuit breaker.
6. Use the remote control to
switch on the unit and select
the cooling mode, maximum
fan speed and lowest target
temperature.
7. Measure and record all
the required values in the
commissioning report and
check the safety functions.
8. Check the unit's control
element using the functions
described in the chapter
"Operation".
Timer, temperature setting,
fan speeds and switching to
ventilation or dehumidifying
mode.
9. Check the correct function
of the condensation line by
pouring distilled water into the
condensation tray.
A bottle with a spout is
recommended for pouring the
water into the condensation
tray.
10. Switch the indoor unit to
cooling mode.
11. Check the correct function and
settings of all control and safety
devices during the test run.
12. Check the control system in the
indoor unit using the functions
described in the operating
manual.
Timer, temperature settings and
all mode settings.
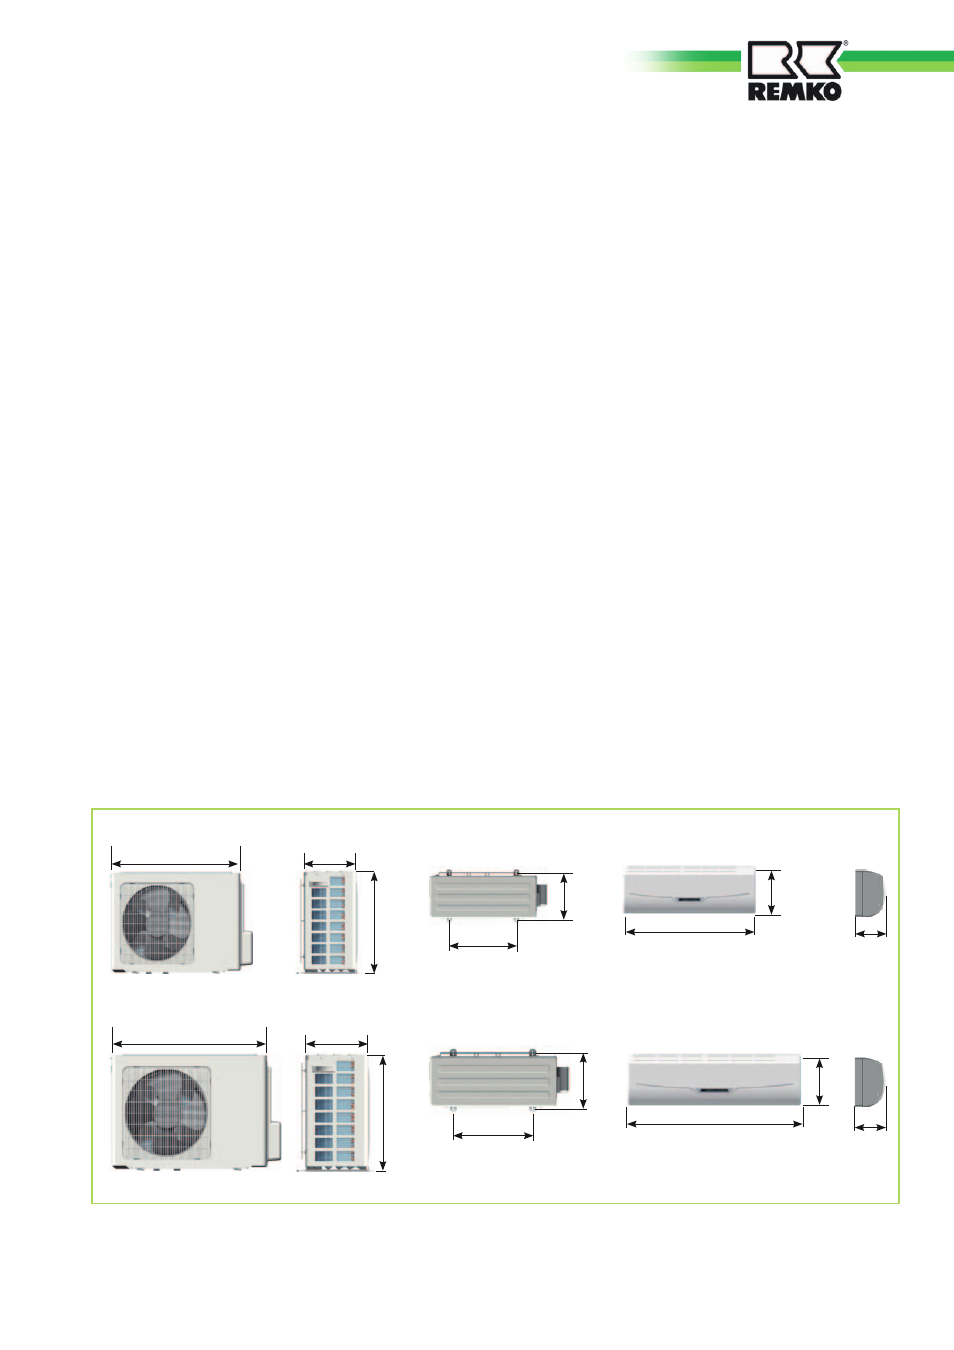
Unit dimensions
We reserve the right to modify the dimensions and constructional design as part of the ongoing technical development process.
All values in mm
ML 262 DC AT to ML 352 DC AT
760
530
295
268
590
ML 522 DC AT
270
590
530
290
770
790
275
190
940
275
200
13. Check the overheating,
outdoor, indoor, outlet and
vaporisation temperatures and
record the measured values in
the commissioning report.
14. Switch the indoor unit to
heating mode.
15. Check all the previously
described safety devices and
functions during the test run.
16. Enter the measured data in the
commissioning report.
17. Remove the pressure gauge.
Check that seals have been
fitted in the sealing caps.
ML 262 DC IT / ML 352 DC IT
ML 522 DC IT
25