Metro Mobile Computing Workstations MPS-4007 Lithium Ion Nano-Phosphate Power Supply User Manual
Page 19
Metro
TM
MPS-4007 Li-Nano Power Supply Operations Manual Supplement, Doc. L01-505
19
InterMetro Industries Corporation
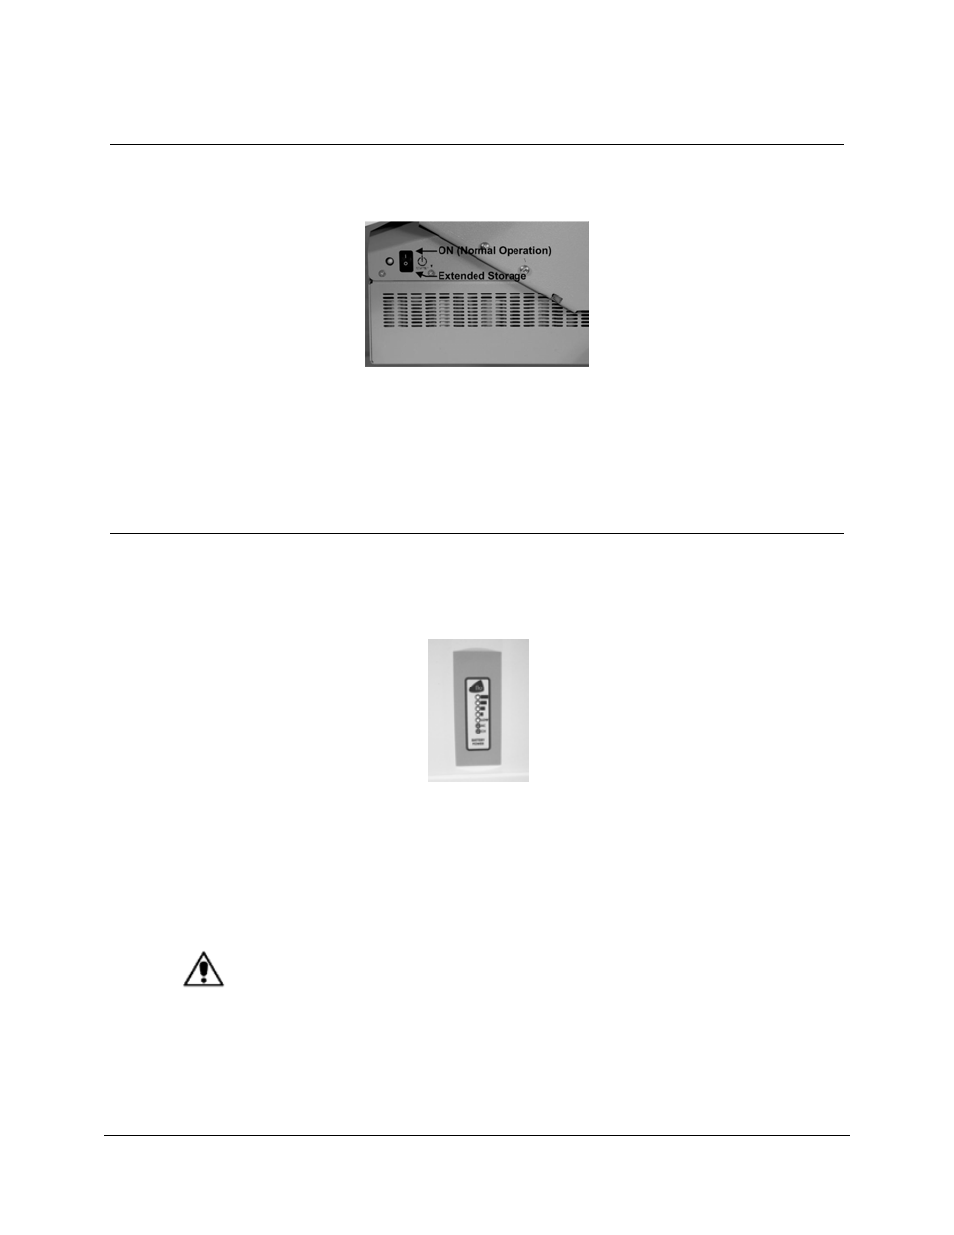
Powering Up the MPS-4007 Li-Nano Power Supply
To turn on the Power Supply, flip the ON (Normal Operation)/Extended Storage switch located
on the side of the power supply to the “ON” (up) position.
Metro
TM
MPS-4007 Li-Nano Power Supply “ON/Extended Storage” Switch
Important Notice:
If the MPS-4007 Li-Nano Power Supply has been switched to “Extended Storage” for more than
1 week, connect the workstation to AC to wake up the power supply before switching it to “ON.”
Remote Fuel Gauge
To display the charge level of the Li-Nano cells when operating on DC power, a Remote Fuel
Gauge is connected to the power supply. The embedded Remote Fuel Gauge is located just
below the monitor in the stalk and gives the user the current battery status at eye level height.
Remote Fuel Gauge
If the battery is fully charged, all five (5) amber LEDs are illuminated. The LEDs always display
the battery charge level whether the computer is operating or not. As the battery looses charge,
the LEDs gradually turn off, one at a time. Once the top four LEDs are off and only the amber
LED marked “LOW” is illuminated and flashing, it is recommended to plug the AC cord into an
AC outlet as soon as possible to charge the battery.
Notice:
Once the amber LED marked “LOW” starts to flash, plug the power supply into
an AC outlet to avoid loss of system power, which may cause loss of data.
Notice:
Once the Li-Nano Power Supply has been plugged into an AC outlet, the
Remote Fuel Gauge two green LEDs marked “AC” and “CH” turn on.