Installing the vapor recovery kit, Preparation, Mounting the vapor recovery piping – Gasboy M06430K00X User Manual
Page 6: Figure 2, Caution
Installing the Vapor Recovery Kit
Page 6
MDE-4522A Atlas™ Self-Contained Pump Vapor Recovery Kit M06430K00X Installation • November 2006
Installing the Vapor Recovery Kit
Preparation
1
Request permission from the manager/owner to remove power from the unit; then remove
power using normal procedures. Perform the lockout/tagout safety procedures.
2
Ensure you have the proper kit for the dispenser model to be retrofitted.
3
Be prepared to follow all applicable safety rules and procedures.
Mounting the Vapor Recovery Piping
1
for the appropriate kit and refer to
through
2
Screw the 3/4-inch x 2-1/2 inch pipe nipple into the splitter on the flange side and tighten.
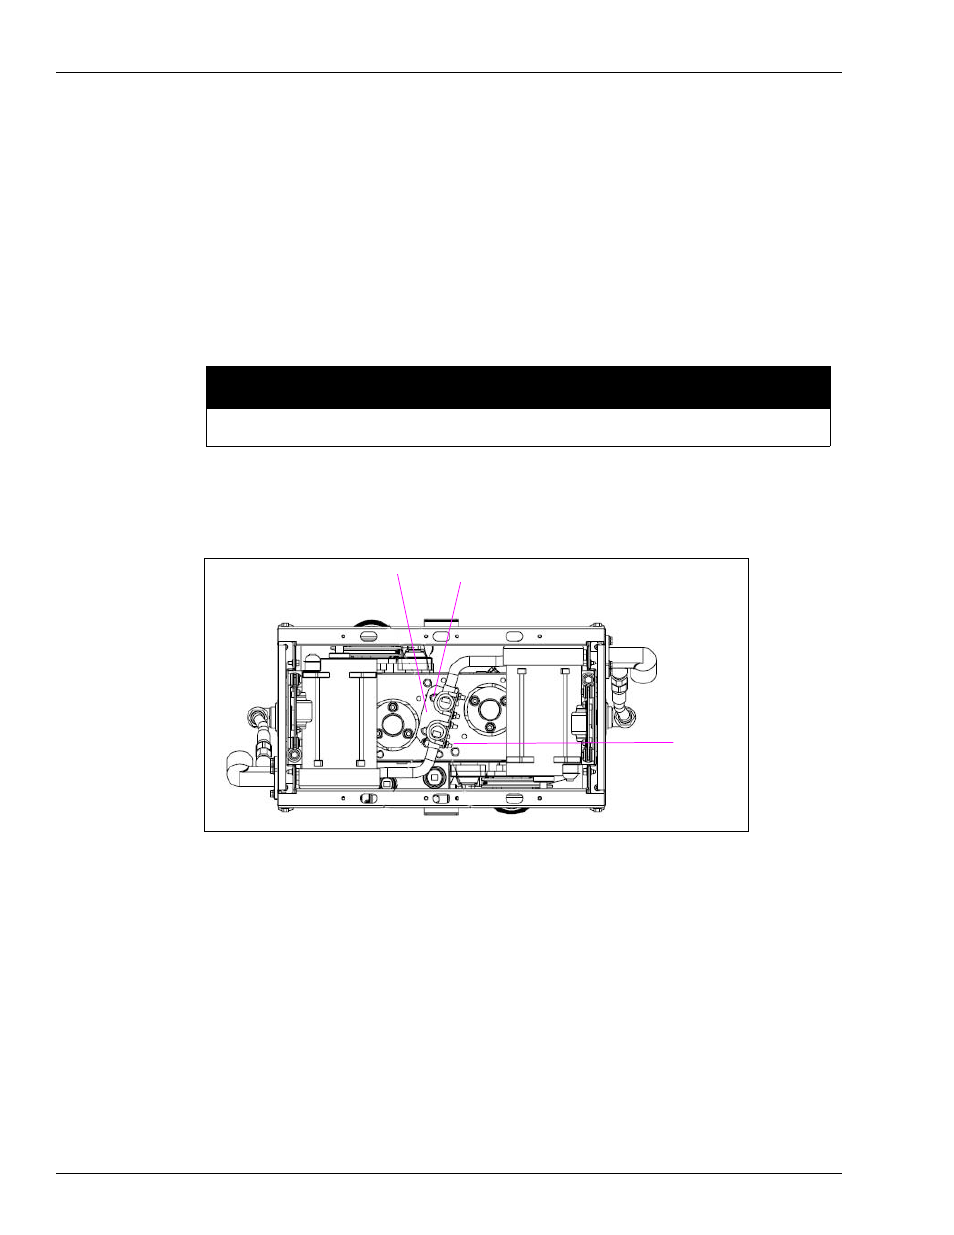
Figure 2: Pump Mounting
3
Insert the nipple through the splitter hole in the frame, place four M8x25 screws and M8 nuts,
and tighten them.
4
Place the 3/4-inch pipe union onto the nipple.
5
Place the other half of the 3/4-inch pipe union to the adapter end of the copper tube assembly.
6
Attach the support bracket to the bottom of the pump mounting plate as shown in
and
insert two M8x25 screws and M8 nuts, and tighten them.
7
Install the copper tube assembly to the unit by coupling the union.
8
Install and tighten the U-bolt(s) and nuts, and tighten the union.
9
Install the connection to the underground tank using an appropriately-sized union.
Use a UL-approved joint compound on all pipe threads. DO NOT use Teflon
®
tape.
CAUTION
Atlas balanced support bracket
Screw, metric M8x25
U-bolt