Desa BLP35E User Manual
Page 15
13
102588
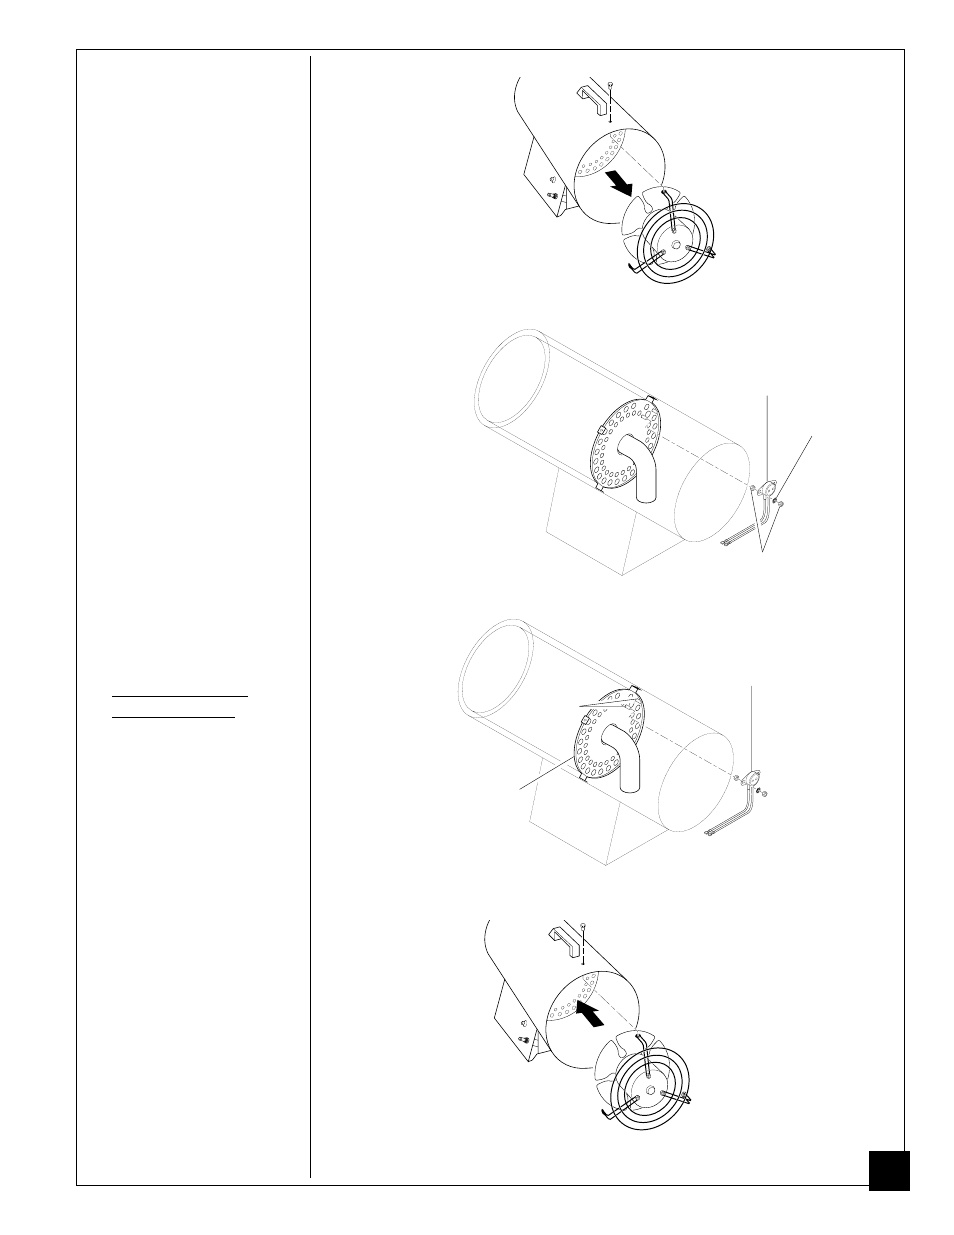
Thermoswitch
1. Make sure unit is un-
plugged.
2. Remove three screws that
attach fan guard to heater
shell.
3. Remove motor and fan
guard from heater shell
(see Figure 20). Be
careful not to damage fan.
4. Remove two nuts and
star washers from
thermoswitch (see Figure
21).
5. Disconnect the blue
thermoswitch leads in
base of heater.
6. Remove the thermoswitch
assembly.
7. Insert new thermoswitch
wires down through hole
at bottom of heater shell.
8. Mount new thermoswitch
onto the two mounting
bolts on rear head (see
Figure 22).
9. Replace star washers and
nuts onto bolts.
10. Recommended for
accurate results: Torque
the nuts to 4-6 inch/lbs.
11. Place motor and fan guard
into rear of heater shell
(see Figure 23).
12. Insert three screws
through heater shell and
into fan guard. Tighten
screws firmly.
13. Attach blue thermoswitch
leads to terminal block
and solenoid valve wire
lead (see Wiring Dia-
gram, page 8).
Figure 20 - Removing Motor and Fan Guard from Heater
Figure 23 - Replacing Motor and Fan Guard into Heater
Figure 21 - Removing Nuts and Star Washers from Thermoswitch
Figure 22 - Mounting New Thermoswitch onto Mounting Bolts
Nuts
Thermoswitch
New Thermoswitch
Mounting
Bolts
Rear Head
Star
Washers