Desa BLP35E User Manual
Page 14
12
102588
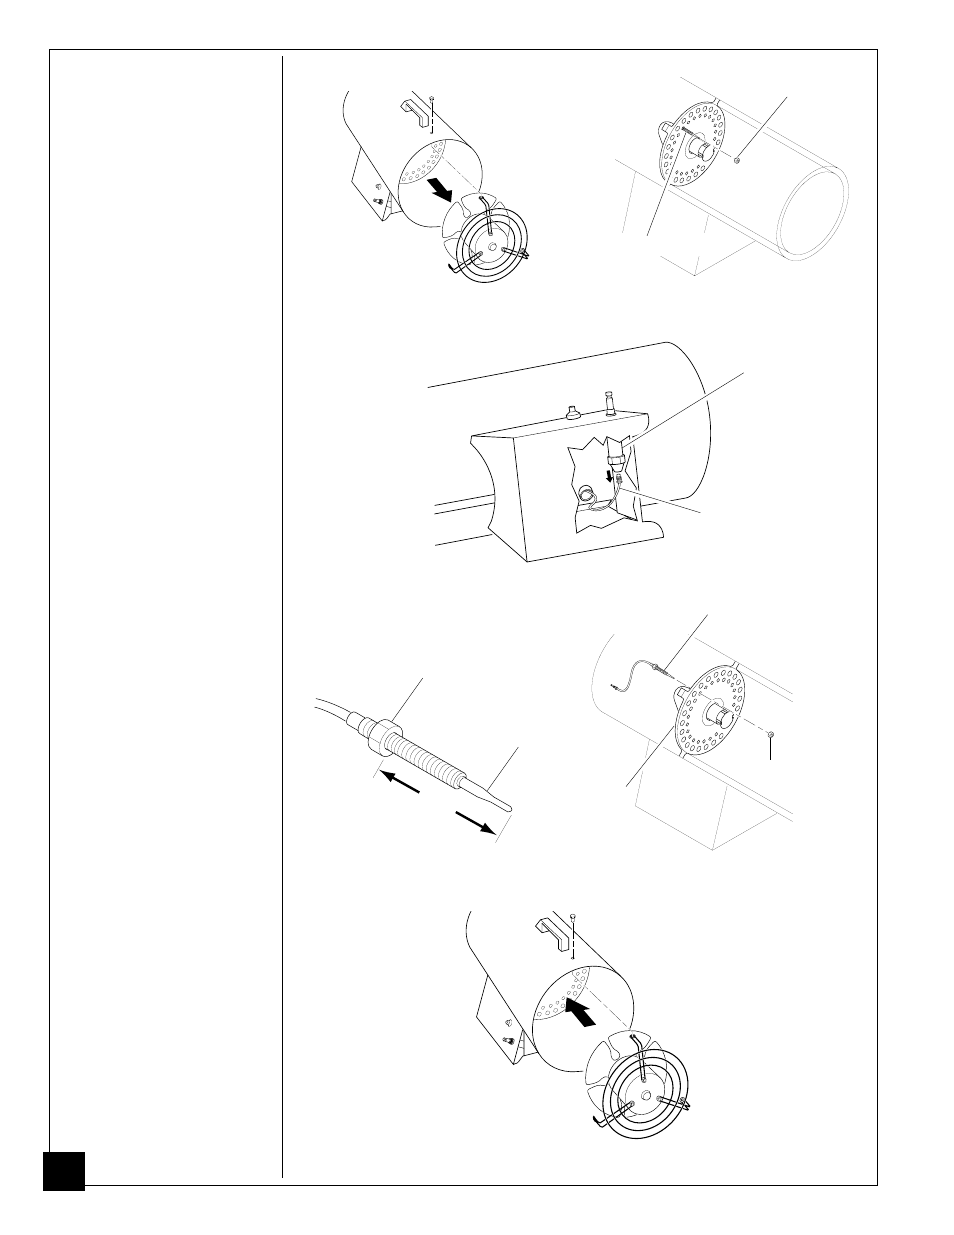
Thermocouple
1. Make sure unit is unplugged.
2. Remove three screws that
attach fan guard to heater
shell.
3. Remove motor and fan
guard from heater shell
(see Figure 14). Be careful
not to damage fan.
4. Remove thermocouple nut
located inside the combus-
tion chamber (see Figure
15).
5. Place unit on its side, and
remove the thermocouple
wire from the gas valve
(see Figure 16).
6. Remove thermocouple
from the unit.
7. Install first of two nuts on
new thermocouple (see
Figure 17). Position nut
about 40mm from tip of
thermocouple.
8. Insert tip of thermocouple
through the thermocouple
hole in rear head (see
Figure 18).
9. Install second nut onto
thermocouple. Attach this
nut to thermocouple from
inside combustion cham-
ber (see Figure 18). Adjust
both thermocouple nuts
until tip of thermocouple
is 40mm from rear head.
10. Tighten thermocouple
nuts and confirm 40mm
tip location.
11. Thread the thermocouple
wire back through unit to
gas valve. Tighten ther-
mocouple wire into gas
valve until snug (do not
over tighten).
12. Place motor and fan guard
into rear of heater shell
(see Figure 19).
13. Insert three screws
through heater shell and
into fan guard. Tighten
screws firmly.
Figure 14 - Removing Motor and
Fan Guard from Heater
Figure 15 - Thermocouple Nut Location
Figure 16 - Removing Thermocouple Wire from Gas Valve
Thermocouple Wire
Gas Valve
First of Two Nuts
Thermocouple Nut
40 mm
Figure 17 - Installing First Nut on
New Thermocouple
Figure 18 - Installing New Thermo-
couple
New
Thermocouple
Figure 19 - Replacing Motor and Fan Guard into Heater
Thermocouple
Rear
Head
Thermocouple Nut
Thermocouple