DR Power 16.50 Pro User Manual
Page 59
CONTACT US AT www.DRpower.com or CALL TOLL FREE 1-800-DR-OWNER 55
3. Remove the Collar from the axle by loosening the Set
Screw with a 5/32" allen wrench and pulling the Collar
off.
4. Remove the Wheel and Spacer that is behind the
Collar from the Axle.
5. Pull the opposite wheel along with the Axle from the
Chipper.
6. Slide the Spacer, Wheel and Collar back onto the Axle
and store in a safe place.
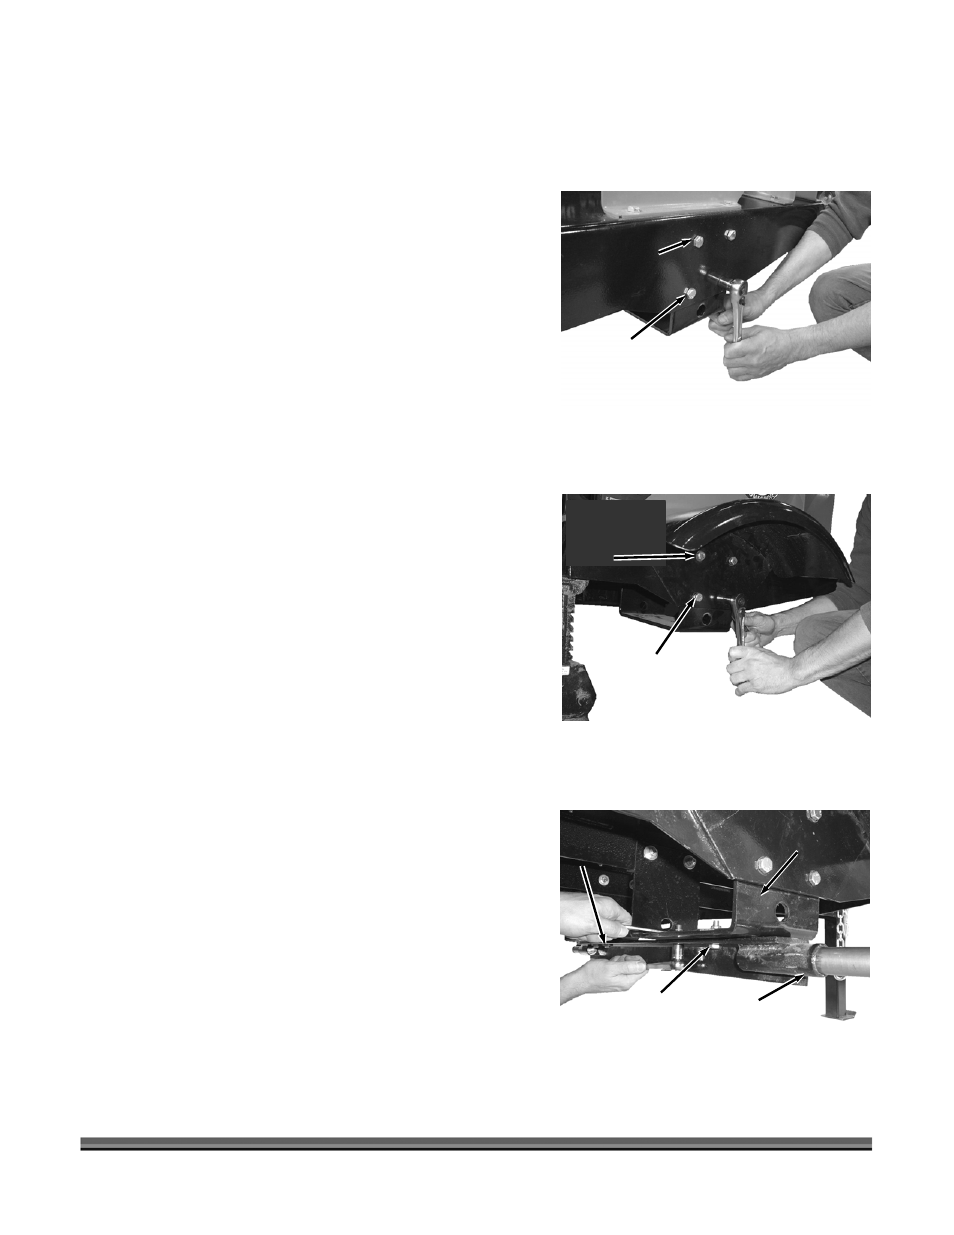
7. Remove the four Bolts, Lock Washers and Nuts (two
large washers on top two holes only) from the side of
the chipper Frame with two 9/16" wrenches (Figure
57).
8. Position the Fender and reinstall the four Bolts, Lock
Washers and Nuts (two large washers on top two
holes only) to the side of the chipper Frame (Figure
58).
9. Repeat the Fender installation for the opposite side.
10. Position the new Axle Assembly under the Chipper
and secure it to the Axle Brackets with two Bolts,
Locknuts and Washers (on the side with slots) and
two Bolts and Locknuts (on side with holes) using two
9/16" wrenches (Figure 59).
Figure 59
Axle
Assembly
Mounting
Slots this
side
Axle Bracket
Axle
Assembly
Hardware
Figure 58
Fender
Bolt, Nut, Lock
Washer and Flat
Washer (top two
holes)
Bolt, Nut and
Lock Washer
(bottom two
holes)
Bolt, Nut, Lock
Washer and Flat
Washer (top two
holes)
Figure 57
Bolt, Nut and
Lock Washer
(bottom two
holes)