Daktronics GPR-12EV-RGB User Manual
Page 70
Temperature Sensor Mounting For
GalaxyPro Revolution Displays
page 2 of 4
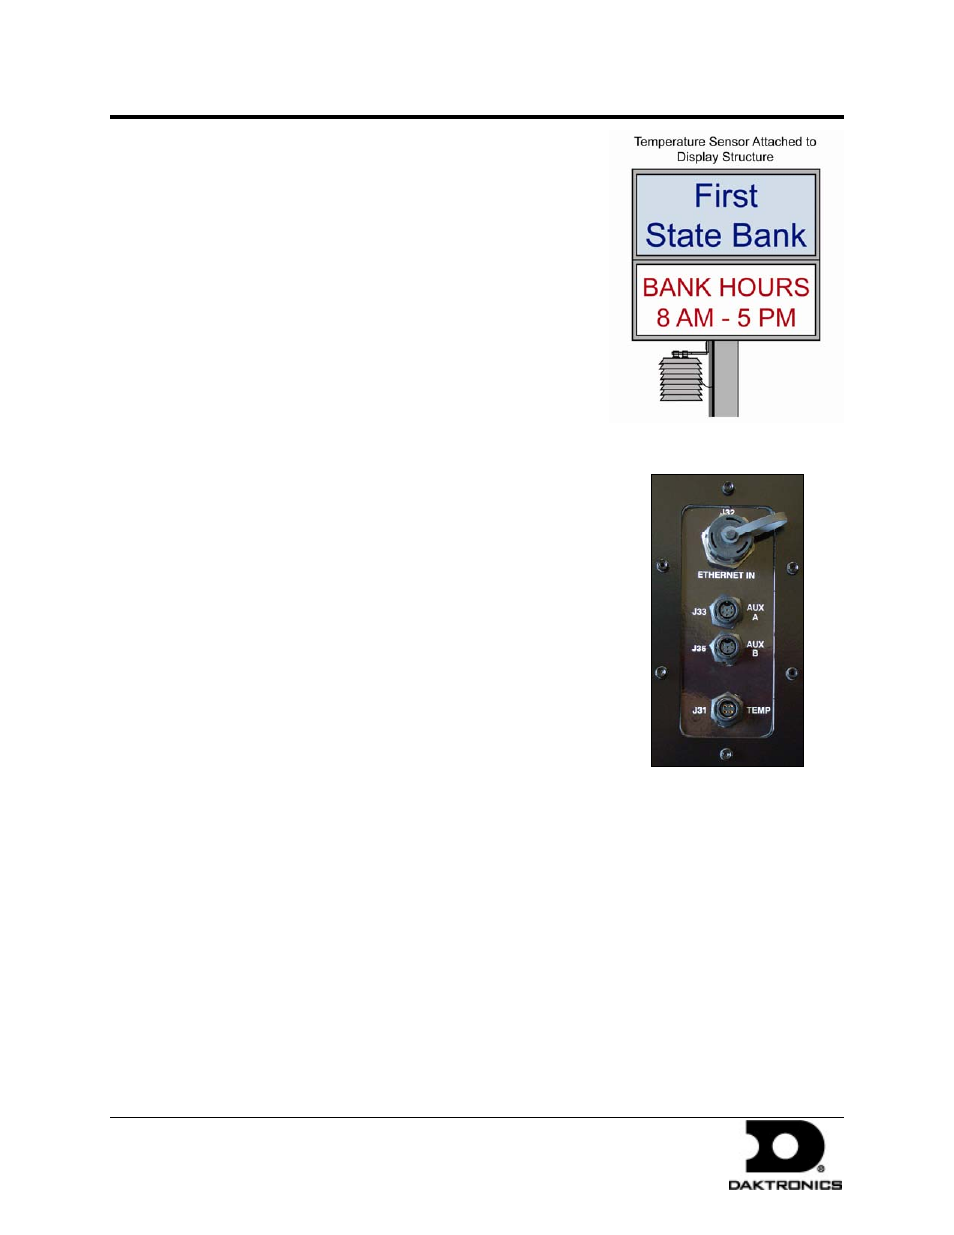
The most common location for the temperature sensor is on
the display structure, as shown in Figure 3. To keep the
sensor shaded, locate it below or on a northern edge of the
display.
DD1514799 Rev 0
29 January 2009
201 Daktronics Drive PO Box 5128, Brookings, SD 57006-5128
tel: 866-343-3122 fax: 605-697-4700
www.daktronics.com
Note: Always mount the sensor in a location so it can easily
be connected to the primary display.
1.3 Using the provided 25-foot quick-
connect cable (most common)
1. The temperature sensor is connected to the display
through a quick-connect input plug on the back of
the first face. The temperature sensor is provided
with 25 feet of weather resistant cable. The cable does
not need to be in conduit. The sensor connects to the display at J31. Figure 4 shows the
location of the quick-connect plug.
Figure 3: Located on Structure
Figure 4: GalaxyPro
Revolution Quick-
Connect Panel
2. Coil any excess cable and secure it to discourage
vandalism.
1.4 Using more than 25-feet of cable and no
quick-connect plug (rare use)
1. Run ½” conduit from the temperature sensor location to a
knockout on the back of the primary display. The cable
must be routed through ½” metal conduit that is earth-
grounded to protect the sensor and controller from
lightning damage.
2. Use a 2-pair, 22 AWG, individually shielded cable to
connect the sensor to the 4-position terminal block in the
display labeled TB1. Connect to the controller as shown in
Figure 5.
3. Open the temperature sensor housing by removing the four nuts from the bottom
and removing the five bottom disks. Refer to Drawing A-198371 for details on sensor
housing disassembly.
4. Disconnect the quick-connect CAN temperature sensor cable from the temperature
sensor terminal block in the CAN temperature sensor housing.