CRU RTX Secure 610-IR User Manual
Page 12
RTX220 QR - Manual
Page 12
Read/Write
Allows selection of cache type. Normally the default option is
preferred.
Priority
Determines the priority that the RTX Secure will give to RAID
activities (rebuild and initialization) versus priority given to
file transfers. “High priority” will result in slower file transfers
during initialization, but provide for faster initialization.
BG Rate
Background Task Priority. The higher the number, the more
priority will be given to background input/output.
Readahead
Choose whether file prefetching should be enabled.
Erase
Wipes out the original data in the Virtual Disk to prevent the OS
from recognizing it. The options are “None”, “First 1GB”, and
“Full Disk.”
c. The Virtual Disk will now display on the main Virtual Disk
screen. If you have enabled an Erase option, do not shut down
or reboot the RTX Secure while the Virtual Disk is initializing or
the erase process will stop.
To finish manually creating a RAID set, at least one Logical Unit
must be attached. Go to the next section, “Manually Attaching
a Logical Unit”.
8.3.3 Attaching a Logical Unit
You will need to attach at least one Logical Unit to a Virtual Disk
to access its RAID Group, although multiple Logical Units can be
attached to the same Virtual Disk.
a. Click the “Attach” button to attach a Logical Unit to a Virtual
Disk.
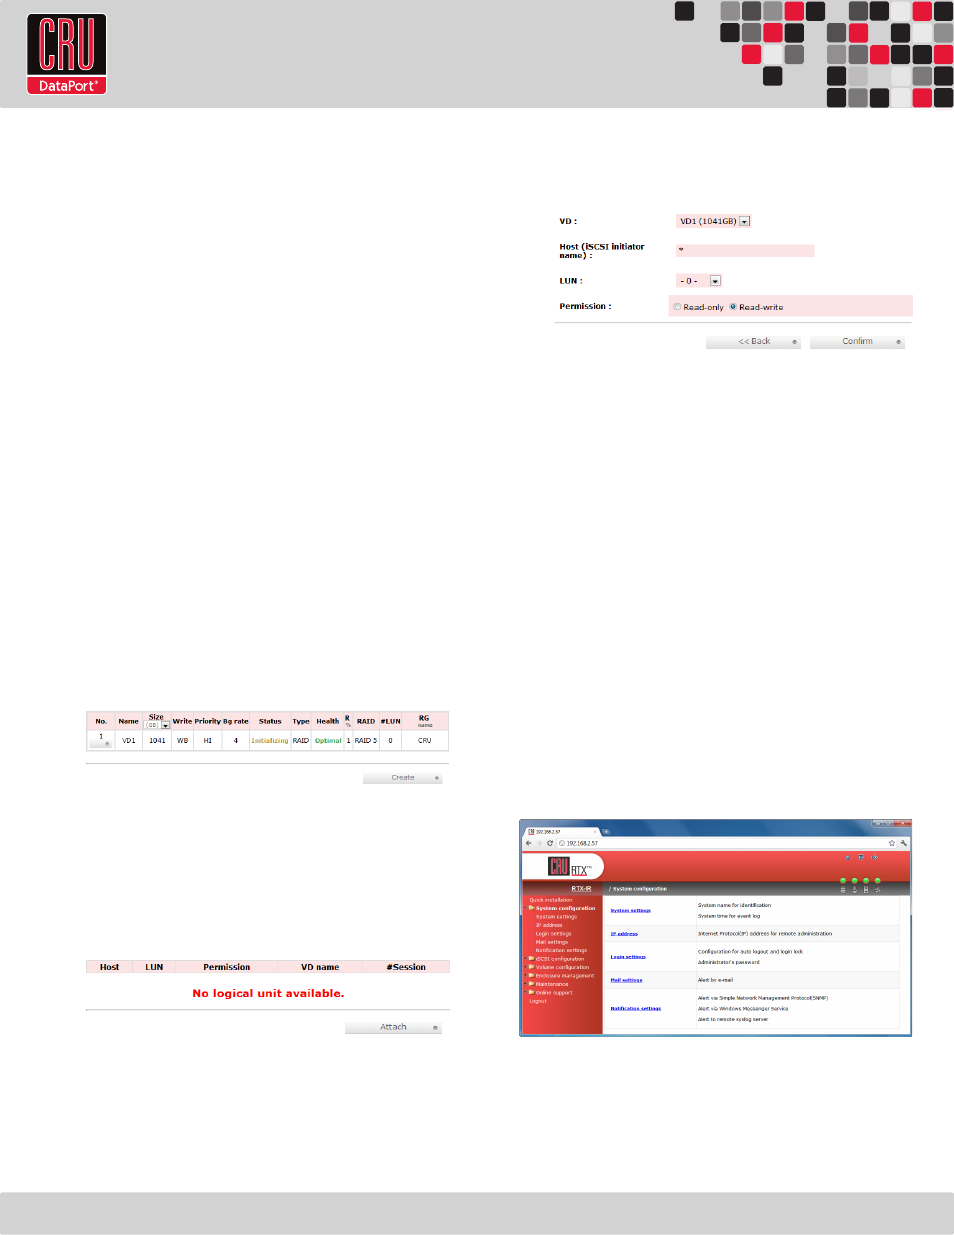
b. You will see the screen below. Fill in the information. Select the
Virtual Disk to which you wish to attach a Logical Unit. The Host
name can remain as an asterisk if you want any host to access
the Virtual Disk. Otherwise, change the field to limit access to
specific hosts. Then select the LUN that will be used. The
default setting on this is acceptable. Finally, select the
permissions that hosts accessing this Logical Unit will have.
Then click “Confirm”.
c. The main Logical Unit Screen will now display the Logical Unit
you have just created. If you’ve been following the instructions
for manually creating a RAID set, you have now completed
setup. Once the RAID set has finished initializing, you will be
able to access it through iSCSI initiator software (see Section 9
for installation and connection instructions).
8.4 Quick Installation
CRU-DataPort does not recommend using the Quick Installation
option to set up your RTX Secure. For quickly setting up a RAID, refer
to Section 8.7.1.
Quick Install uses all physical disks in the RTX Secure and the
maximum amount of space they contain to create a RAID Group using
one Virtual Disk. There will be no space set aside for spares. If some
disks are used in other RAID Groups, Quick Install cannot be run.
8.5 System Configuration
The System Configuration menu gives access to a number of options
used to configure the RTX Secure system properties. Click on “System
Configuration” to access the following menu options: System
Settings, IP Address, Login Settings, Mail Settings, and Notification
Settings.
8.5.1 System Settings
System Settings allows you to view and change the system name,
change the date and time, and turn the System Indication LED on
or off.