CRU RTX Secure 610-IR User Manual
Page 11
RTX220 QR - Manual
Page 11
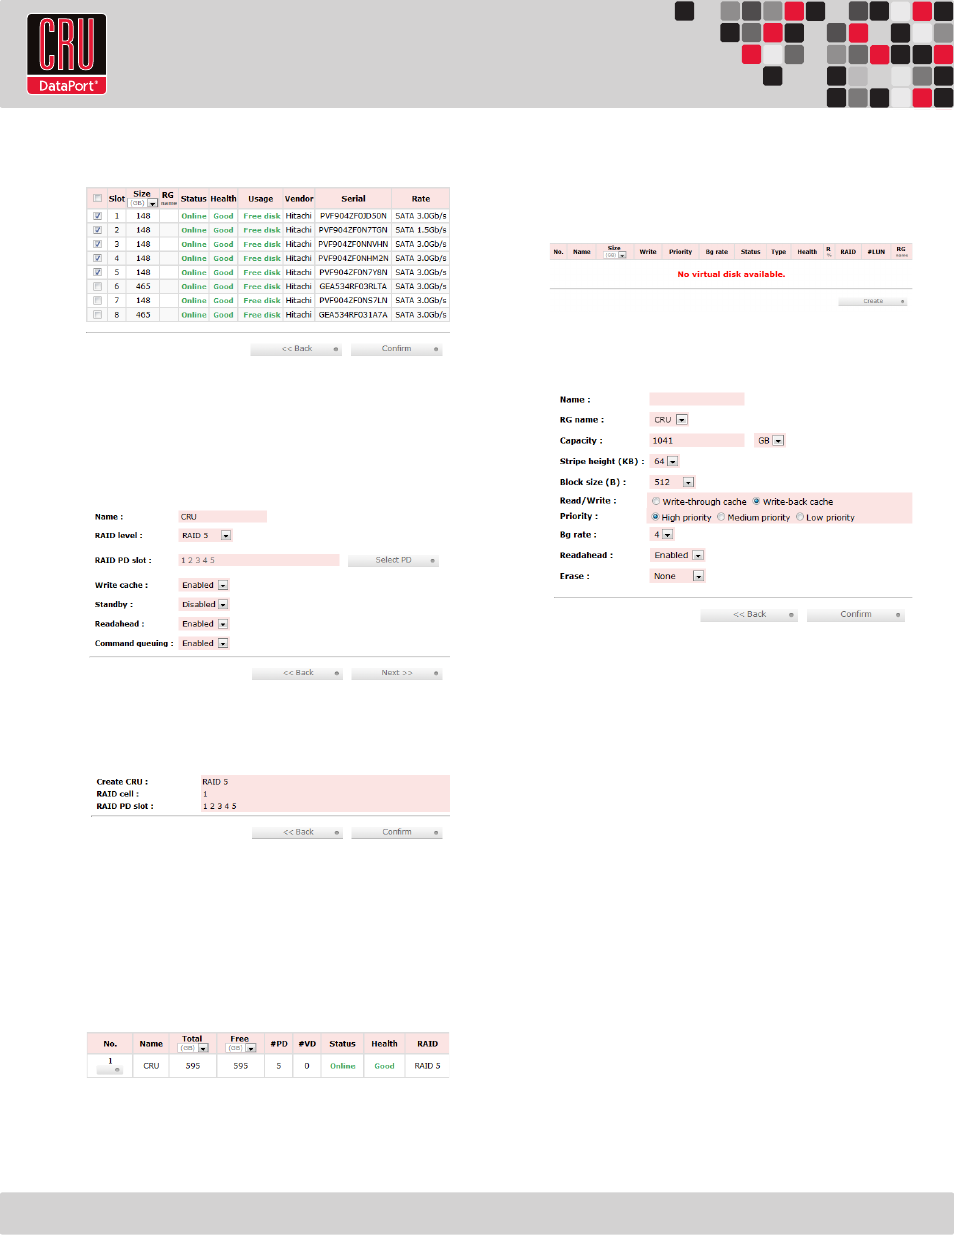
c. All available Free Disks will be displayed. Check the drives that
you wish to add to the RAID Group, then click “Confirm”.
d. The selected Physical Disks will now be displayed in the
RAID Group creation screen. Enable or Disable Write Cache,
Standby, Readahead, and Command Queuing based on
your needs. Most RAID Groups will be fine with the default
settings. Then click “Next” to proceed to the confirmation
screen.
e. On the confirmation screen, verify that the RAID level is correct
and all of the disks you selected are displayed under “RAID PD
slot”, then click “Confirm” to create the RAID Group.
f. The RAID Group will now display on the main RAID Group
screen. To finish manually creating a RAID set, a Virtual Disk
still must be created and a Logical Unit must be attached. Go to
the next section, “Creating a Virtual Disk”.
If you opted to create JBOD drives, skip to Section 8.3.3,
“Manually Attaching a Logical Unit” as Virtual Disks have
already been created for each JBOD drive.
8.3.2 Creating A Virtual Disk
After a RAID Group has been created, you can create associated
Virtual Disks. You must create at least one Virtual Disk to access
the drives of the RTX Secure with a computer.
a. Click the “Create” button at the bottom of the page to open the
Virtual Disk creation screen.
b. You will see the screen below. Fill in the information and then
click “Confirm”. Each field is explained below the picture.
Name
Enter a name for the Virtual Disk.
RG Name
Choose the RAID Group to which the Virtual Disk will be added
Capacity
Enter the capacity of the Virtual Disk. The default uses the
maximum capacity of the associated RAID Group. If you wish
to create multiple Virtual Disks on the selected RAID Group,
you will need to reduce the capacity below the maximum so
that there is space left on the RAID Group for additional Virtual
Disks.
Stripe Height (KB)
Determines how the RTX Secure organizes the RAID. Normally
the default option is preferred.
Block Size
Determines the minimum file size for files that will be stored
on the Virtual Disk. Higher block sizes can result in more
wasted space if many small files are saved to the drive, but
are necessary to take advantage of high capacity RAIDs. If
you are creating a Virtual Disk over 2TB in size for use
with MacOS 10.4.x or older, or for use with Windows
XP, you must increase the block size to 4096KB to take
advantage of the full capacity of the Virtual Disk. For
more information, see Section 14.