Vortech 2003-2004 Chevrolet SS User Manual
Page 47
29
P/N: 4GL020-015
©2008 Vortech Engineering, LLC
All Rights Reserved, Intl. Copr. Secured
08OCT08 GM Trk/H2(4GL..015v5.0)
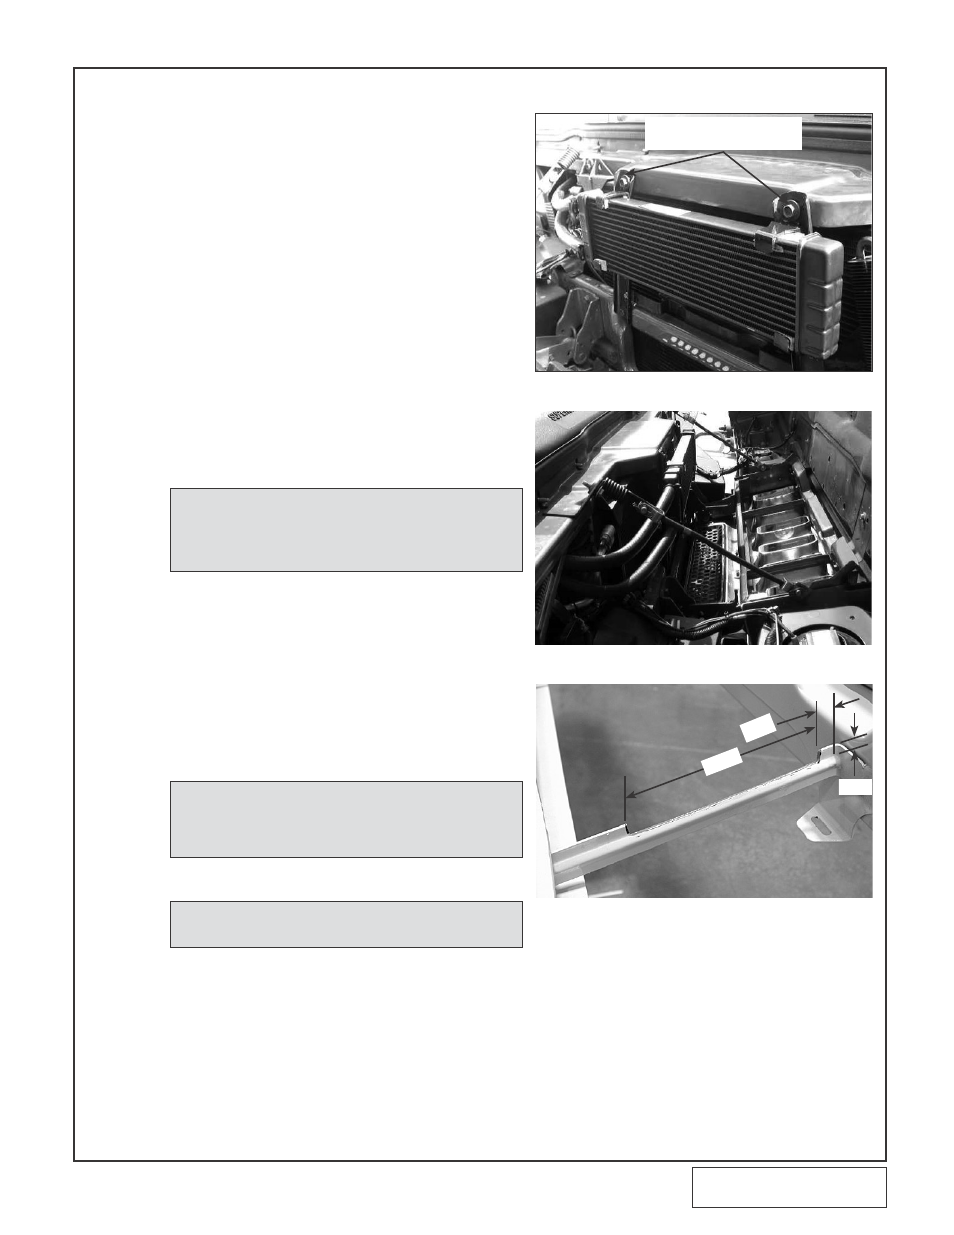
17.B H2 HUMMER HEAT EXCHANGER INSTALLATION
A. Remove the two screws securing the ends of
the grill. Unsnap the middle clips and remove
the grill from the vehicle. Remove the black
insert (diffuser) in the grill. There are eight
clips which hold it in.
B. Take four supplied cooler brackets and line
them with the supplied adhesive backed
foam. Trim any extra foam.
C. Unscrew the two factory screws securing the
cross supports to the upper core support.
(See Fig. 17.B-f.) Place the cooler in the
brackets with the barbs facing to the passen-
ger’s side. Grind the bottom of the stock
washers flat to fit onto the cooler brackets.
D. Place the brackets on the bottom of the cool-
er and mark on the cross supports where you
will need to drill. Make sure to close the hood
with the brackets temporarily installed to veri-
fy clearance between the brackets and the
hood supports.
Fig. 17.B-f
Fig. 17.B-g
Fig. 17.B-h
NOTE: The clearance will be tight between the heat exchang-
er and the hood once it is installed.
NOTE: Some 2005 and later vehicles may require hood sup-
port modification as shown in Fig. 17.B-h. Coat any
trimmed metal edges with paint or primer to resist cor-
rosion.
E. Drill two 9/32" holes at the marked locations
on the cross support.
F. Open the hood and mount the cooler to the
cross support with the supplied 1/4" hardware
and brackets. Make sure that the cooler is
sandwiched snuggly between the upper and
lower brackets.
G. CAREFULLY and slowly close the hood.
Make sure the heat exchanger has clearance
with the hood.
H. Reinstall the hood to its factory location.
NOTE: Temporaritly place a piece of sheet metal between the
core support and the A/C condenser when drilling to
ensure that the condenser is not punctured. (See Figs.
17.B-f, and 17.B-g for the following steps.)
REMOVE TWO SCREWS AND
INSTALL COOLER BRACKETS
6-1/8"
1/2"
3/8"