Disassembly – Eurocom Armadillo 2 User Manual
Page 33
Disassembly
Removing the Hard Disk Drive 2 - 9
2.Disassembly
4.
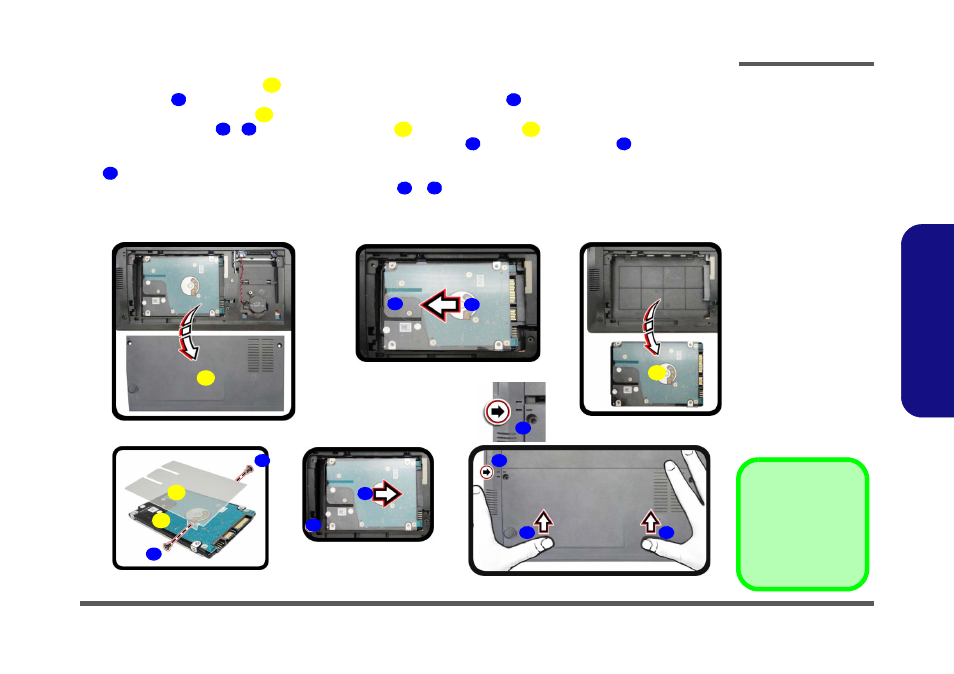
Remove the HDD bay cover
(
Figure 5c
).
5.
Grip the tab
and slide the hard disk assembly in the direction of arrow
(
Figure 5d
).
6.
Lift the hard disk assembly
out of the bay
(
Figure 5e
)
.
7.
Remove the screws
-
and the hard disk cover
from the hard disk
(
Figure 5f
)
.
8.
Replace the HDD assembly by using a finger to push it in at point
in the direction of arrow
.
9.
Reinsert the HDD bay cover by placing it on the bottom case assembly, and make sure the case markers line up
.
10. Apply downward pressure with both thumbs at points
&
and slide the cover in the direction of the arrows as
illustrated.
11. Replace the screws and battery
(see
)
.
3
5
6
7
8
9
10
11
12
13
14
15
16
c.
g.
3
5
8
14
d.
6
10
9
15
12
14
16
e.
f.
h.
7
11
13
3. HDD Bay Cover
7. HDD Assembly
10. HDD Cover
11. HDD
•
2 Screws
Figure 5
HDD Assembly
Removal (cont’d.)
c. Remove the HDD bay
cover.
d. Grip the tab and slide the
HDD assembly in the di-
rection of the arrow.
e. Lift the HDD assembly
out of the bay.
f. Remove the screws and
cover from HDD.
g. Reinstall HDD assem-
bly.
h. Replace the HDD bay
cover.