Lamp replacement – Ask Proxima Ultralight LS1 User Manual
Page 46
Attention! The text in this document has been recognized automatically. To view the original document, you can use the "Original mode".
с
LAMP REPLACEMENT
li the lamp fails to come on and LAMP REPLACEMENT INDICATOR on the profector is yellow, you r
replace the lamp.
A
• For continued safety, ropiace with a lamp assembly of the same type.
•
Allow the projector to cool for at least 45 minutes before you open the lamp cover. T
inside of the projector can become very hot.
•
Oo not drop the lamp module or touch the glass bulb ! The glass can shatter and cai
Injury.
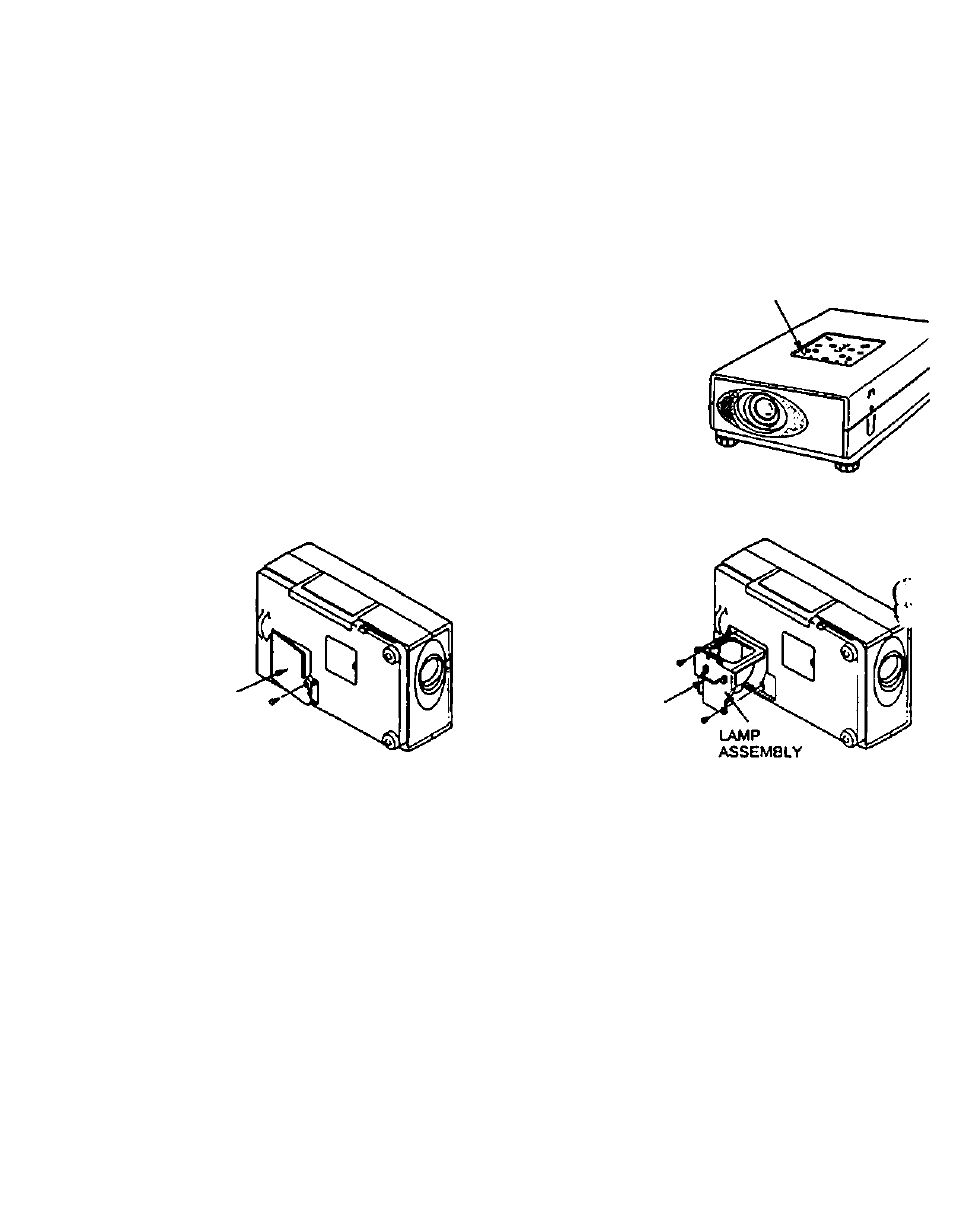
Foflow these steps to replace the lamp assembly.
1. Turn off the protector and allow the projector to cool thoroughly.
2. Disconnect the AC cord from the AC outlet.
3. Remove a screw with a screwdriver and remove the lamp cover.
4. Remove 2 screws with a screwdriver arid puN out the lamp assembly by
grasping the handle.
5. Replace the lamp assembly.
6. Tighten 3 screws to secure the lamp assembly and the lamp cover.
7. Connect the detachable AC cord to the projector.
8. Reset LAMP REPLACEMENT MONITOR TIMER. (See 'LAMP AGE*
section on page 44.)
LAMP
REPLACEMENT
INDICATOR
LAMP
COVER
HANDLE
NUib: Do not reset the LAMP REPLACEMENT MONITOR TIMER, when the lamp is r>ot replaced.
•*v
-'fk
• /