Buttonholes and butons, Garment preparation, Buttonhole position – SINGER 3150 User Manual
Page 69: Buttonholes and buttons
Attention! The text in this document has been recognized automatically. To view the original document, you can use the "Original mode".
6. Buttonholes and
Butons
Buttonholes can be made easily with the
built-in for step method. Before sewing on your
garment,
always
make
a
test
buttonhole
duplicating the number of thicknesses of fabric
and interfacing if appropriate.
Garment Preparation
Buttonhole position
Accurate
guidelines
are
essential
to
keep
buttonholes at a uniform distance from the
edge of the garment, evenly spaced, and on the
grain of the fabric.
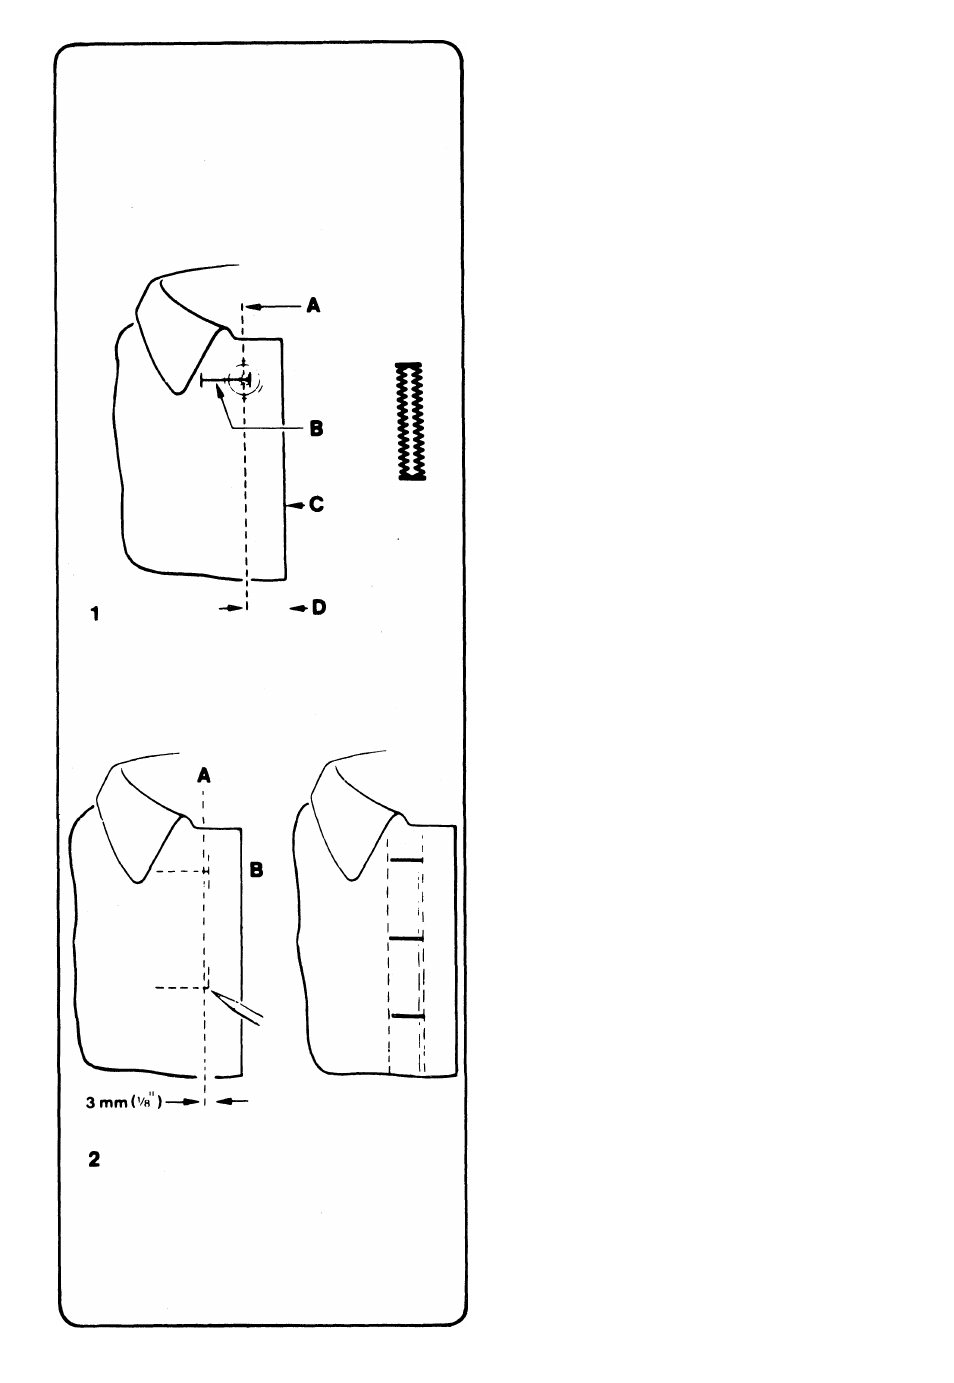
1.
Mark the centre line on the garment. This
guideline can be made by machine or hand
basting or using tailor's chalk.
Be sure that the space from the centre line
to the finished edge of the garment is at
least equal to three-quarters the diameter of
the button. With this spacing, the button
will not extend beyond the edge when the
garment is buttoned.
Make sure that the centre line marking
follows a lengthwise fabric thread.
A.
Centre line
B.
Buttonhole
C Finished Edge of Garment
D.
Diameter of Button
2. Mark a position guideline for each
buttonhole.
Horizontal buttonholes B are placed to extend
3mm (1
/8
inch) beyond the centre line A of the
garment, as shown, so that the buttons will be
in the centre of the figure when the garment is
fastened.
Horizontal buttonhole guidelines should follow
a crosswise fabric thread.
•
Mark the horizontal buttonhole guideline
for each buttonhole. It should be longer
than the finished length of the buttonhole.
•
Mark the starting point for each buttonhole
3mm (
1/8
inch) beyond the centre line (see
illustration).
s----------------------------------------- ------ 67