Multi-stitch zig-zag, Bar tacks, Multi stitch zig-zag – SINGER 9614 User Manual
Page 59
Attention! The text in this document has been recognized automatically. To view the original document, you can use the "Original mode".
i'
^
0> ^
^ Si
<'o
^
^
'ii ^
*<5
<1^’
V
'<3?
^u
-
if <■:,
3'^
'if ‘C.
% ^
^
■ ^
^ a
% a
fii ¿f
St i>
<;5/
V>“
MULTI-STITCH ZIG-ZAG
The multi-stitch zig-zag is an extremely versatile stitch. Use it to mend, join or reinforce
without bulk. With this stitch you may attach elastic and stretch lace, construct lingerie
and swimsuits and finish seams. There are many other useful applications for the multi
stitch zig-zag.
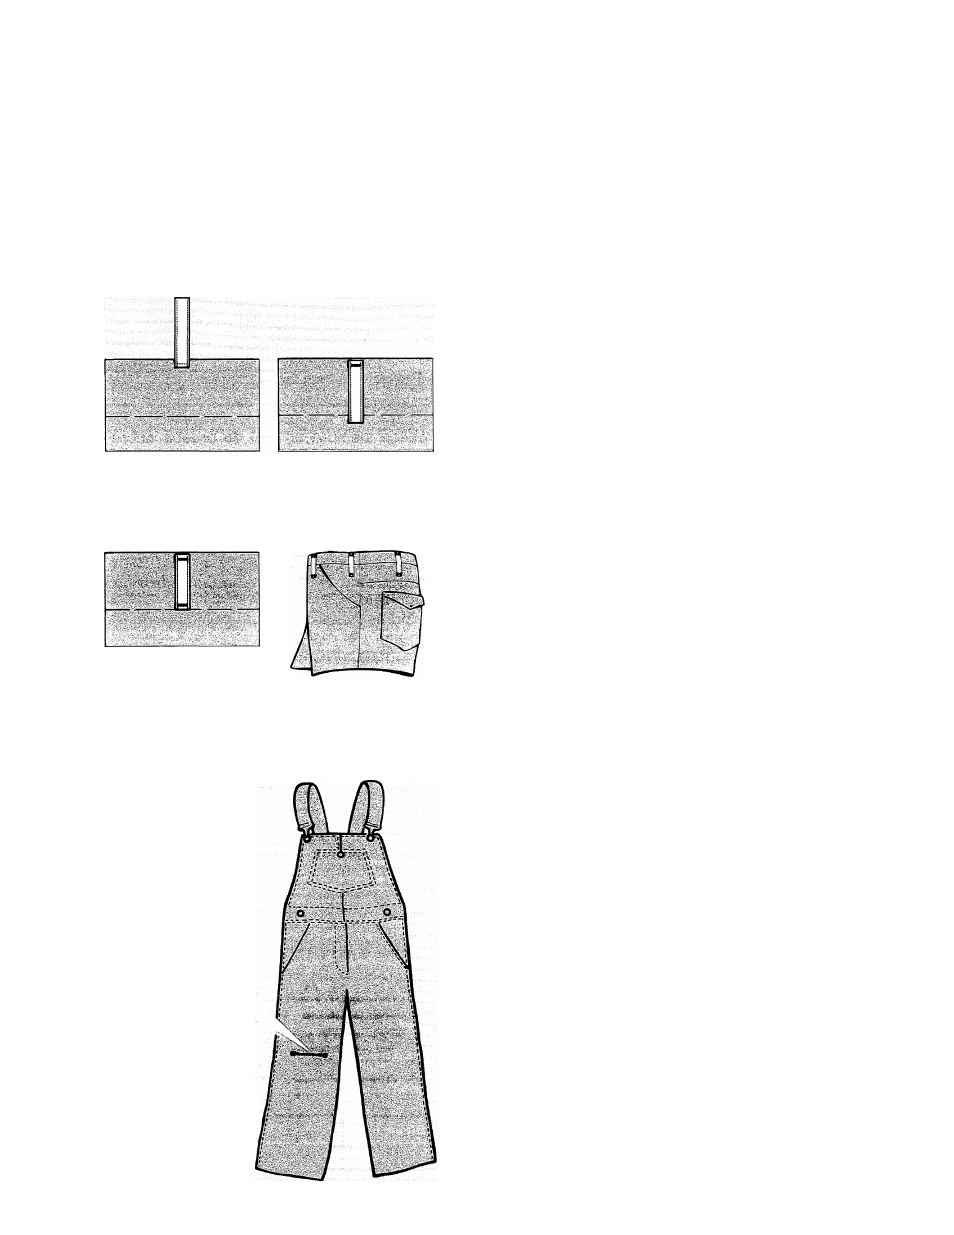
Bar Tacks
• Pattern Group Selector: 8-9
• Needle Position;
I----1
• stitch Width: 1.5 to 6
• Stitch Length: 0.5 -1
• General Purpose Needle Plate
• General Purpose Foot
Make a test sample, using scraps of your ma
terial, and duplicating all garment thickness.
1. Mark position for the finished end of belt loop
on the fabric.
• Place belt loop, wrong side up, straight
stitch with cut end 3 mm (1/8 inch) from
edge of garment; do not stitch beyond
edges of the belt loop. Trim the end close
to the stitching and press.
2. Fold belt loop back on the stitching line and
press.
• Set your machine according to the code
above.
• Stitch 3 mm (1/8 inch) from the fold using
the multi-stitch zig zag stitch.
•
3. Fold over second part and bar tack.
Mending a Tear
• Trim ragged edges.
• Place underlay on the wrong side of tear for
reinforcement. (Do not baste or pin the under
lay, since you will be bringing the edges
together in the next step).
• Stitch on the right side, bringing the edges of
the tear together. Shorten stitch length at
ends and corners to give extra strength.
Trim underlay.
57