Zipper insertion, Adjusting the zipper foot, Applications with zig-zag stitching – SINGER 9614 User Manual
Page 39: Appliqué, Zipper insertion appliqué
Attention! The text in this document has been recognized automatically. To view the original document, you can use the "Original mode".
ZIPPER INSERTION
• Needle Position:
• Stitch Width: 0
• Stitch Length: To suit fabric
• General Purpose Needle Plate
• Zipper Foot
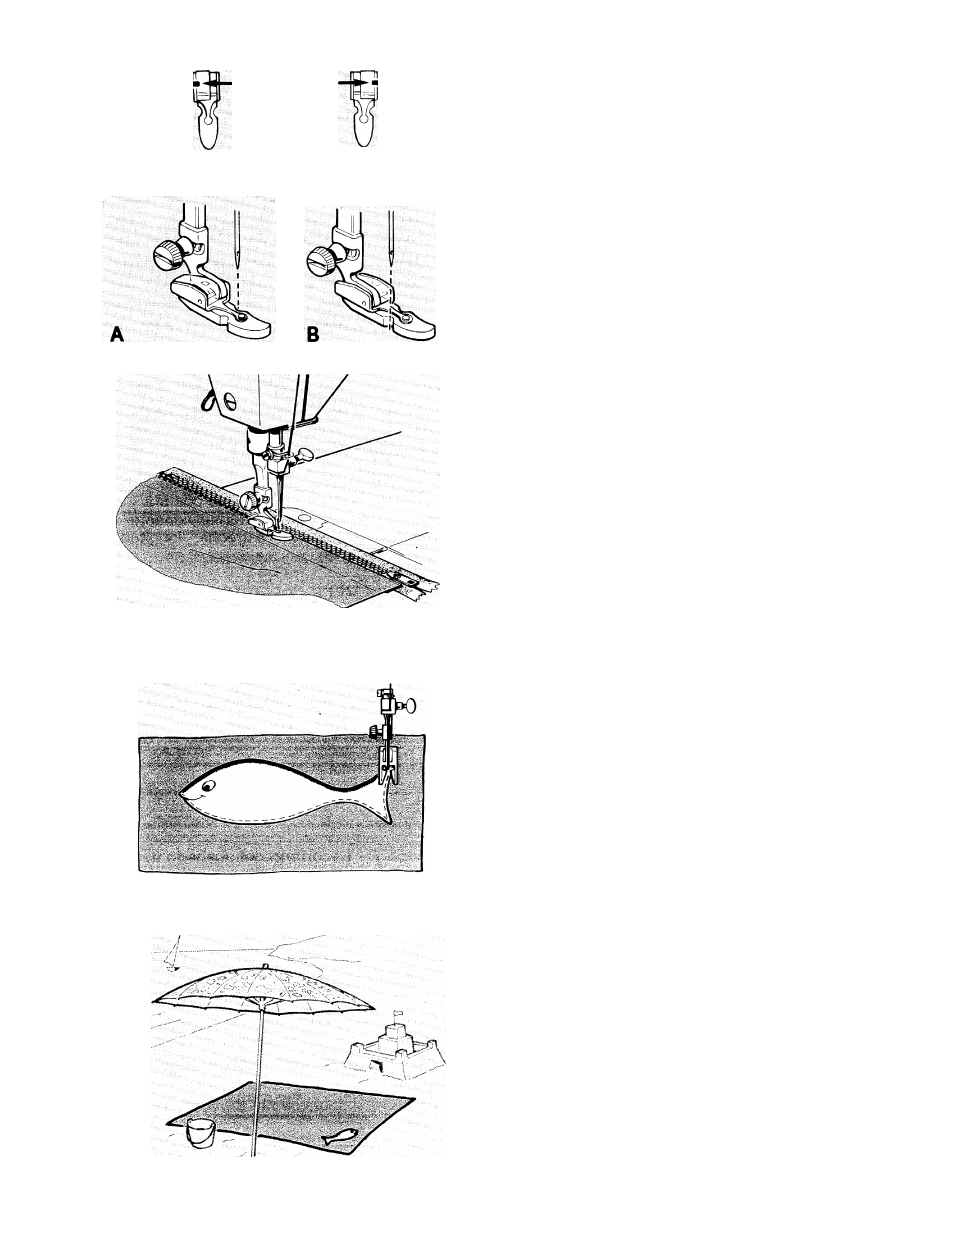
Adjusting the Zipper Foot
When the zipper is to the right of the needle.
• Before attaching the zipper foot slide the
adjusting spacer to the left (illustration A).
• Snap on the zipper foot as instructed on
page 9.
• Check the position of the foot by lowering
the needle into the side notch of the foot,
making sure it clears the foot.
When zipper is to the left of the needle, adjust
the foot to the right of the needle in the same
way (illustration B).
Applications with zig-zag stitching
APPLIQUÉ
• Pattern Group Selector: 1-2-3-4-5
• Needle Position:
• Stitch Width: To suit fabric
• Stitch Length: Between 0 and 1
• General Purpose Needle Plate
• Special Purpose Foot
•
• Trim outside fabric edges close to straight
stitch outline of design.
• Set machine as code recommends.
• Overedge the design with appliqué stitching.
This step will produce a smooth, lustrous
finish that requires no additional trimming.
37