Adjusting stitch balance, Adjusting stitch density, Adjusting stitch width adjusting stitch length – SINGER 2210 Athena User Manual
Page 40
Attention! The text in this document has been recognized automatically. To view the original document, you can use the "Original mode".
Adjusting Stitch Balance
* Check buttonhole stitch balance before
full programming, using the same type of
fabric and number of plies of the garment
being sewn.
® With b1 showing in window, start sewing
the right hand side of the buttonhole.
When a length of about 1 inch (2.5 cm.)
is reached, press button (2) once to sew
left hand side.
* Upon returning to start position, stop
machine and press again button (3) and
complete the buttonhofe.
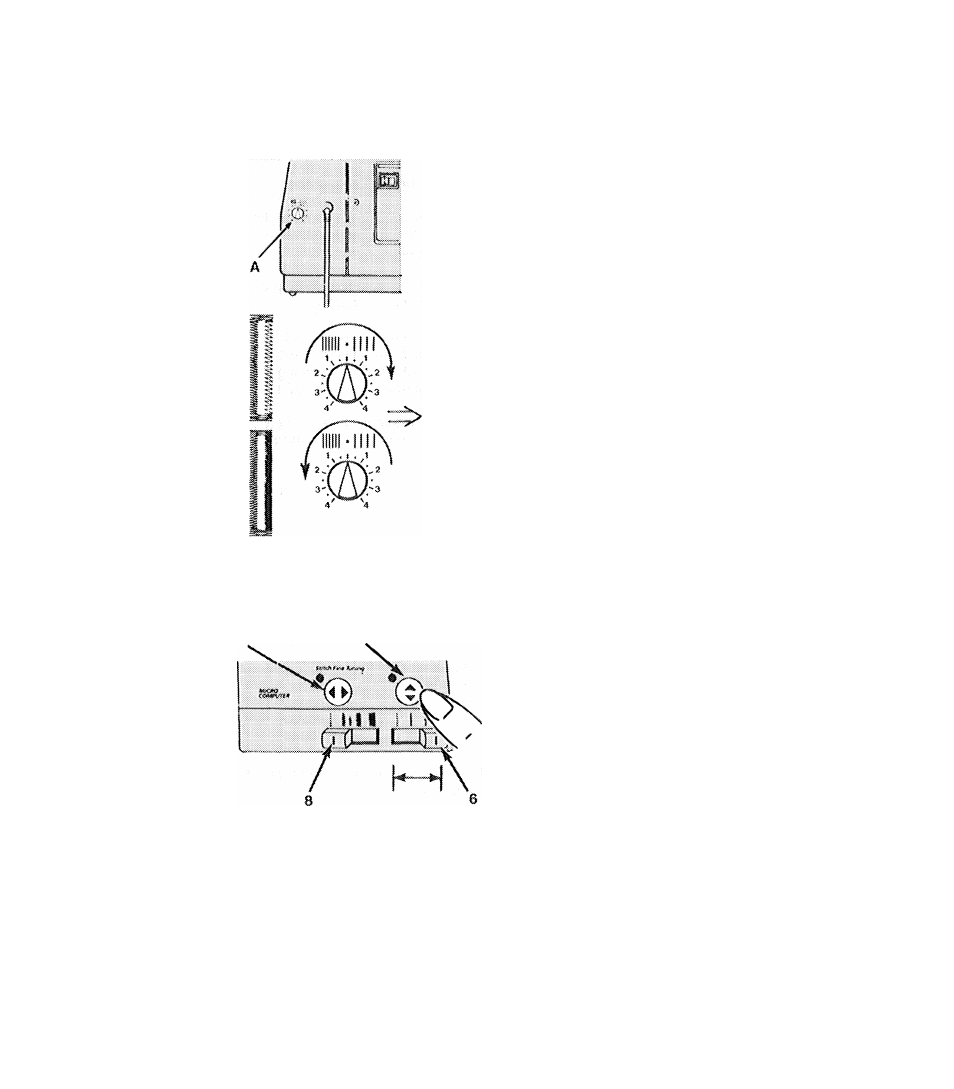
» If stitches in right side of buttonhole are
too far apart compared to left side, turn
balance control (A) in a clockwise direc-
tion.
« If stitches on right side are too close
together relative to the left side, turn
balance control (A) in a counteeclockwise
direction.
* Press b3 (CLR), repeat test and adjust un
til stitching on both sides is equal.
Adjusting Stitch Density
5
II
11
II
s|
I
I
If required, the stitch density can be adjusted
by activating the stitch tength override bub
ton (5). Adjust stitch length control (6) and
retest until desired appearance is achieved.
38