Figure 3 – Tuffy Security 139 User Manual
Page 3
Page 3 of 3 - 06/23/2008 – Rev02152006
OPTIONAL ADDITIONAL SECURITY STEP
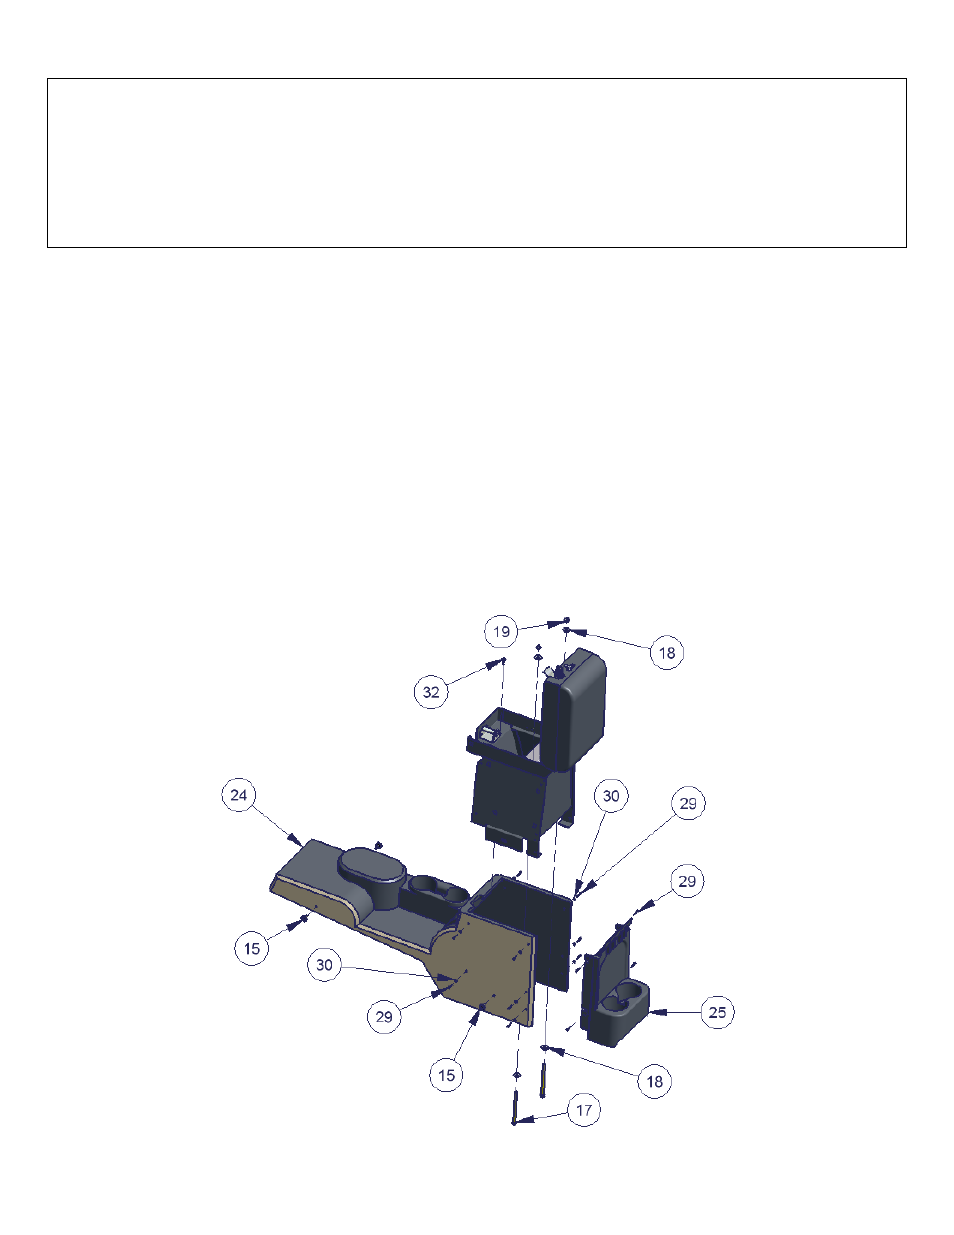
6. Place the Tuffy insert in the finished mounting position by lining up all the mounting holes and mark at least one spot on the
vehicle floor under the 3/8” holes in the bottom of the Tuffy insert for drilling. (Fig 3)
WARNING! Make sure that there is nothing under/on the vehicle that will be damaged by the drill bit when drilling.
7. Remove the Tuffy insert and drill a ¼” pilot hole in each marked spot then drill them out to 3/8” holes. Use touch up paint or
silicone sealant in any drilled holes to prevent rusting.
8. Attach the original rear panel (#25 – Fig 3) to the Tuffy insert using the (4) supplied 6-32 x ¾” Button socket cap screws. Make
sure the bottom holes which are not used yet on the original rear panel are aligned with the nuts on the Tuffy insert when
tightening this hardware. (#29 – Fig 3) If the switch harness is present on the original rear panel it will have to be maneuvered
out of the way toward the passenger side then plugged back in.
9. Attach the Tuffy insert to the original console (#24 – Fig 3) using the (10) supplied 6-32 x ¾” Button socket cap screws #29 and
(10) #6 Black Washers #30. It is easiest for alignment to insert all the screws a few turns starting with the rear bottom left and
right screws then coming back and tightening them all. (#29 & #30– Fig 3). In rare cases a hole in the original plastic console
will have to be obrounded with a 3/16” drill bit if it does not line up with the hole on the Tuffy insert.
10. Fasten the entire console assembly down using the (4) original OEM mounting torx screws (#15 Fig 1 & 3)
11. Fasten the #32 – ¼” self tapping screw through the illustrated hole to the OEM factory console front lip. Push on the lip to
position it correctly while installing the screw. (#32 – Fig 3)
12. If the optional additional security steps were done fasten down the Tuffy insert using the (2) 5/16-18 x 4 ½” Hex cap screws, (2)
Hex nylon insert nuts, & (4) 5/16” USS washers through the holes previously drilled. Do not over tighten. (#17, #18, #19 – Fig
3)
FIGURE 3