Figure 1 figure 2 – Tuffy Security 139 User Manual
Page 2
Page 2 of 3 - 06/23/2008 – Rev02152006
PLEASE READ ALL INSTRUCTIONS THOROUGHLY BEFORE STARTING INSTALLATION.
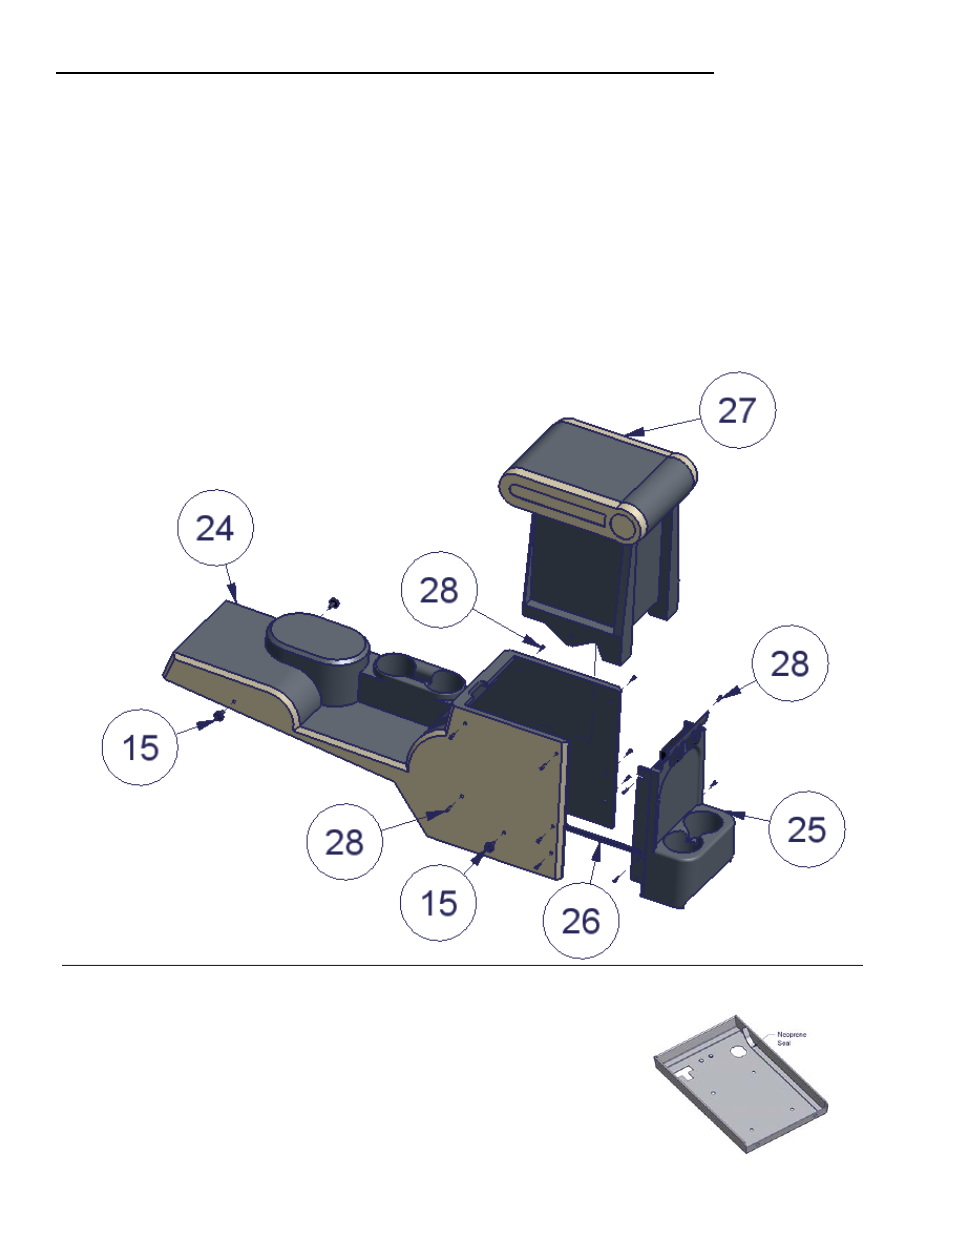
1. On the OEM console detach the original insert (#27 - Fig 1) by removing the (4) original torx mounting screws (#15 – Fig 1, these
will be reused) and (10) original torx side screws (#28 – Fig 1, these will not be reused). Some of these torx side screws may
instead be push fasteners which can be removed with pliers.
2. Remove the (4) original torx screws (#28 – Fig 1, these will not be reused) to detach the original rear panel (#25 – Fig 1) and
maneuver it out of the way. These are accessed behind the OEM console sides.
NOTE: Vehicles with electric windows will have switches mounted in this rear panel with a wiring harness (#26 – Figure 1). Leave
these switches in the rear panel, they will be reused. There are (3) support clamps which attach the wiring harness to the bottom of the
original insert (#27 – Fig 1) that will have to be popped out with a flat head screwdriver. (These may break when removed but they
will not be reused). It is not necessary but it will make the installation easier if the switch harness is unplugged. The release clip for
the plug is difficult to find, it is located on the bottom of the plug toward the front.
3. Maneuver the original insert (#27 – Fig 1) out of the original console (#24 – Fig 1) by popping it down and out of the tabs on the
inside top front of the original console.
4. Install the rubber seal around the edge of the lid. (Fig 2)
5. Check the lock and latch operation.
FIGURE 1
FIGURE 2