Figure 3, Figure 4 – Tuffy Security 296 User Manual
Page 3
Page 3 of 3 – 10/23/2012 – Rev 10/23/12
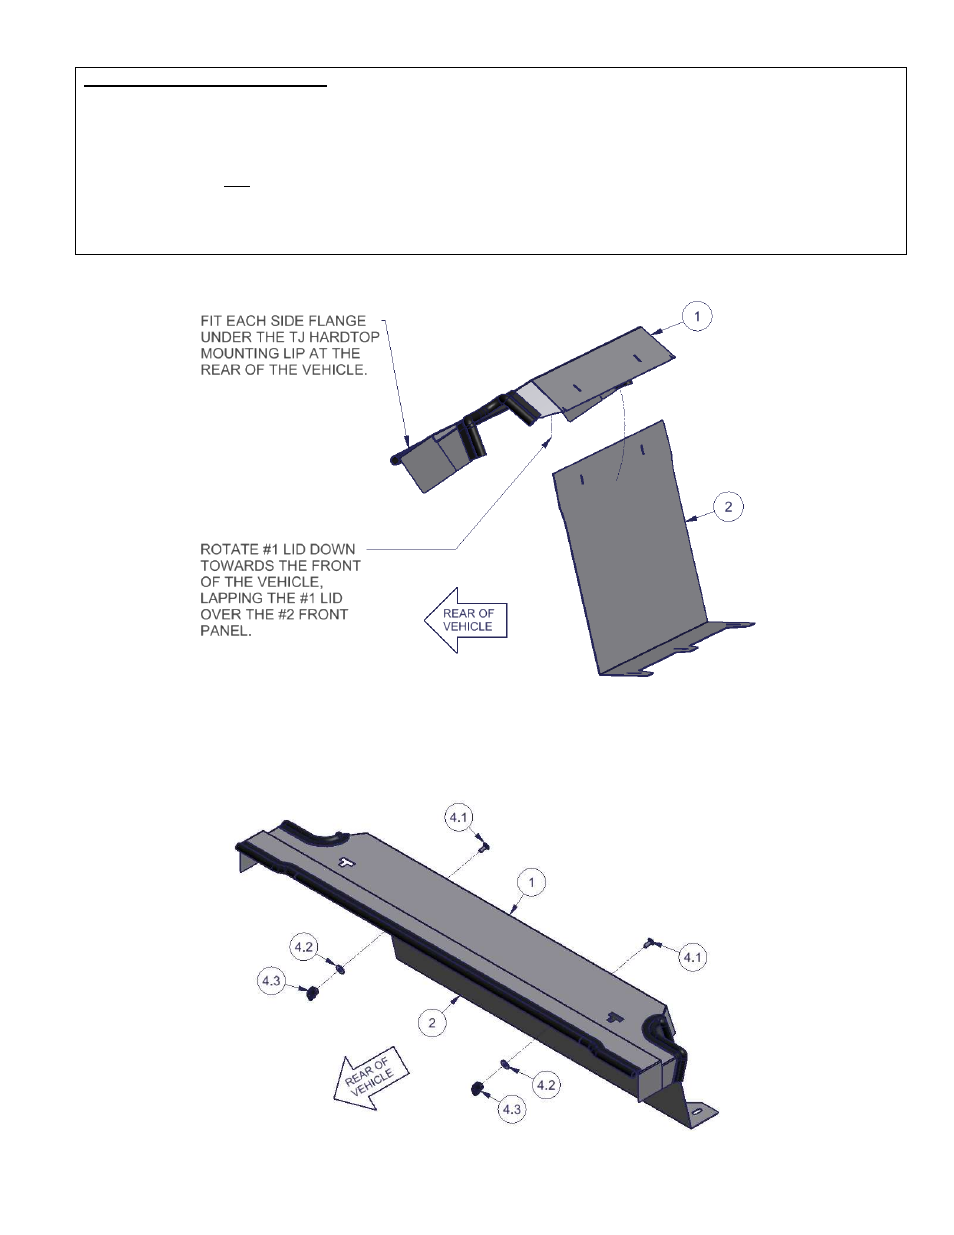
FITMENT AND SEALING NOTES:
***Note: Be sure to fully insert the #1 Lid rear tabs under the hardtop mounting lip before tilting the Lid downwards. If
the Lid is not properly positioned fully rearward under the body lip, the Lid will not meet up to the OEM roll bar/
seatbelt plastic cover.
***The #1 Lid is designed to fit quite tightly between the hardtop mounting lip and the OEM roll bar trim in order to
provide a good seal and as a main security feature to prevent the Lid from shifting forward and allowing unwanted
access to the secured space.
***Note: Be sure to keep the rubber edge trim in position when installing the #1 Lid in order to insure a proper seal
between the Lid and the roll bar/ seatbelt plastic cover.
FIGURE 3
7. Install the (2) #4.1 carriage bolts from the front of the installed enclosure. Install the (2) #4.2 washers and (2) #4.3
wing knob nuts from inside the enclosure. The two panels have slotted mounting holes to allow for the tailoring of the
enclosure fit and position – it may be necessary to raise or lower the #1 Lid a small amount. Hand tighten the #4.3
wing knob nuts. Tighten the #5.4.1 OEM bolts to factory specifications. (Figure 4)
FIGURE 4
Call (970)564-1762 for Technical Support