Figure 2, Figure 3 – Tuffy Security 295 User Manual
Page 2
Page 2 of 3 – 7/26/2012 – Rev 7/26/12
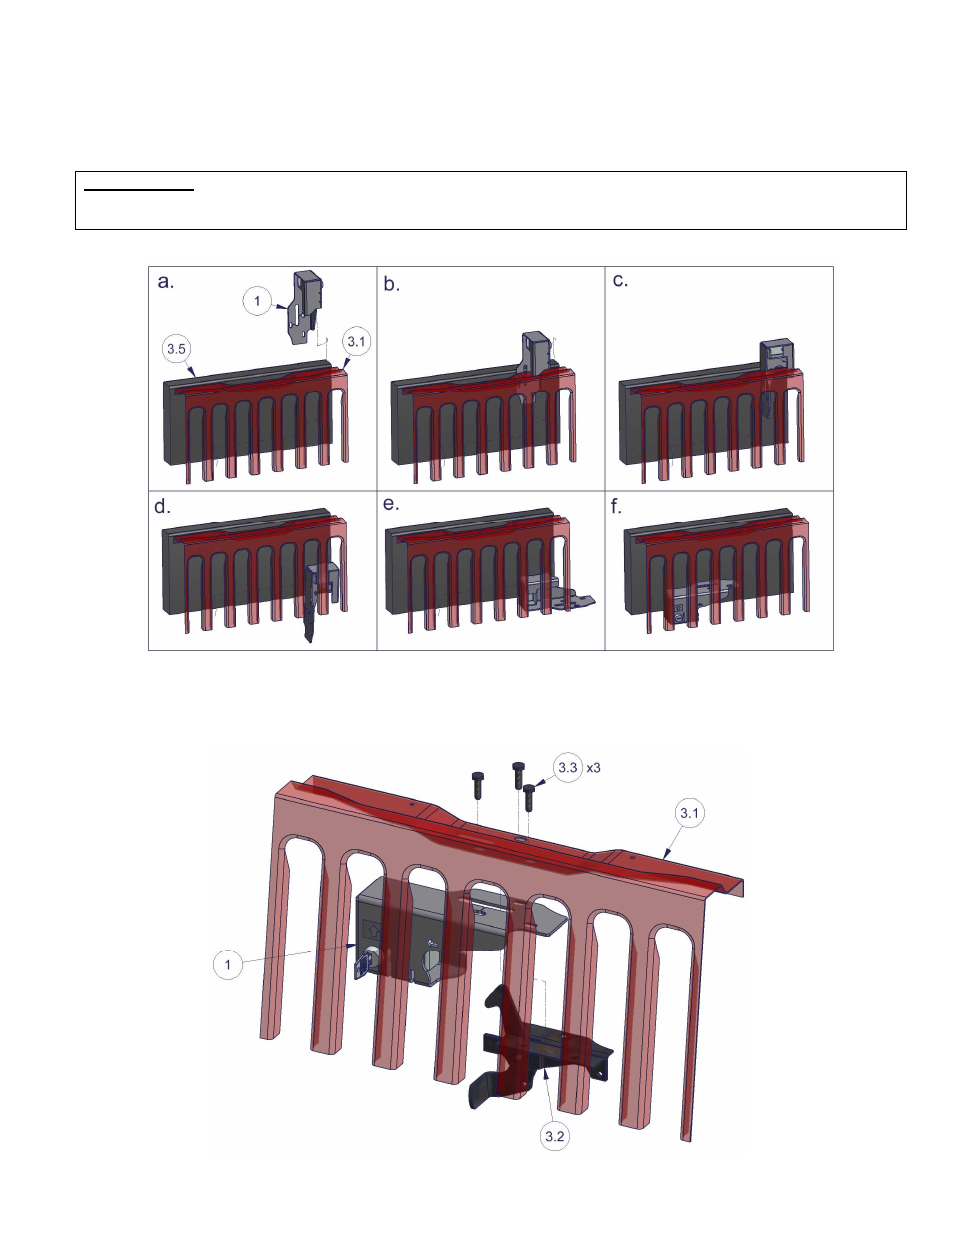
between the grille structure and the radiator. However, it may be necessary to remove the two upper radiator
mounting bolts and carefully push the top of the radiator rearward (away from the grille) while simultaneously dropping
the #1 Hood Lock down between the radiator and the grille. The #1 Hood Lock can be inserted between the #3.1
grille and the #3.5 radiator with the mounting flange first (Figure 2a-2b), then using a twisting motion, turn the #1 Hood
Lock body narrow dimension down between the radiator and grille (Figure 2c). Finally spin the Hood Lock around as
illustrated to get it into position to receive the OEM hood latch. (Figure 2d-2f)
INSTALL TIPS:
**Note: To help keep the #1 Hood Lock from getting scratched when installing, wrap the hood lock in the 2 pieces of
foam wrap that the item was packaged in when shipped.
FIGURE 2
4. Next, raise the #3.2 OEM hood latch up into the #1 Hood Lock. Install the #1 Hood Lock along with the #3.2 hood
latch up to the grille mounting surface and re-install the (3) #3.3 OEM hood latch bolts. Only hand-tighten bolts at this
time. (Figure 3)
FIGURE 3