Top Flite TOPA0215 User Manual
Page 33
- 33 -
❏
❏
5. Turn the wing over and locate the 1/16"
[1.6mm] holes in each of the blocks in the bottom
wing. With a T-pin, punch through the covering into
each of the holes in the blocks. Insert and glue the
cord into one of the blocks in the right wing. Feed the
cord through a nylon landing gear strap (not included)
or something similar. Then glue the opposite end of
the cord into another block on the same side of the
wing. Repeat this for the two remaining blocks in the
right wing.
❏
6. Repeat step 5 for the left wing.
❏
7. Drill a 1/16" [1.6mm] hole through the center of
the kingpost on the bottom of the fuselage. Pull the
cord towards the center of the fuselage. Join the left
and right wing wires by inserting a #2 sheet metal
screw into the two landing gear straps and then
screwing them into the kingpost.
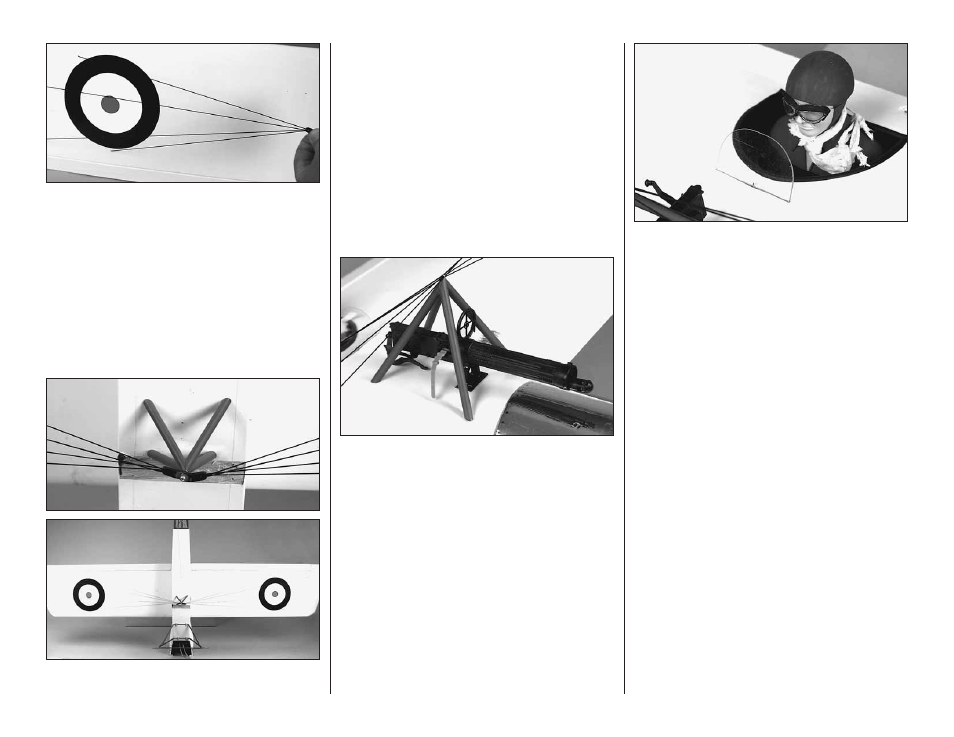
Machine Gun
❏
1. The machine gun is a nice touch! We used the
Williams Brothers 1/6 scale Vickers machine
gun (WBRQ3560).
Cockpit and Pilot
❏
1. Cockpit coaming gives a finished look to the
cockpit. This can be made from black neoprene fuel
tubing (DUBQ0455) or Fourmost Cockpit Coaming
(FORQ2014). If you choose neoprene fuel tubing,
simply cut a slit in the tubing. Slide the slit tubing onto
the edge of the cockpit and then glue it in place with CA.
❏
2. Cut the windshield as shown on the pattern on
the plan. Glue it in place with a white aliphatic glue
like Pacer canopy glue (PAAR3300).
❏
3. Glue the pilot in place. We trimmed the
shoulders from a Williams Brothers 1/6-scale
Standard pilot (WBRQ2476) and glued him directly
to the floor of the cockpit.
Final Hookups and checks
❏
1. Mount your wheels to the landing gear with a
1/8" [3mm] wheel collar on both sides of both wheels.
Secure the wheel collars with a drop of thread lock
on the set screws. Note: We recommend you file a
small flat spot on the landing gear wire where the set
screws are located.
❏
2. Take the servo arms off the servos and turn on
your transmitter and receiver. Then, center all the
trims. Reinstall all the servo arms and secure them
with the screws.
❏
3. Double-check all the servos and make sure the
servo arms are secure and all the clevises have a
silicone retainer.
❏
4. Be sure the tank is securely in place. A scrap
balsa stick glued across the width of the fuselage
works well.