Top Flite TOPA0215 User Manual
Page 19
- 19 -
❏
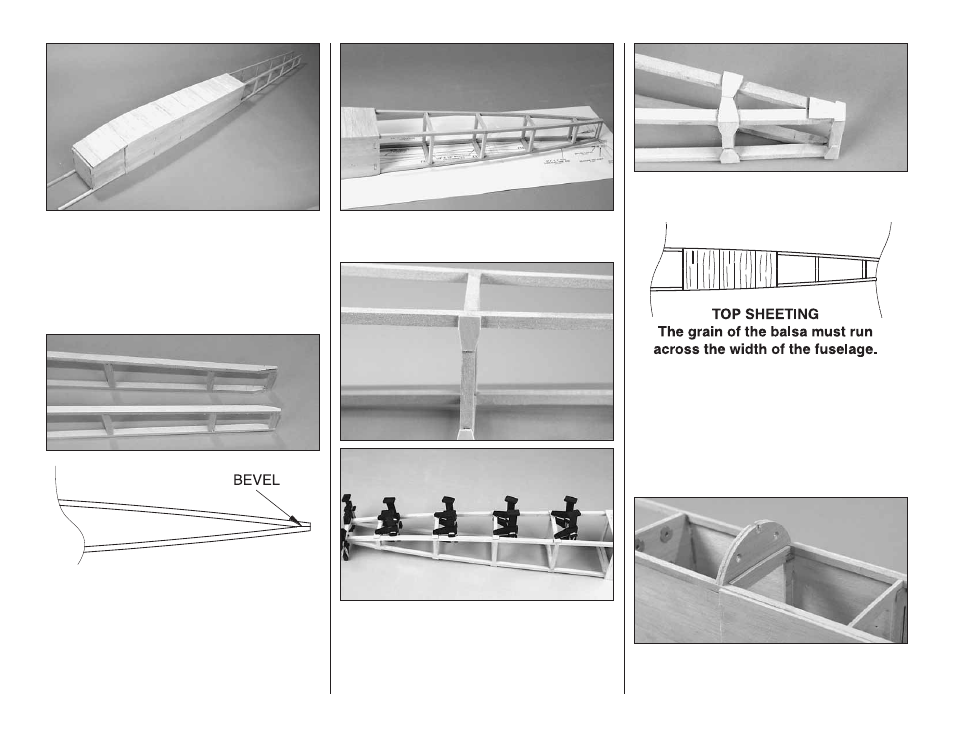
24. From the 1/8" x 3" x 24" [3 x 76 x 610mm]
balsa, sheet the bottom of the fuselage. The grain of
the balsa needs to run across the width of the
fuselage. Once you have the fuselage bottom
completed, take the time to sand the bottom of the
fuselage. It will be much easier to do while the
fuselage is placed flat on the bench.
❏
25. Cut the aft end of the longerons to the angle
shown on the plan. Once the angle has been cut,
glue the longerons together with 6-minute epoxy. Use
small clamps to hold the tail together while the glue
is curing. Be sure that you do not twist the longerons
when you clamp and glue them together. The
fuselage and longerons should remain completely
flat to the building board during the gluing process.
❏
26. Cut and glue the remaining cross braces in
place on the top and bottom of the fuselage.
❏
27. Locate the sheet of 32 laser-cut 1/16 [1.6mm]
plywood fuse gussets. Use 6-minute epoxy to glue
them in place over each of the cross brace joints.
Refer to the plans for exact positioning. You will find
it helpful to use small clamps to hold them in place
while the epoxy cures.
❏
28. Glue the 1/16" [1.6mm] tail gusset in place at
the rear, bottom of the fuselage with 6-minute epoxy.
❏
29. From 1/8" x 3" x 24" [3 x 76 x 610mm] balsa,
sheet the top of the fuselage from former F5 to the
rear of the fuselage. The grain of the balsa needs to
run across the width of the fuselage.
❏
30. Locate two die-cut 1/8" [3mm] plywood F2T
formers. Glue them together to form one 1/4"
[6mm] former.
❏
31. Trial fit the F2T former in place in front of
fuselage former F2. When you are satisfied with the
fit, glue it in place with 6-minute epoxy.