Top Flite TOPA0215 User Manual
Page 15
- 15 -
❏
❏
6. Sand the aileron to its final shape as shown
on the cross section of the wing. Sand a “V” in the
leading edge.
❏
7. Repeat steps 1-6 for building the aileron for the
left wing.
Finish the Wing
❏
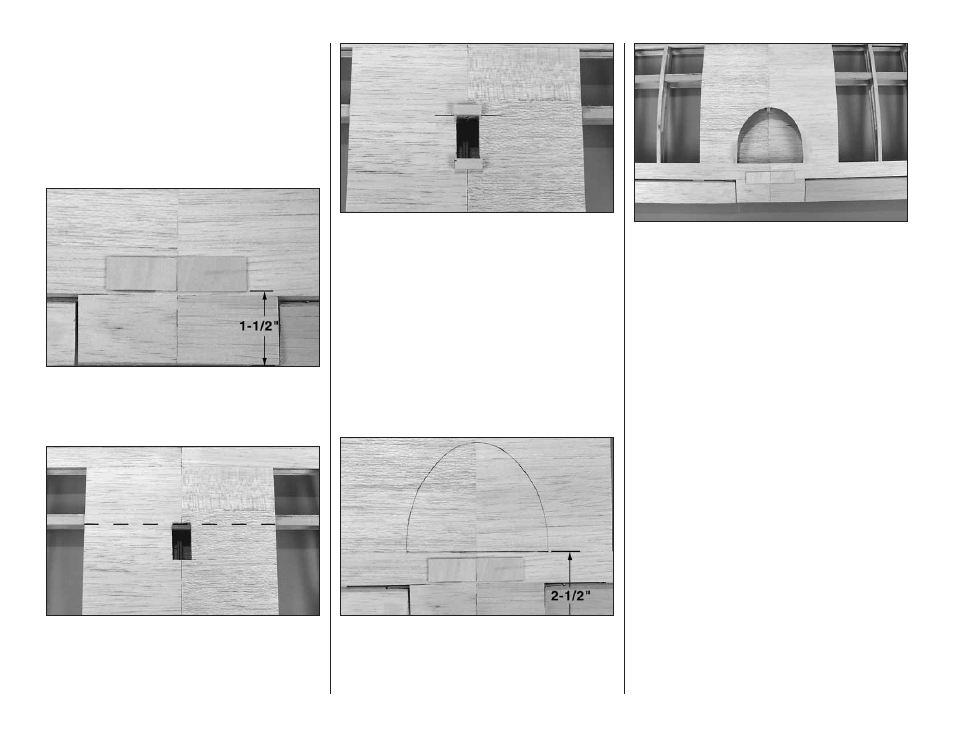
1. Locate two laser-cut 1/16 x 3/4" x 1-1/2" [1.6 x 19
x 38mm] plywood wing bolt plates. Glue them in place
on the top of the wing. The plates should be positioned
1-1/2" [38mm] from the trailing edge of the wing.
❏
2. On the bottom of the wing, cut an opening for
the aileron servo. Begin by drawing a line that is just
behind the basswood main spar. With that line as a
reference, make an opening large enough for your
particular brand of servo.
❏
3. Using a 1/4" x 3/8" x 30" [6 x 9.5 x 762mm]
basswood stick, cut two pieces 1" [25mm] long for
the servo mounting rails. Glue them in place on the
wing skin with 6- minute epoxy.
Make the Cockpit (Optional)
When the Elder was originally introduced we found
that modelers chose to finish the plane in different
ways. The original plan had a cockpit in the top of the
wing. Some modelers chose not to do this. Just as
you had to make a choice to scallop the elevator and
rudder, you need to decide if you would like to make
the cockpit. If not, skip this section.
❏
1. Locate the cockpit pattern on the plan and cut it
out. Place the pattern on the top of the wing so that
the back edge of the cockpit pattern is 2-1/2" [64mm]
from the trailing edge of the wing. Trace the pattern
onto the wing.
❏
2. Cut out the cockpit from the sheeting. When you
remove the sheeting the W1 wing rib will be in the
middle of the cockpit. Remove the rib in this area to
create the open cockpit. This will not compromise the
strength of the wing.
❏
3. When you finish your model you will find that
either Fourmost Cockpit Coaming (FORQ2014) or
18" of black neoprene fuel tubing makes a nice finish
to the cockpit opening. Installation instructions are at
the end of the construction process.