Top Flite TOPA0215 User Manual
Page 20
- 20 -
❏
32. Earlier you temporarily glued F3T and F4T in
place. Remove and discard them.
❏
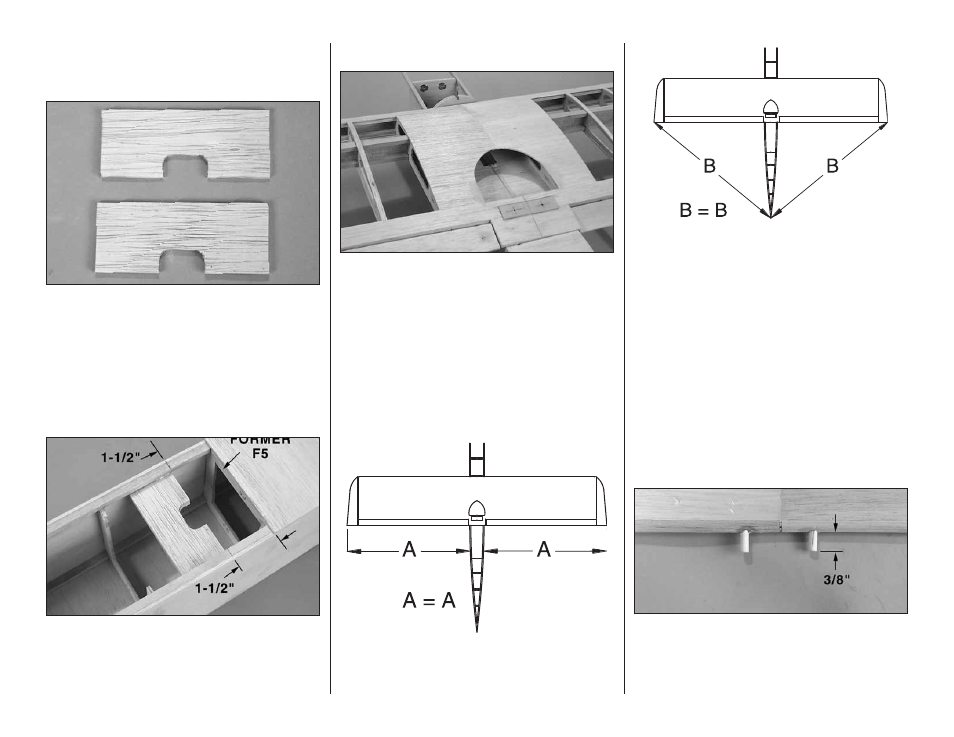
33. Locate the two die-cut 1/8" x 1-1/2" x 3-5/8" [3
x 38 x 92mm] plywood wing bolt mounting plates.
Glue them together to form one 1/4" [6mm] thick
wing bolt mounting plate.
❏
34. From former F5 measure forward 1-1/2"
[38mm]. Make a mark on both sides of the fuselage.
❏
35. Glue the wing bolt mounting plate in position
with 6-minute epoxy. The rear of the mounting plate
is the side with the cut-out. This should be towards
the rear of the fuselage and aligned on the marks
you made on the fuselage.
Mount the Wing to the Fuselage
❏
1. Position the wing onto the fuselage with the
leading edge of the wing against former F2T.
❏
2. Measure from the side of the fuselage to the
wing tip. Adjust the wing as needed until the distance
on the left side and right side are equal.
❏
3. Measure from the tip of the left wingtip to the tail
of the fuselage and from the right wingtip to the tail of
the fuselage. Adjust the wing until the distance is equal.
❏
4. When you are satisfied with the placement of
the wing, mark the location for the wood dowels onto
the leading edge of the wing with a pencil. Make the
marks through the center of both of the holes in F2T
onto the wing leading edge.
❏
5. Drill a 1/4" [6mm] hole through each of the
marks you made on the wing leading edge. Be sure
to drill through the wing leading edge and the
plywood sub-spar dowel brace inside of the wing.
❏
6. Locate the 1/4" x 4" [6 x 102mm] wood dowel.
Cut it into two 2" [51mm] pieces.
❏
7. Apply a liberal amount of epoxy into the holes
you drilled in the wing. Apply a thin layer of epoxy to
the portion of the dowel that you will insert into the
wing. Insert the two wooden dowels into the holes,
twisting them as you insert them. Leave the dowel