Top Flite TOPA0215 User Manual
Page 21
- 21 -
extending 3/8" [9.5mm] out of the wing leading edge.
Wipe any excess glue from the exposed dowel. Allow
the glue to cure then round the ends of the dowels as
shown on the plan. This will make it easier to insert
the dowels through the holes in F2T when installing
the wing on the fuselage.
❏
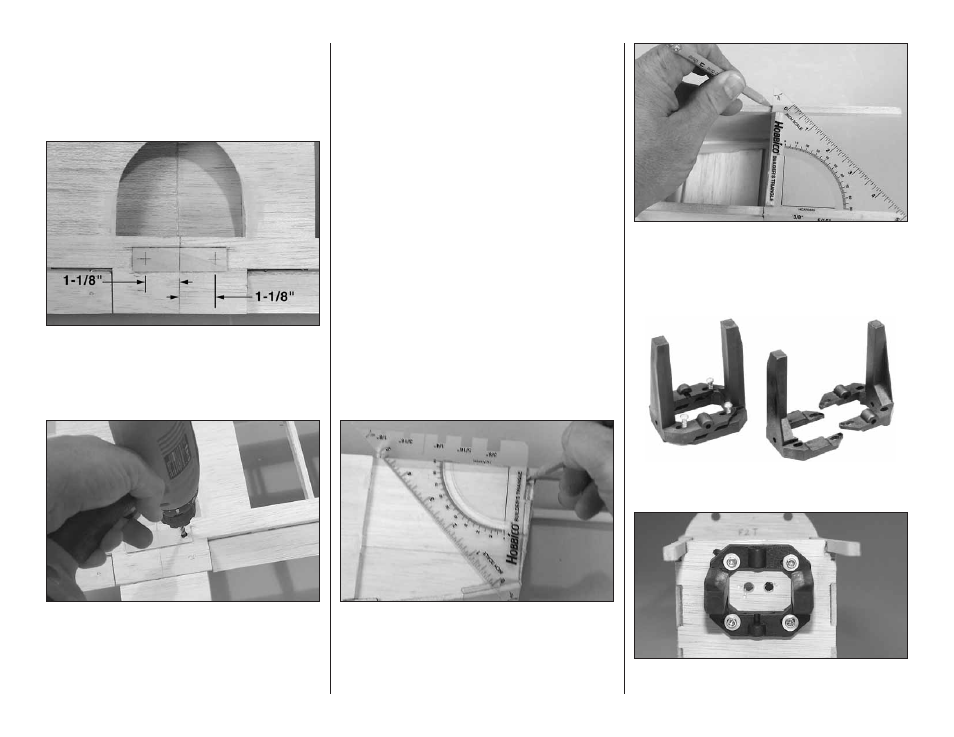
8. On the top center of the wing at the aft end of
the wing is the plywood wing bolt plate. Measure
from the center of the wing 1-1/8" [28mm] to the left
and right. Make a mark on the center of each
plywood wing bolt plate.
❏
9. Double check all your measurements to be sure
the wing is still properly positioned. When you are
satisfied with the positioning of the wing drill a 13/64"
[5.2mm] hole through the wing on the marks you made
on the wing bolt plates. Drill through the wing and the
wing bolt mounting plate inside of the fuselage. When
drilling be sure that the drill remains perpendicular to
the top of the wing. If the drill does not remain
perpendicular to the wing you may not hit the center of
the wing bolt mounting plate in the fuselage.
❏
10. Remove the wing from the fuselage. Drill a
17/64" [6.7mm] clearance hole through the wing bolt
holes you drilled in the wing. Do not drill through the
holes in the wing bolt plate in the fuselage.
❏
11. Using a 1/4-20 tap, tap each of the holes in the
wing bolt mounting plate. After they have been tapped
apply a couple of drops of thin CA onto the threads in
the wing bolt mounting plate. After the CA has
completely cured, run the tap through the threads again
to clear out any excess glue on the threads.
❏
12. Install the wing onto the fuselage and screw
the nylon wing bolts through the wing into the
threaded block in the fuselage to be sure that
everything fits properly. When you are satisfied
things fit well, remove the wing.
Finish the Fuselage
❏
1. Place the fuselage on your bench with the right
side of the fuselage facing up. Using a builders
triangle or a small square, mark a line across the
side of the fuselage from the bottom corner of the
fuselage to the top of the fuselage, perpendicular to
the top fuselage.
❏
2. Turn the fuselage upright on the bench. Using the
triangle or square, mark a line across the top of the
fuselage perpendicular from the end of the line on the
right side of the fuselage. Turn the fuselage and
continue the line down the left side of the fuselage.
❏
3. Prepare the engine mount by cutting off the tabs
and slide the two halves together as shown.
❏
4. Install the engine mount to the firewall with four
6-32 x 3/4" [19mm] socket head cap screws, four #6 flat