Top Flite TOPA0215 User Manual
Page 22
- 22 -
washers and four #6 lock washers. Temporarily place
your engine in the mount to set the width of the
mounting rails to fit your engine. Remove the engine
and tighten all the engine mount mounting bolts. For
our model we will be installing the engine inverted so
we have installed the engine mount inverted. Be sure to
properly install your engine mount for the position you
choose to install your motor. Drill two 3/16" [4.8mm]
holes in the firewall to accommodate the fuel line and
the engine pressure line from the fuel tank.
❏
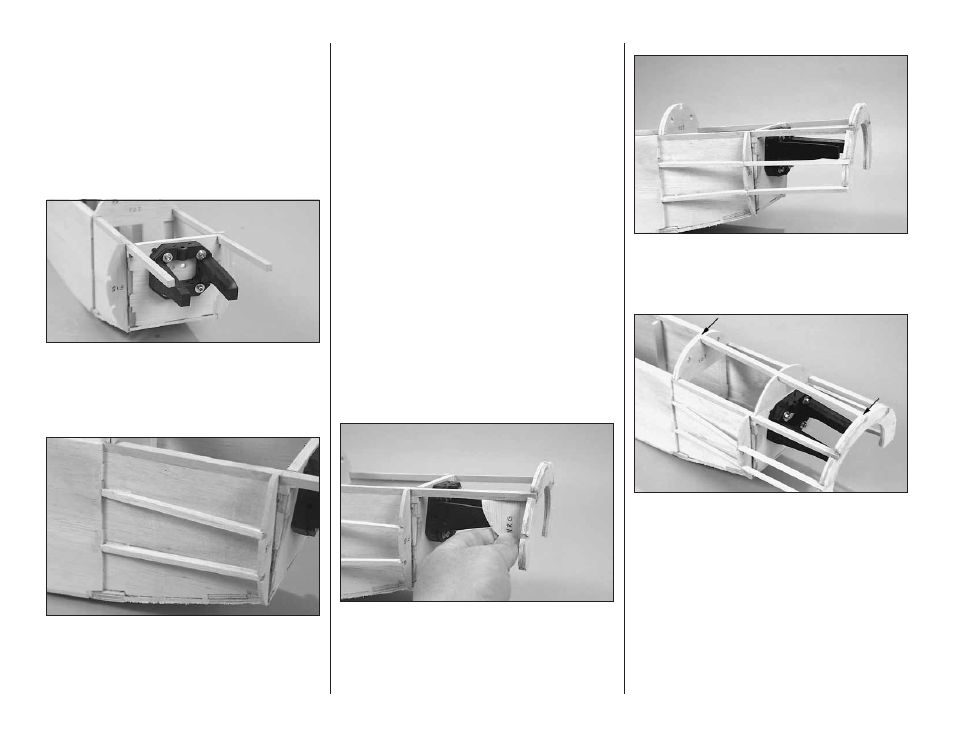
5. Locate the two die-cut 1/8" [3mm] balsa F1S
formers. Glue them in position on both the left and
right side of the fuselage. Use the lines you have
drawn on the sides of the fuselage as reference for
gluing them in place.
❏
6. From a 3/16" x 3/16" x 36" [4.8 x4.8 x 914mm]
balsa stick cut the balsa side stringers. Sand a bevel
on the end of the sticks that are glued flush to the
fuselage side. Cut the sticks to length so they fit to
the middle of former F1S and glue them in place.
❏
7. Locate the two die-cut 1/8" [3mm] plywood nose
rings. Glue them together to form one 1/4" [6mm]
plywood nose ring.
❏
8. You are now going to install the nose ring to the
fuselage. The positioning of the nose ring is
determined by the length of your engine. Temporarily
position your engine onto the engine mount. (Do not
permanently mount your engine to the mount).
Determine where the nose ring will be positioned so
when the engine is installed the front of the engine
thrust washer is approximately 1/4" - 3/8" [6mm –
9mm] further forward than the nose ring. Mark the
location of the nose ring on the basswood rails.
❏
9. Insert the nose ring onto the basswood rails.
Locate the die-cut 1/8" [3mm] nose ring gauge
(NRG). Use it to set the angle of the nose ring as
shown. Glue the nose ring to the rails. If there is any
of the basswood rail extending beyond the nose ring,
cut it off flush with the nose ring.
❏
10. From the remainder of the 3/16" x 3/16" x 36"
[4.8 x4.8 x 914mm] balsa stick, cut, fit and glue the
remaining side stringers from F1S to the nose ring.
Do this for both sides of the fuselage.
❏
11. From a leftover 1/4" x 1/4" [6 x 6mm] basswood
stick, cut a stick for the center fuselage stringer to fit
from former F2T to the front of the nose ring. Glue it
in position. Glue the die-cut 1/8" [3mm] plywood
former F1T to the top of F1. Slide it forward or aft
slightly to fit under the basswood stick.
❏
12. You are now going to sheet the front of the
fuselage. This is going to require compound bends to
the sheeting. To accomplish this you must wet the
wood before gluing it into place. Rubbing alcohol
misted onto the wood with a spray bottle works best
but you can also accomplish the task with water.