Reznor RBL Option - Installation - Weather Hood Assembly User Manual
Page 14
Form-I-OPT-WH, Page 14
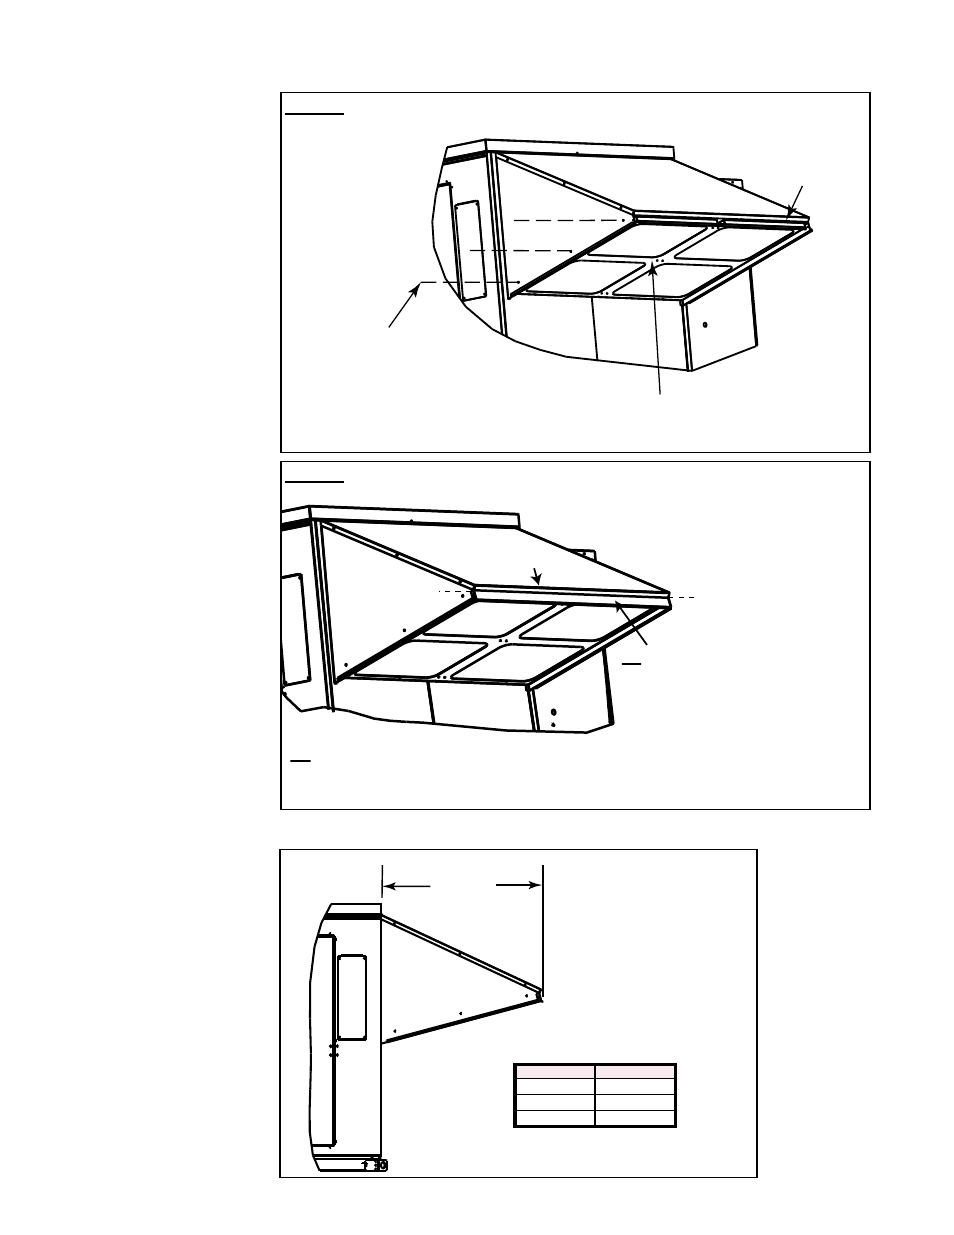
Right Side
Filter
opening.
3a) Position the ‘Filter Support
Assembly’ within the Hood with
filter opening out as indicated.
3b) Attach ‘Filter Support
Assembly’ with sheet metal
screws. Each side requires
(3) three screws; 1/2” with
slotted head and standard
point.
3.5.2 Installation
Instructions
and Dimensions
(cont'd)
3. Components,
Dimensions,
and Installation
Instructions
(cont'd)
FIGURE 9A - Assembly Steps (cont'd)
STEP 3 - Attach filter support.
STEP 4 - Install filters and attach the front cover.
3.5 Option AS16,
Outside Air
Hood, for YDSA,
YDMA, YDHA
(cont'd)
FIGURE 9B - Length Dimensions of Installed Hood
4a) Slide filters
through the front
opening and onto the
installed filter support.
4b) Position the ‘Front Cover’ and attach with sheetmetal
screws. Each side requires (1) one screw; 1/2” (12.7mm) with slotted
head and standard point.
Front Cover
Cabinet Size
Dim “A”
1
32.44 / 824
2
40.31 / 1024
3
49.39 / 1255
Dim “A”
(in / mm)
Option AS16
Air Hood
- RPBL Option - Installation - Weather Hood Assembly RPB Option - Installation - Weather Hood Assembly REDC Option - Installation - Weather Hood Assembly RECC Option - Installation - Weather Hood Assembly RDDC Option - Installation - Weather Hood Assembly RDCC Option - Installation - Weather Hood Assembly RDC Option - Installation - Weather Hood Assembly RCC Option - Installation - Weather Hood Assembly REDB Option - Installation - Weather Hood Assembly RECB Option - Installation - Weather Hood Assembly RDDB Option - Installation - Weather Hood Assembly RDCB Option - Installation - Weather Hood Assembly RDB Option - Installation - Weather Hood Assembly RCB Option - Installation - Weather Hood Assembly ADFH Option - Installation - Weather Hood Assembly ADF Option - Installation - Weather Hood Assembly