2 installation instructions and dimensions, 1 application and components by model and size – Reznor RBL Option - Installation - Weather Hood Assembly User Manual
Page 13
Form I-OPT-WH, P/N 132901 R13, Page 13
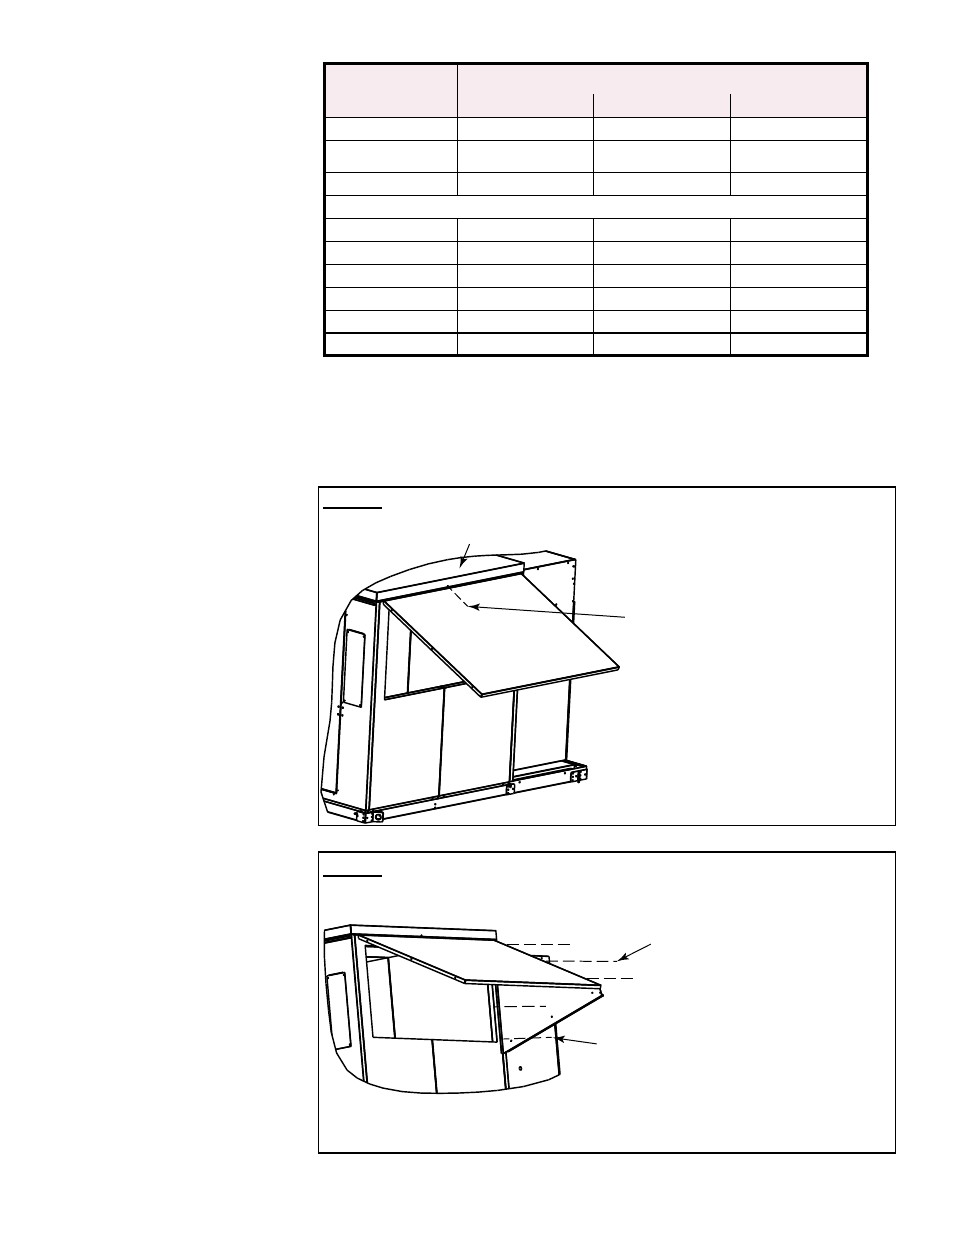
1a) Remove screw
in cabinet top.
Hood Top
(edge must go
under cabinet top)
1b) Slide the edge of
the ‘Hood Top’ under
the edge of the ‘Cabinet
Top’ and reinsert the
screw.
ref. Cabinet Top
Hood Top
(see Step 1)
Left Side
2b) Attach the ‘Side Panels’ to the
‘Cabinet’ with self tapping screws.
Use the 1/2” hex head/no slot
screws with the drill point. Each side
panel requires (3) three screws.
2a) Position the ‘Side Panels’
inside the ‘Hood Top’ and attach
with sheet metal screw. Each
side panel requires (3) three
screws;1/2” with slotted head
and standard point.
2c) Repeat the procedure to install
the ‘Right Side’.
3.5.2 Installation
Instructions and
Dimensions
STEP 1 - Attach top of outside air hood. Prepare to attach sides.
STEP 2 - Attach sides of outside air hood.
FIGURE 9A - Assembly Steps
Follow the instructions in
FIGURE 9A shown below and on page 14.
Hood length dimensions are listed in
FIGURE 9B shown on page 14.
MODEL
CABINET SIZE
1
2
3
YDSA
N/A
120, 150
180, 210
YDHA
YDMA
060, 090, 120, 150
180, 210, 240
300, 360
Pkg P/N
273283
273373
284598
Air Hood Components:
Top
272476
271116
284449
Right Side
272477
271117
284450
Left Side
272478
271118
284551
Front Cover
272479
271119
284454
Filter Support Asm
272482
268702
284452
Filter (Qty)
101607 (4)
101610 (4)
101609 (8)
3.5 OPTION AS16,
Outside Air
Hood, for
YDSA, YDMA,
YDHA
3.5.1 Application
and Components
by Model and
Size
- RPBL Option - Installation - Weather Hood Assembly RPB Option - Installation - Weather Hood Assembly REDC Option - Installation - Weather Hood Assembly RECC Option - Installation - Weather Hood Assembly RDDC Option - Installation - Weather Hood Assembly RDCC Option - Installation - Weather Hood Assembly RDC Option - Installation - Weather Hood Assembly RCC Option - Installation - Weather Hood Assembly REDB Option - Installation - Weather Hood Assembly RECB Option - Installation - Weather Hood Assembly RDDB Option - Installation - Weather Hood Assembly RDCB Option - Installation - Weather Hood Assembly RDB Option - Installation - Weather Hood Assembly RCB Option - Installation - Weather Hood Assembly ADFH Option - Installation - Weather Hood Assembly ADF Option - Installation - Weather Hood Assembly