Replacing a designer color filter – PRG Bad Boy User Manual 1.6 User Manual
Page 86
78
BAD BOY
®
SPOT LUMINAIRE USER MANUAL
Replacing a Designer Color Filter
Parts:
Designer Color Filter(s), as required.
(Refer to
"Designer Color Wheel Standard Configuration"
Tools:
#2 Phillips screwdriver
Cotton gloves or finger cots
WARNING:
Remove power from luminaire before performing any maintenance procedures.
To replace a designer color filter:
Step
1. Remove power from luminaire.
Step
2. Locate appropriate head cover door for
access to Designer Color Wheel as shown
in Figure 4-10 on
. (Doors are
identified by a label.) Turn captive screw to
open door.
CAUTION:
Do not touch color filters with
bare fingers. Wear cotton gloves or finger
cots when handling.
Step
3. Rotate wheel until desired designer color
filter is accessible.
Step
4. Rotate Color and Gobo 2 Wheels so that
their "open" position lines up next to the
designer color filter you wish to replace.
(This will avoid potential damage to the
adjacent wheels as the filter is being
replaced.)
Step
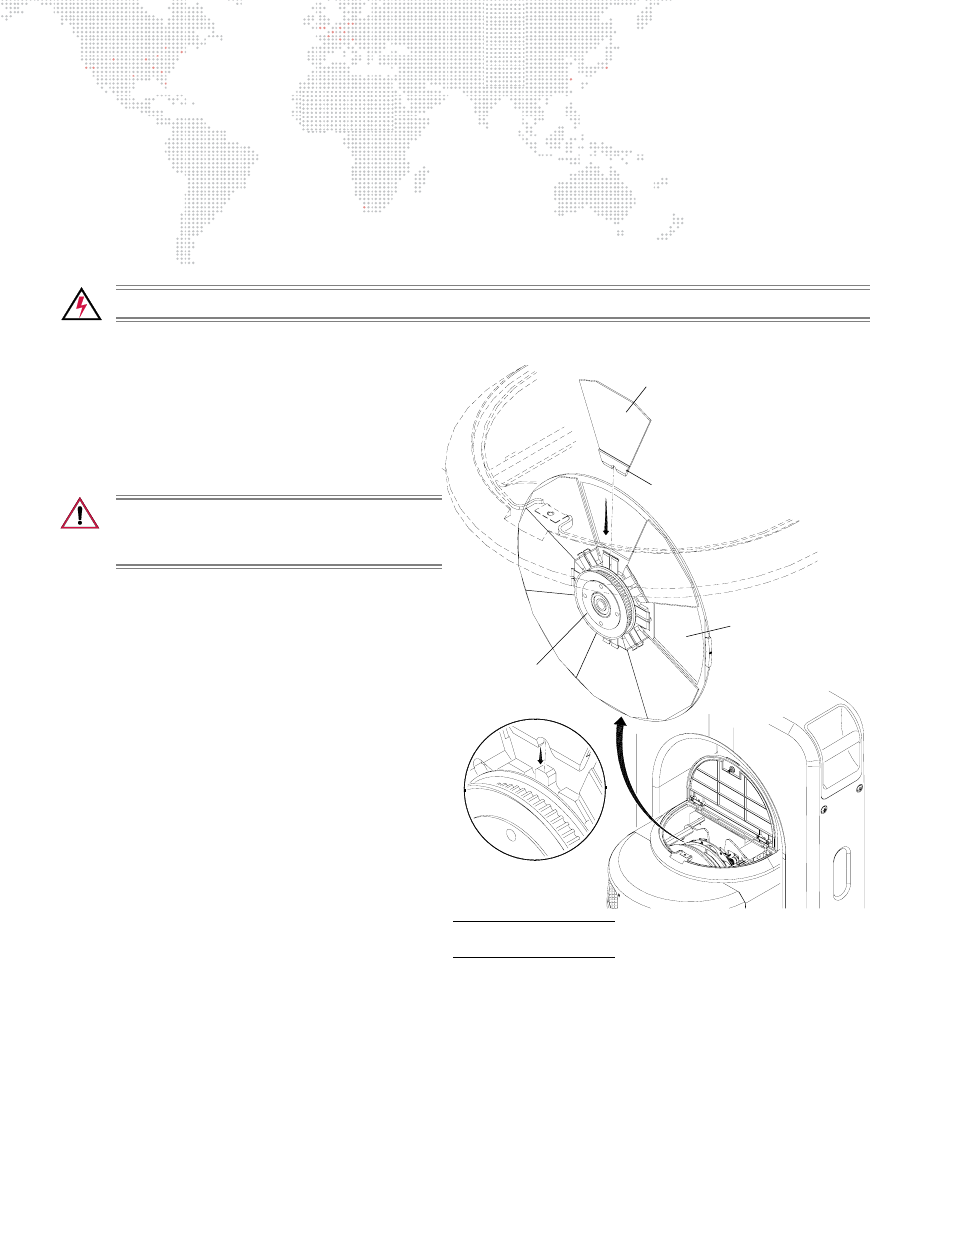
5. Using fingers, grasp frame of color filter and
pull out of wheel hub (Figure 4-13).
Step
6. Noting proper orientation of carrier, insert
new designer color filter into position and
push until carrier clicks into place. Refer to
Figure 4-14 on next page for an overview of
designer filter positions.
Step
7. Close head cover access door.
Designer Color Filter
Wheel Hub
Note
: Drawing is flipped 180°
for clarity purposes.
Carrier
Figure 4-13: Removing Designer Color Filter
Open Hole (no filter)
1
2
3
4
5
6
7