Installing the wip310, Switching between wireless profiles – Cisco WIP310 User Manual
Page 17
Chapter 2
Installing the WIP310
13
Wireless-G IP Phone
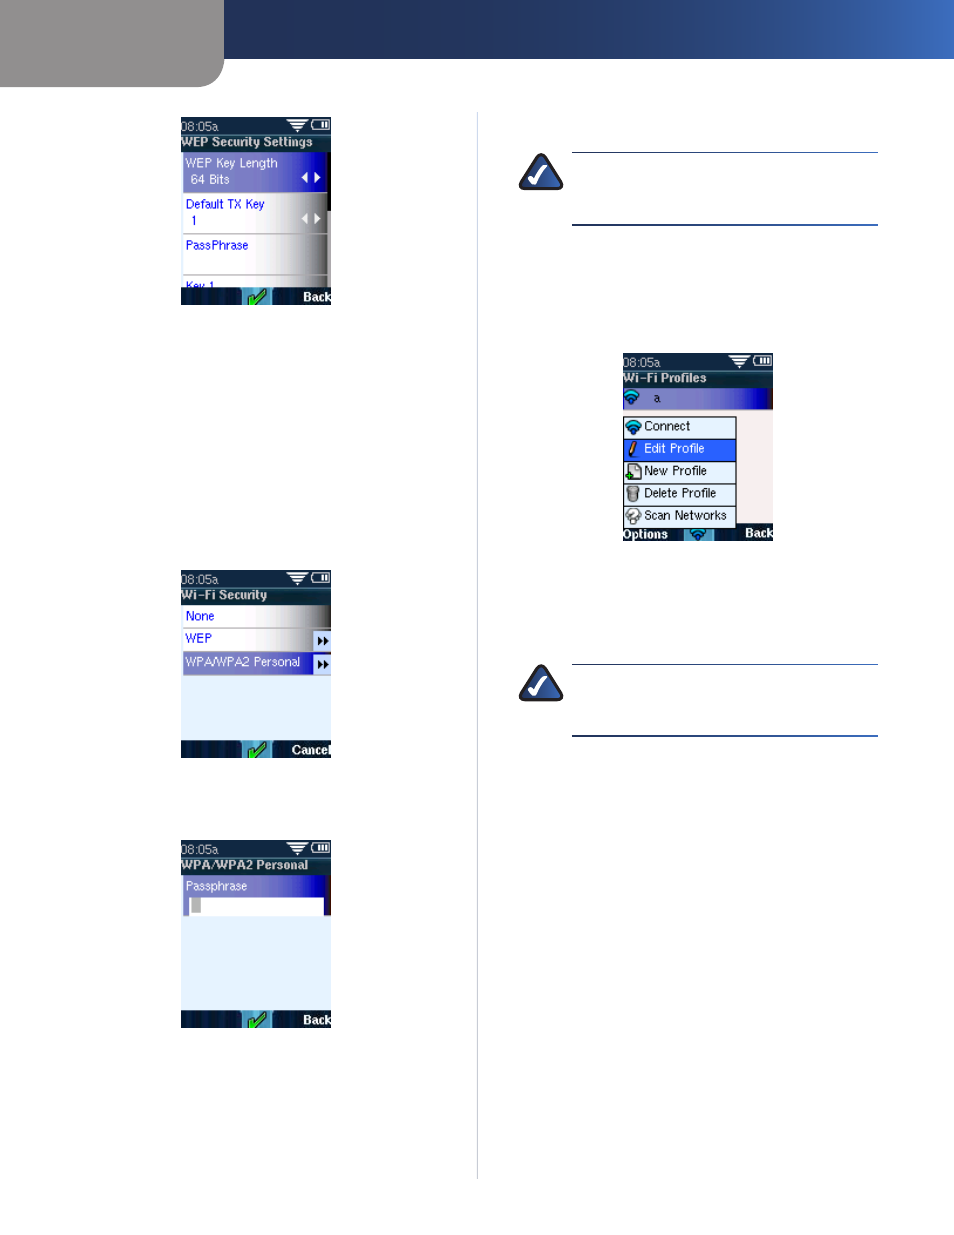
WEP Settings
Press the
1
right navigation key to choose the WEP key
length (64 or 128 bits)
Enter the default TX Key (1, 2, 3, or 4)
2
Do one of the following:
3
Enter the passphrase To generate a passphrase, select
•
Options Click Generate Key, then Save
You chose a TX key field in Step 2 (Key 1, Key 2, Key 3,
•
or Key 4) Enter the 64 or 128-bit key in the field
WPA/WPA2 Personal—Wi-Fi Protected Access
WPA/WPA2 Personal
Enter the passphrase to access the router
1
Enter Passphrase
Press the
2
Select button
A message appears if the connection is successful
NOTE:
If you have more than one wireless
profile saved, the phone tries to contact the first
wireless router in the list upon startup
Editing a Wireless Profile
To edit a profile:
In the
1
Wireless Setup > Manual Setup screen, press
Options and choose Edit Profile
Edit Profile
Make the desired changes and press the
2
Select
button
Deleting a Wireless Profile
NOTE:
You are not asked to confirm you want to
delete the profile, so be sure you want to delete
it before proceeding
In the Wireless Setup > Manual Setup screen, press Options
and choose Delete Profile
Switching Between Wireless Profiles
You can configure multiple wireless profiles on your
WIP310 If you have more than one wireless profile saved
on your phone, the phone tries to contact the first wireless
router in the list upon startup Therefore, you should first
configure the wireless profile for the location where you
use the phone the most
To switch to a different wireless profile, you need to
manually choose it from the list in your phone:
In the Home screen, press the
1
Select button to display
the Settings menu Press the Select button again and
navigate to the Wireless Setup menu
Press the
2
Select button to view your options