Installation (cont.), Connect the brine line, Electrical connection – Culligan Platinum Plus Series User Manual
Page 21
17
Installation
(cont.)
Connect the Brine Line
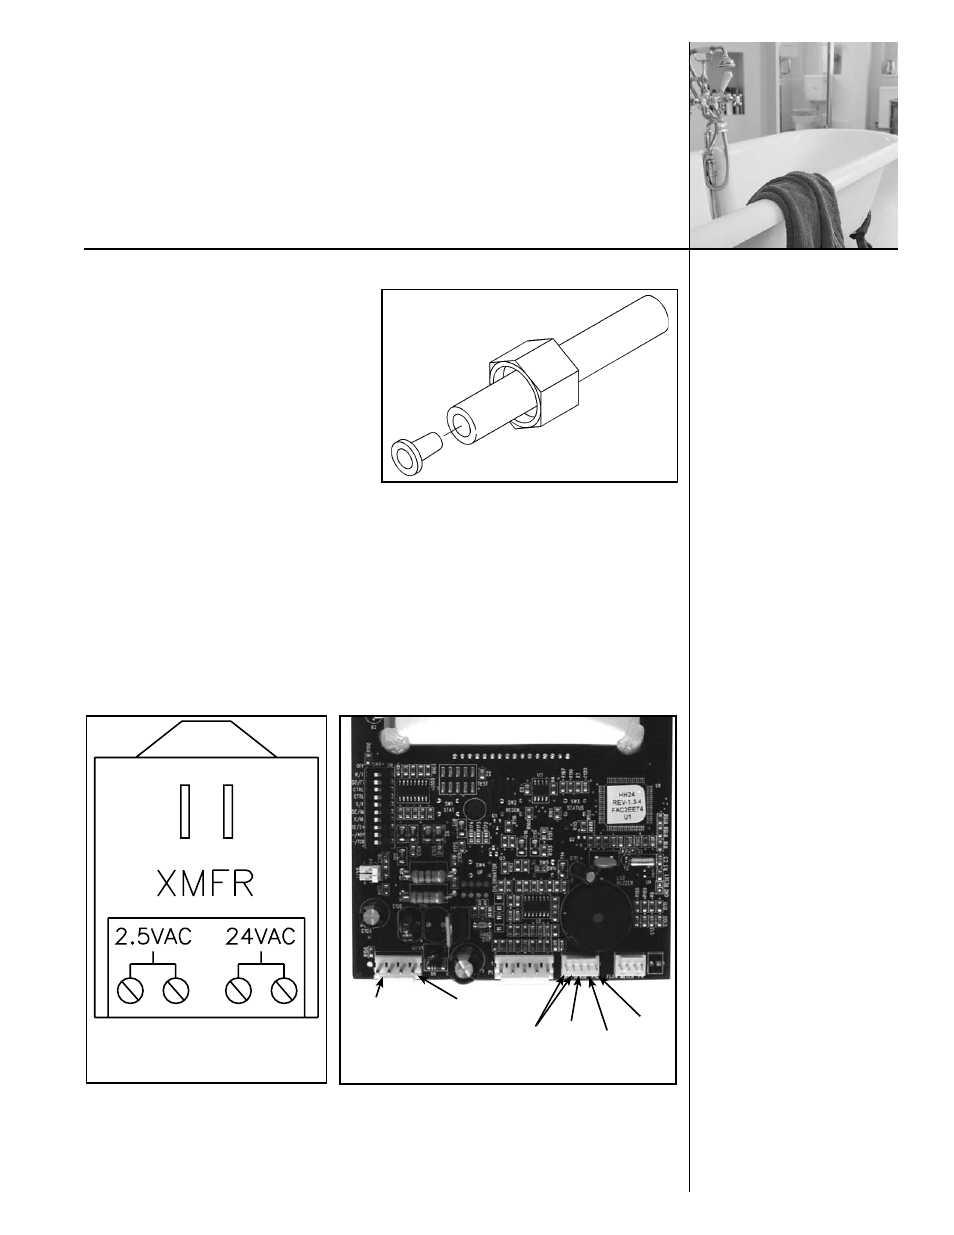
• Measure a length of brine line sufficient
to reach from the brine tank to the brine
fitting, with no sharp bends. For easier
access to the float it is recommended to
add an extra four feet (1.3 meters) of
length to the brine line. Cut both ends of
the brine line squarely and cleanly.
• Slip the white nut over one end of the
tubing and press the plastic insert into the
end of the tubing (Figure 10). Connect to
the brine valve and tighten nut.
• Remove white nut and plastic insert from
the small parts pack.
• Slip the white nut over one end of the tubing and press the plastic insert into the end of the
tubing (Figure 10). Connect to the brine connection on the valve and tighten nut
Electrical Connection
The Aqua-Sensor
®
probe (Figure 11) requires a 2.5 VAC power source. This source is provided
via two of the posts on the 24V/2.5V transformer. Two leads from the transformer must be wired
to the 2.5 VAC terminal on the circuit board. The wire connector from the Aqua-Sensor
®
probe is
simply plugged in the circuit board (Figure 12).
Figure 10
Power to circuit board, 2.5 VAC
for Aqua-Sensor
®
installation
Figure 11
2.5 VAC
Aqua-
Sensor
®
Power
24 VAC
Power
Blue
Black
Red
White
Figure 12