Installation (cont.), Brine valve “a” dimension, Aqua-sensor – Culligan Platinum Plus Series User Manual
Page 20: Probe and soft-minder, Meter connection
16
Installation
(cont.)
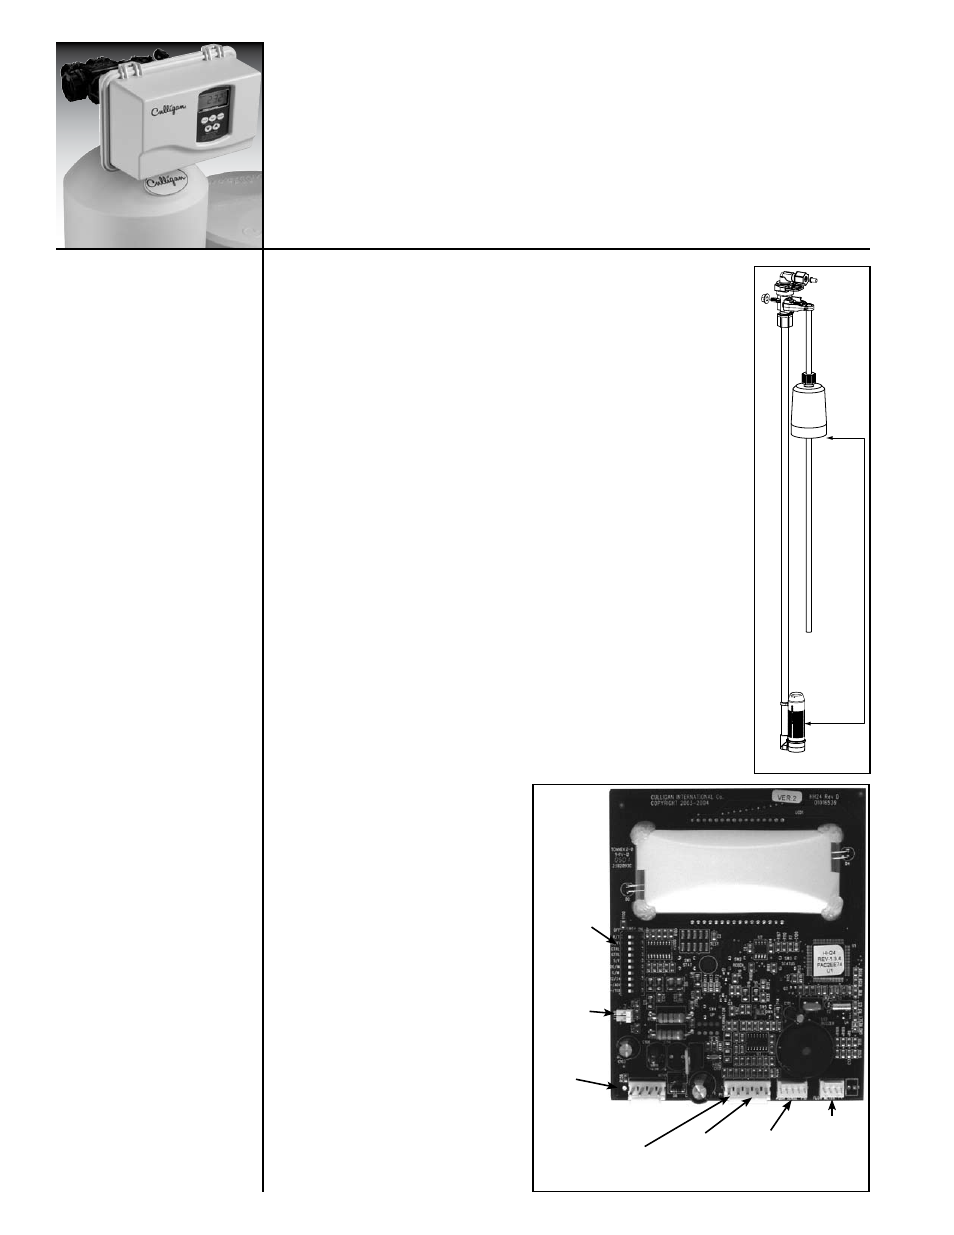
Brine Valve “A” Dimension
The Culligan Platinum Plus Series
™
unit contains a brine float which can
serve as a backup refill shutoff in the event of a failure, such as a power
outage when in the refill position. The float level should be set based on the
salt dosage setting. Refer to Figure 8 and Appendix A Table 4,
page 43.
• Remove the nut retaining brine valve to the brine chamber.
• Lift the brine valve from the brine chamber.
• Set the distance from the top of the filter screen to the base of the float
accordingly. The slight difference in height when the float is pulled up
or down is negligible.
• Re-install the brine chamber and replace the nut.
Aqua-Sensor
®
Probe and Soft-Minder
®
Meter
Connection
To connect the probe or meter leads refer to Figure 9 and proceed as
follows:
• Remove the timer case from the back plate.
• Snap the circuit board holding plate off the back plate to provide
access to the back of the circuit board.
• Remove the plastic plug from the backplate.
• Slip the sensor probe lead or meter cable through the hole and toward
the circuit board.
• Connect the lead to the circuit
board. The Aqua-Sensor
®
probe
terminal is labeled “Aqua Sense”
while the Soft-Minder
®
meter
terminal is labeled “Flow Meter”.
• Pull any excess cable wire back
out of the enclosure, and route
the wiring inside the enclosure to
avoid any interference with moving
parts.
• Locate the strain relief bushing
in the parts pack. Place it on the
cable at the point of entry to the
rear of the timer plate and push it
into the hole.
“A” Dimension
Figure 8
Dip
Switches
Optional
Battery
Power
Motor
Cam
Switches
Aqua-
Sensor
®
Soft-
Minder
®
Meter
Figure 9