Okay, Apply the decals – Great Planes Edge 540 1.60-43cc Performance Series ARF - GPMA1414 User Manual
Page 43
43
o
3. Secure the
spinner to the adapter with the 5x54mm
spinner screw. If the screw is too long, use a cutoff tool
such as a Dremel rotary tool to shorten the screw. Thread
the included 5mm nut onto the spinner screw before cutting.
When the nut is removed, it will straighten the threads on the
screw that may have been deformed from the cutting process.
Note: The process for attaching the spinner to a Fuji-Imvac
BT-43 EI-2 engine is the same as the 1.60 FX. However, you
will use the spinner bolt included with the engine instead of
the spinner adapter shown above. There is a longer 70mm
[2-3/4"] spinner screw provided for use with gas engines.
o
4. This completes the building instructions for the Edge
540 1.60 ARF!
Apply the Decals
1. Use scissors or a sharp hobby knife to cut the decals from
the sheet.
2. Be certain the model is clean and free from oily fingerprints
and dust. Prepare a dishpan or small bucket with a mixture
of liquid dish soap and warm water—about one teaspoon of
soap per gallon of water. Submerse the decal in the soap and
water and peel off the paper backing.
Note: Even though the
decals have a “sticky-back” and are not the water transfer
type, submersing them in soap and water allows accurate
positioning and reduces air bubbles underneath.
3. Position decal on the model where desired. Holding the decal
down, use a paper towel to wipe most of the water away.
4. Use a piece of soft balsa or something similar to squeegee
remaining water from under the decal. Apply the rest of the
decals the same way.
gET ThE MODEL READy TO FLy
Install and Connect the Motor Battery
Before you can power the radio system and set up the
controls, the motor batteries will need to be charged.
IMPORTANT: If using multiple battery packs that are
connected with an adapter, never charge the batteries
together through the adapter. Always charge each battery
pack separately. Charge the batteries, then read the
following precautions on how to connect multiple packs
for flying the model.
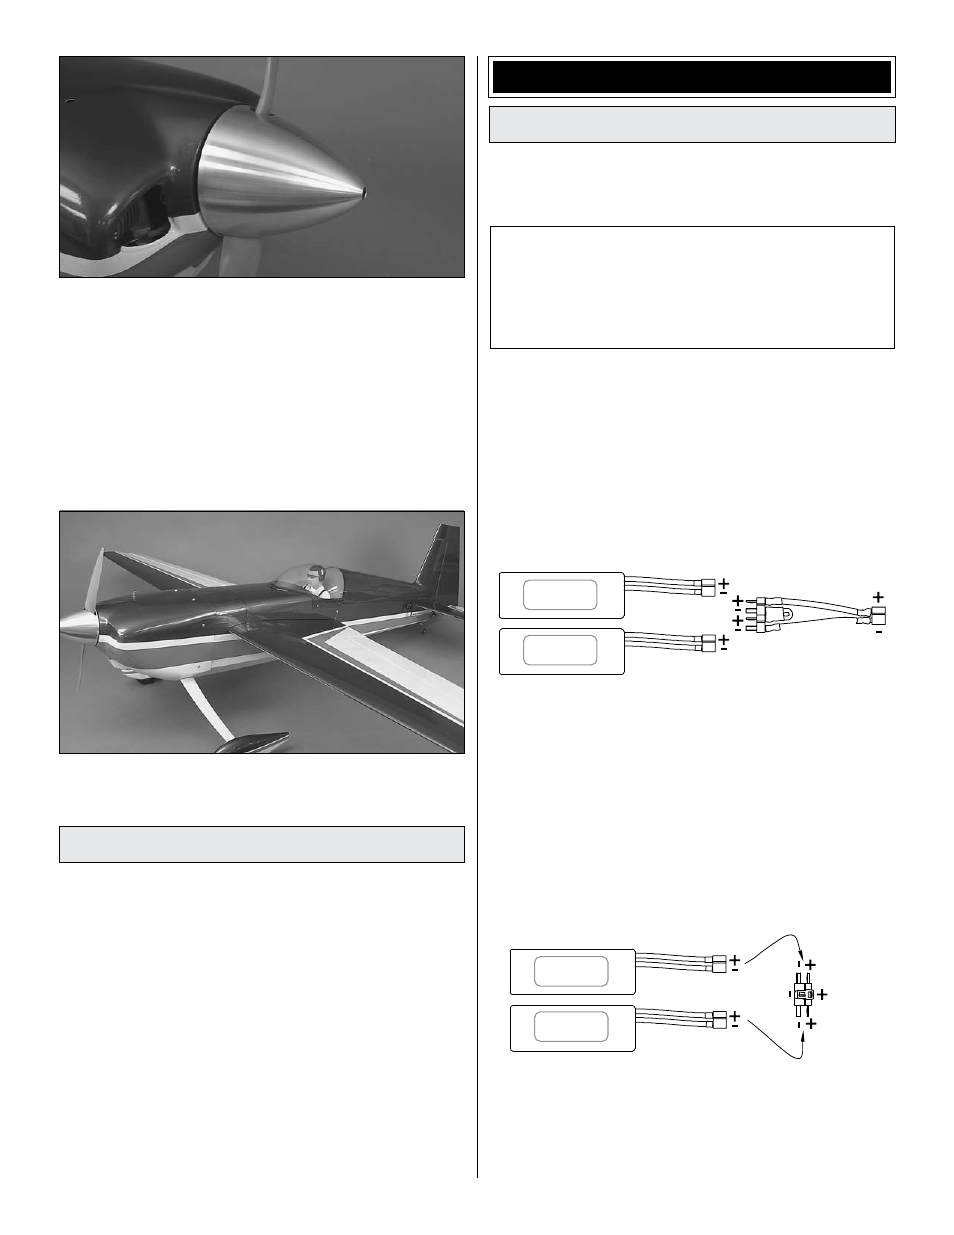
BATTERy pRECAUTIONS
There are two ways to connect multiple battery packs: In
Series and in Parallel.
These are two 3200mAh batteries (one 11.1V
and the other 7.4V). When joined in
SERIES,
the result will be a 18.5V, 3200 mAh battery.
It’s okay to connect batteries with different voltages in
series to achieve the new, desired voltage.
This is a
SERIES battery
adapter (GPMM3143)
that connects two
batteries in series.
11.1V (3-Cell)
GPMP0613
OKAY
7.4V (2-Cell)
GPMP0613
o
1. Connecting batteries in
“Series” means to connect the
(+)’s to the (–)’s and the (–)’s to the (+)’s. This combines the
voltages of the batteries, but the capacity remains the same.
These two 1500mAh batteries (both 11.1V) are
being joined in
PARALLEL. The result will be
one
11.1V, 3000mAh battery.
This is a
PARALLEL battery
adapter (GPMM3142) that
connects two batteries in parallel.
11.1V (3-Cell)
GPMP0613
OKAY
11.1V (3-Cell)
GPMP0613
o
2. Connecting batteries in
“Parallel” means to connect the
(+)’s to the (+)’s and the (-)’s to the (-)’s. This combines the
capacities of the batteries, but the voltage remains the same.