Install the tail gear assembly – Great Planes Edge 540 1.60-43cc Performance Series ARF - GPMA1414 User Manual
Page 15
15
end of all the hinges for the elevators along with a small
amount of petroleum jelly at the center of each hinge. Insert
the hinge points into the holes, wiping away excess epoxy
with denatured alcohol as necessary. Be sure the hinges
are inserted in the correct orientation. Apply epoxy to the
other ends of the hinges and slide the elevators into place.
Use masking tape to hold the elevators in position while the
epoxy cures.
o
10. Attach the rudder in the same manner.
Install the Tail gear Assembly
o
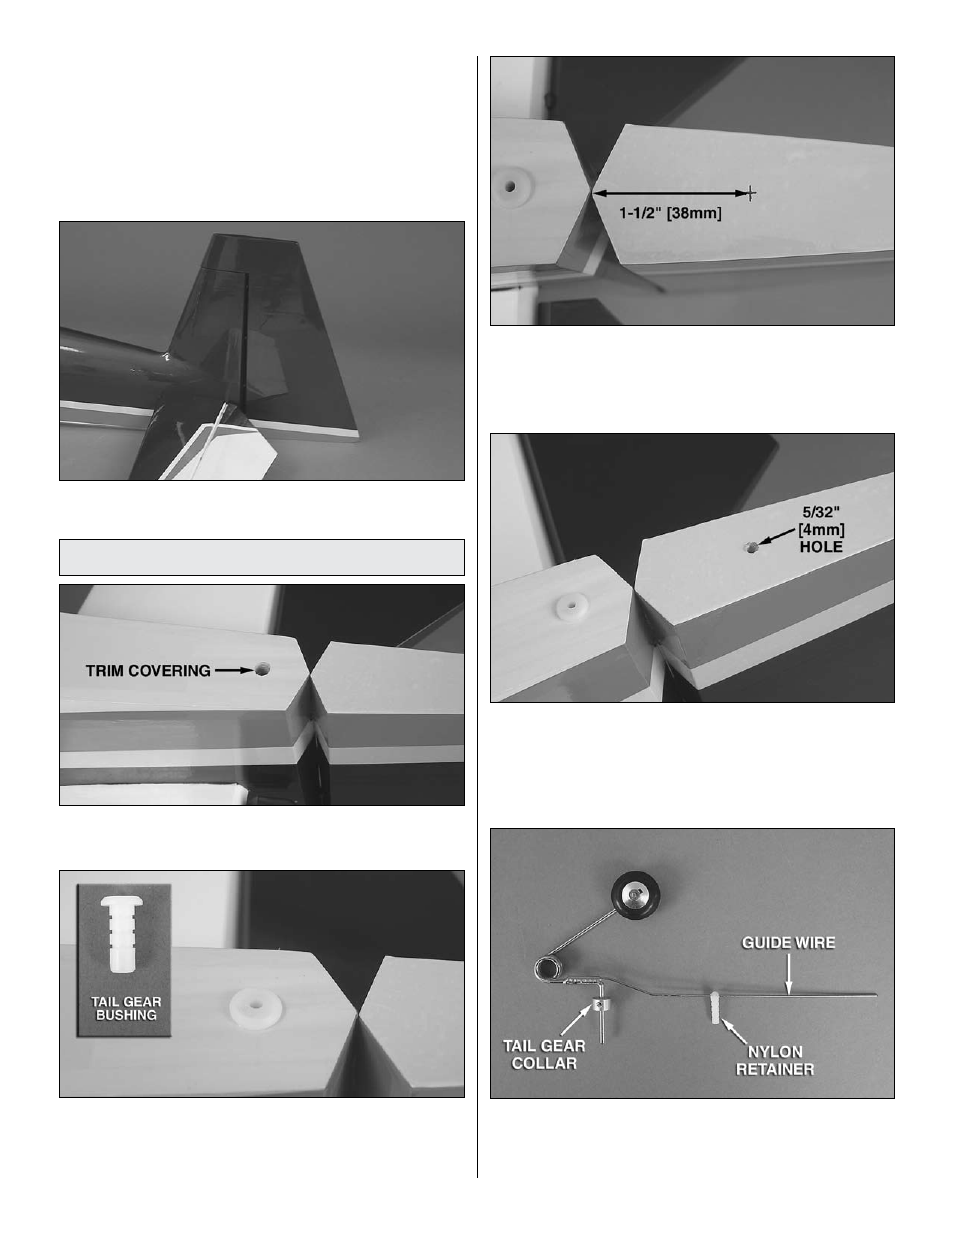
1. Trim the covering from the fuselage for the
tail
gear bushing.
o
2. Apply CA or epoxy to the outside of the bushing and
insert the bushing into the hole by gently tapping it into place
until fully seated. Be sure not to get glue into the hole in
the bushing.
o
3. Measure 1-1/2" [38mm] back from the LE bevel of the
rudder and make a mark on the underside center of the rudder.
o
4. Use a 5/32" [4mm] drill bit to make a 1/2" [13mm] deep
hole at the mark. To improve accuracy, drill a smaller pilot
hole at your mark first.
o
5. Slide the
tail gear collar and nylon retainer onto the
tail gear assembly as shown. If necessary, use a 1/16"
[1.6mm] drill bit to enlarge the hole in the retainer for the tail
gear guide wire.