Great Planes Edge 540 1.60-43cc Performance Series ARF - GPMA1414 User Manual
Page 40
40
o
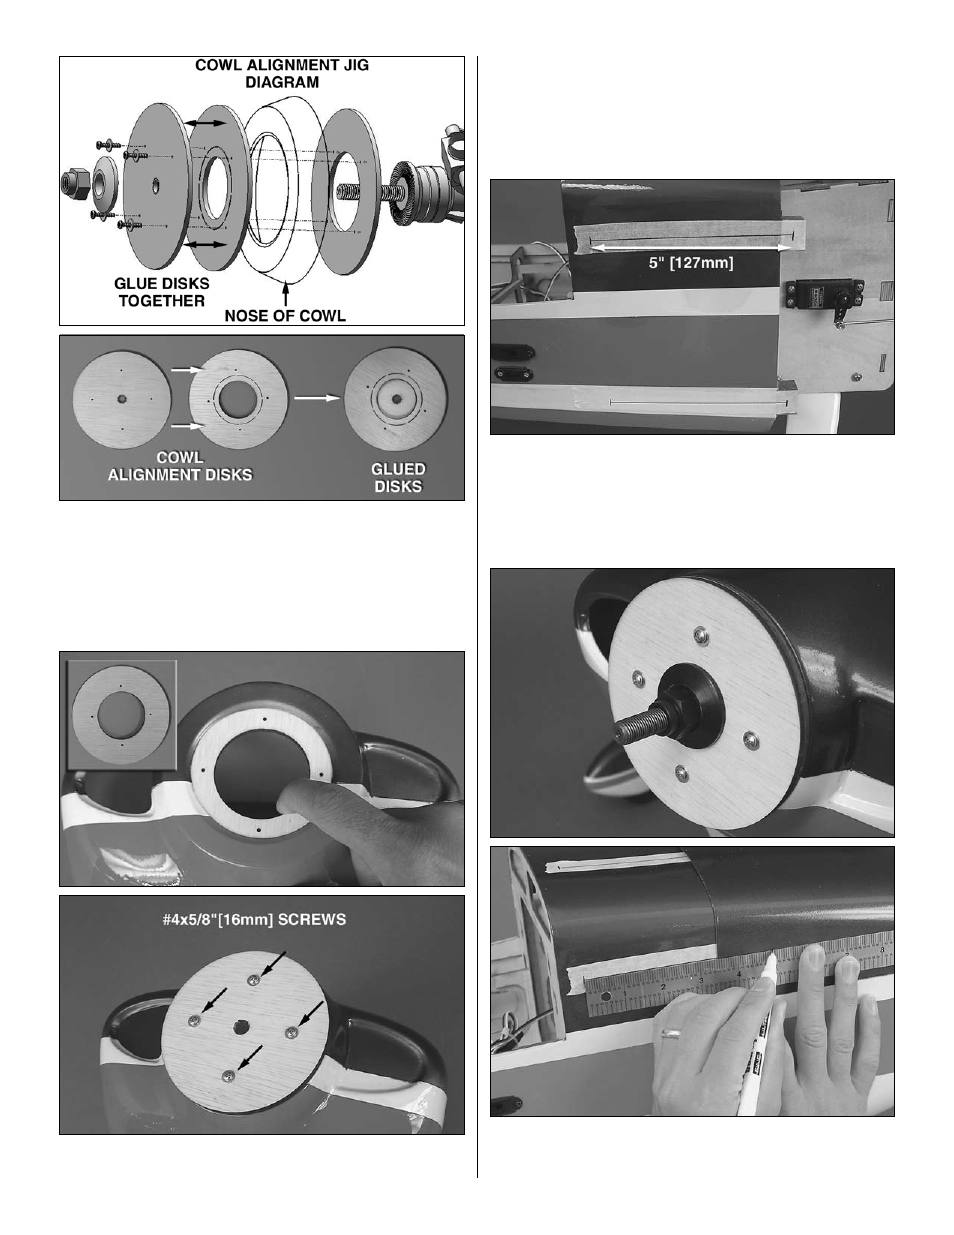
4. Locate the three
cowl alignment disks. Cut the
perforations in the two disks to match the size of your engine
crankshaft (or prop bolt) and drive washer. Carefully glue the
two disks that have perforations together, being sure to align
the four screw holes. The cowl alignment jig will allow easy
positioning of the cowl onto the fuse without needing tape or
a second set of hands.
o
5. The cowl alignment disk with the large hole in the
center fits on the
inside of the cowl as shown. Use four #4
x 5/8" [16mm] self-tapping screws and four #4 flat washers
to screw the assembly you made in step 4 to the disk that
is inside of the cowl. The front flange of the cowl should be
sandwiched between the rear disk on the inside of the cowl
and the two disks in front. Carefully center the front disks
over the front of the cowl and tighten the screws.
o
6. Apply strips of masking tape approximately 6" [152mm]
long from the cowl mounting blocks back along the fuselage
as shown (make the tape parallel with the length of the
fuse). Measure from the center of each cowl mounting block
5" [127mm] back and draw a straight line down the tape
between your marks.
o
7. With the cowl alignment jig installed on the front of the
cowl, slide the cowl onto the engine crankshaft and use the
prop washer and nut to hold it in place. Align the colors on